Cryo-con Model 24C
Basic Setup and Operation
Now, you can begin ramping by changing the setpoint to the
end
of the ramp. The
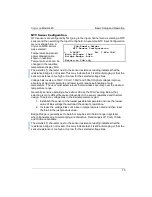
display will indicate that a ramp is in-progress. In this example, the setpoint was
changed to 190 and the controller is ramping from 180.000. Notice that the loop
status area now indicates a ramp is in progress. The Ramp Pt: field shows where the
ramp should be and is
continuously updated until
the new setpoint is
attained. The input
temperature should track
the Ram Pt: field,
indicating that the ramp is
progressing as it should.
Ramping will continue until the setpoint is attained. Then, the loop status will return to
normal PID control and the
controller will maintain the
setpoint.
From here, each time you
change the setpoint, the
controller will ramp to the
new value and control
temperature there.
Summary
To perform a temperature ramp, proceed as follows:
1. Set the control loop P, I and D parameters to allow stable control at both ends
of the desired ramp. This is usually done by using ‘slow’ PID values (Low
values for P, high for I and zero for D).
2. Set the Ramp Rate in the Heater Configuration Menu. Set the setpoint to the
starting value for the ramp.
3. Press CONTROL. Now, the controller will begin temperature regulation at the
current setpoint.
4. Enter a new setpoint. The controller will enter ramping mode, and ramp to the
target setpoint at the specified rate. The word RMP will appear in the control
loop menu.
5. When the new setpoint is reached, ramping mode terminates and
temperature regulation begins at the new setpoint.
87
Loop 1A:Sample Holder
Set Pt:190.000K
Pgain: 5.0000
Igain: 120.00S
Dgain: 0.0000/S
Pman: 5.0000%
Type: RamP
Input: ChA
A: 190.000K
58% HI
--|
Range: HI
PID Table index: 1
Htr Load: 50
W
Next
Loop 1A:Sample Holder
Set Pt:190.000K
Pgain: 5.0000
Igain: 120.00S
Dgain: 0.0000/S
Pman: 5.0000%
Type: RamP
Input: ChA
A: 181.234K
Ramp HI
---|
Ramp Pt: 181.110
Range: HI
PID Table index: 1
Htr Load: 50
W
Next
Ramping to 190K
Ramp complete. Controlling at 190K


