7- 5
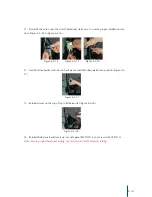
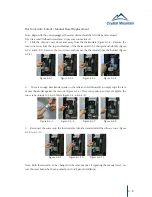
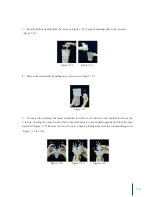
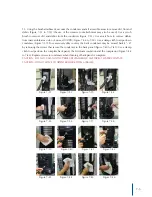
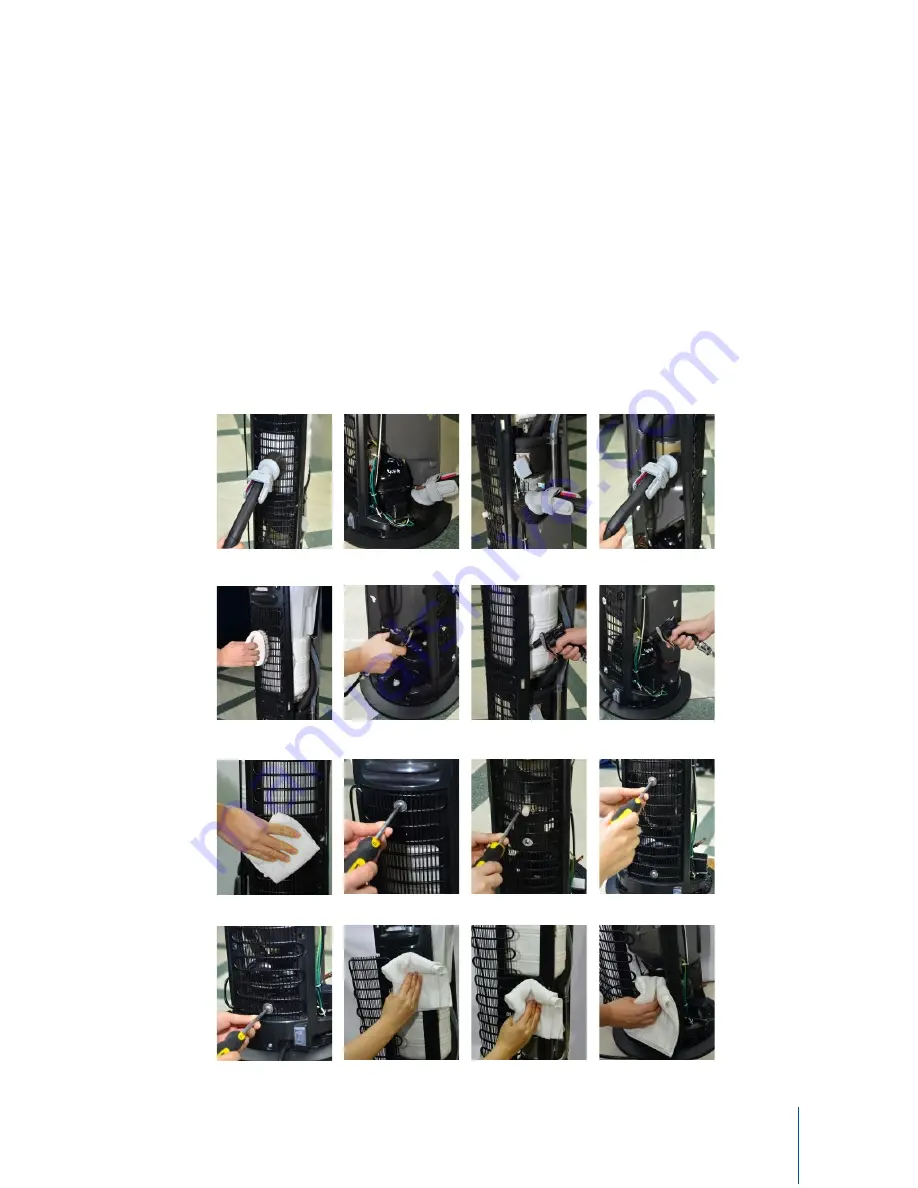
13. Using the brush attachment, vacuum the condenser and all accessible areas to remove dirt, lint and
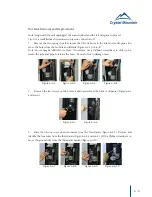
debris (Figure 7-31 to 7-39) (the use of the crevasse tool attachment may also be used). Use a scrub
brush to remove dirt and debris from the condenser (Figure 7-35). Use an air hose to remove debris
from inaccessible areas (do not exceed 100 PSI) (Figure 7-36 to 7-38). Use a damp cloth to wipe down
condenser (Figure 7-39). For excessively dirty coolers, the back condenser may be moved back 4”- 6”
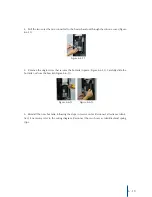
by removing the screws that secure the condenser to the back panel (Figure 7-40 to 7-43). Use a damp
cloth to wipe down the complete back panel, the Styrofoam insulation and the compressor (Figure 7-44
to 7-46). Replace screws in condenser when cleaning of back panel is complete.
CAUTION: DO NOT CLEAN USING PRESSURE WASHER OR ANY DIRECT WATER CONTACT.
CAUTION: DO NOT MOVE CONDENSER MORE THAN 6 INCHES.
Figure 7-31 Figure 7-32 Figure 7-33 Figure 7-34
Figure 7-35 Figure 7-36 Figure 7-37 Figure 7-38
Figure 7-39 Figure 7-40 Figure 7-41 Figure 7-42
Figure 7-43 Figure 7-44 Figure 7-45 Figure 7-46

