2
1.
INTRODUCTION
Proper installation and maintenance are essential for maximum satisfaction from your appliance. It is therefore
necessary to carefully read and observe the indications of these instructions for use.
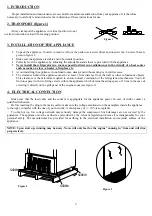
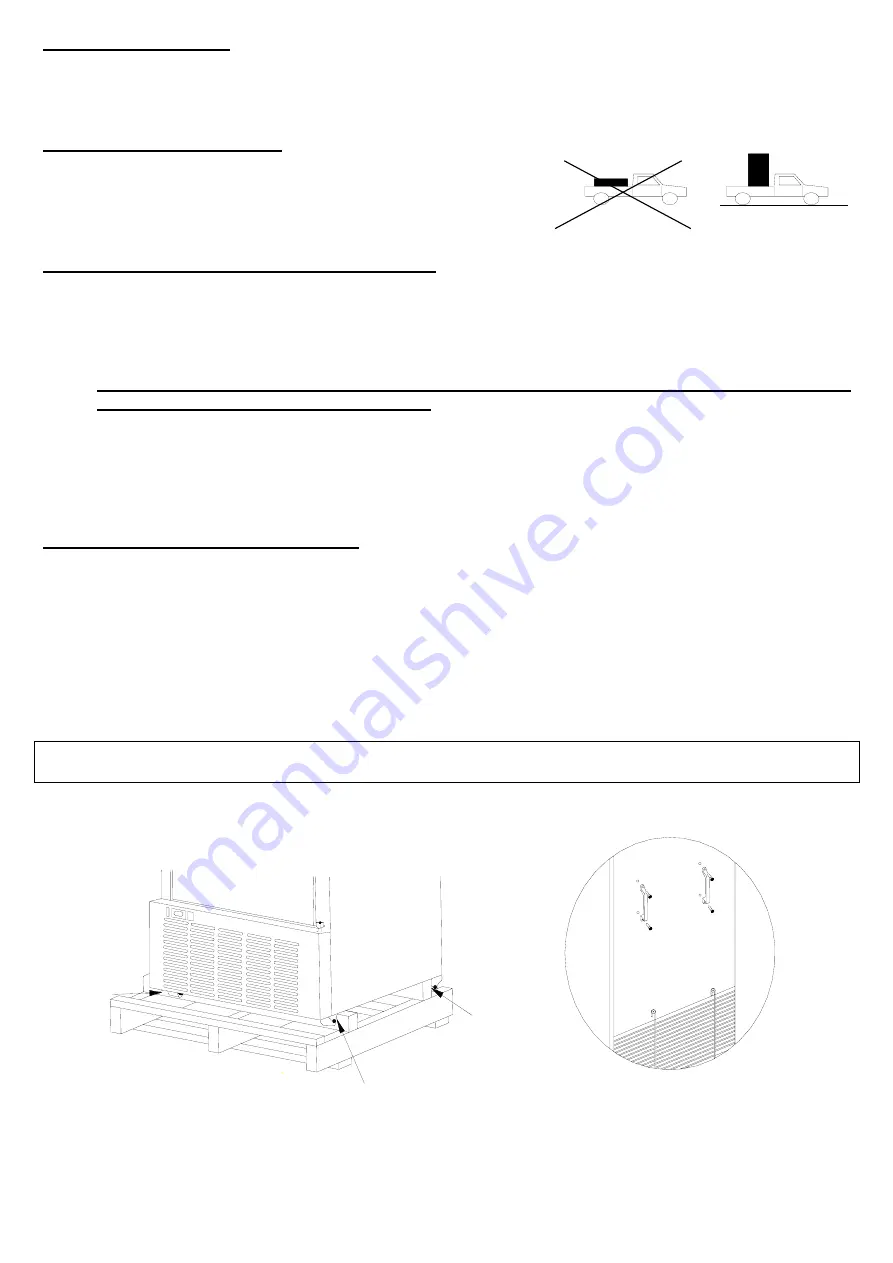
2. TRANSPORT (figure 1)
3. INSTALLATION OF THE APPLIANCE
Unpack the appliance. In order to remove it from the pallet use a screwdriver and unscrew the 4 screws that are
given in figure 2.
Make sure the appliance is stable and in horizontal position.
Perfectly level the appliance by adjusting the adjustable stands that are provided with the appliance.
Never install the refrigerator in a room exposed to direct sun radiation nor in the vicinity of a heat source
such as cooker, a stove, a heater, a fireplace etc.
Avoid installing the appliance in confined rooms, damp, and without airing or in wall recesses.
The clearance behind the appliance must be at least 10 cm distance from the wall or other voluminous objects.
This clearance is the minimum required to ensure normal ventilation of the refrigeration mechanism. You will
find one spacer with two fixing screws within the appliance which obtains the airing space of 10 cm in the case of
screwing it directly on the grill panel of the engine-room (see figure 3).
4.
ELECTRICAL CONNECTION
Make sure that the feed cable and the socket are appropriate for the appliance power. In case of doubt, contact a
qualified technician.
Before inserting the plug in the mains outlet, make sure the voltage mentioned on the nameplate inside the appliance
to the right, compiles with the one of your network. A discrepancy of +/- 10% is acceptable.
Too high or too low voltage network may seriously damage the compressor. Such damages are not covered by the
guarantee. The appliance must be earthed as prescribed by the relevant legislation whereas it is indispensable for your
personal safety. The manufacturer has provided for earthing in the electrical installation and external surface of the
appliance.
NOTE: Upon start up, running may be noisy. Noise will only last for the engine “running in” time and will dim
progressively.
Figure 1
Always transport the appliance in vertical position, do not
overturn it and do not load it in leaning position.
Figure 2
Figure 3
SCREW
SCREW
SCREW
Figure 2


