5. Move the junction box to the opposite side of the cabi-
net. Install using the two screws removed in step 3
above. Note that all screws penetrating the junction
box must be blunt – no sharp tipped screws can be
used.
6. Replace the plug from the opposite of the furnace (the
new j-box location) to the old j-box location and install
qty=2 1/4” plugs from parts bag in empty screw holes
in old location of j-box into the mounting screw holes in
the old junction box location.
7. Using a flat screwdriver, squeeze the retaining arms
on the door switch and gently pry the door switch from
it’s opening as shown in Figure 39.
8. Install the door switch in the same opening on the op-
posite of the furnace and reconnect the electrical con-
nectors (removed in Step 2) to the door switch.
THERMOSTAT
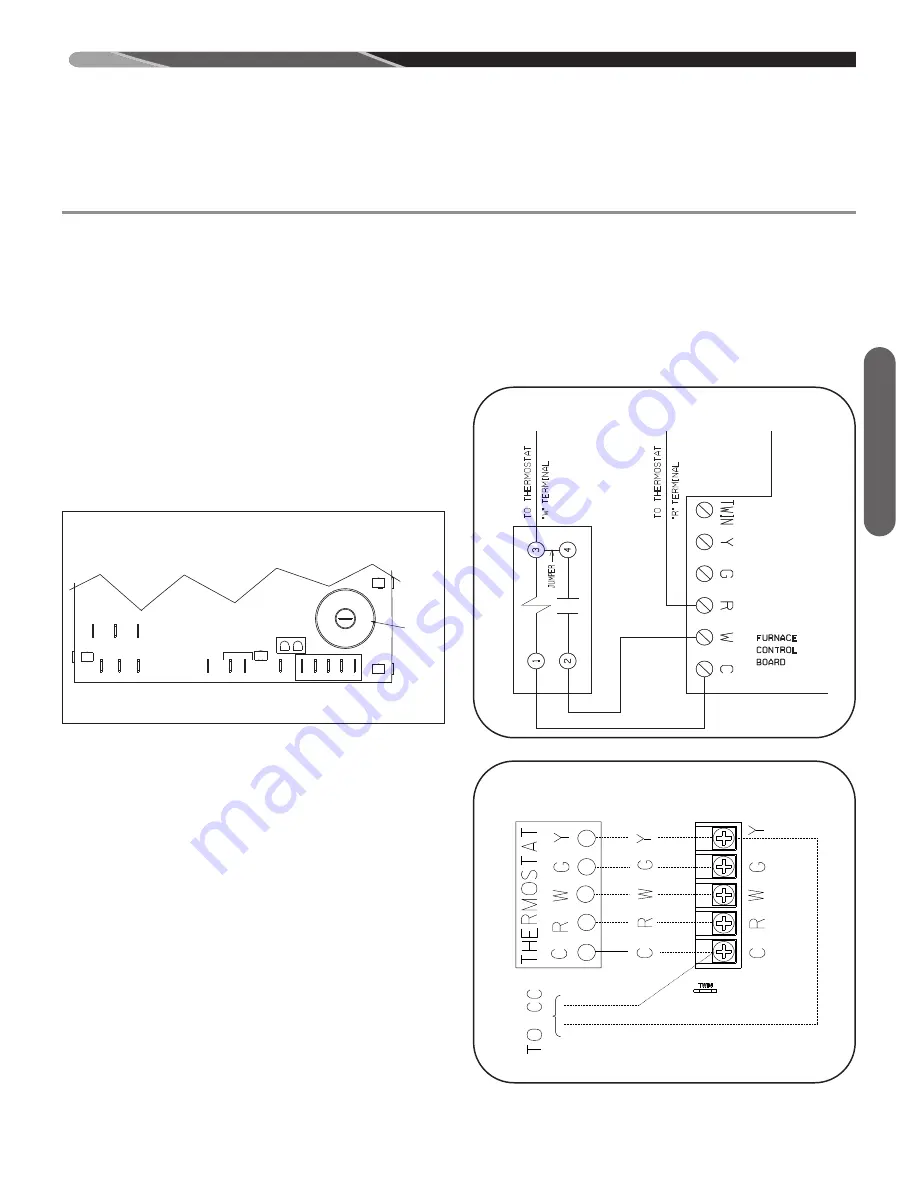
The room thermostat must be compatible with the furnace.
See manufacturer’s thermostat spec sheet for compatibility
concerns. Generally, all thermostats that are not of the
“current robbing” (“current robbing” thermostats require the
addition of an isolation relay. See Figure 41) types are
compatible with the integrated furnace control. The low
voltage wiring should be sized as shown.
NOTE:
Do not use 24 volt control wiring smaller than No.
18 AWG.
Install the room thermostat in accordance with the instruc-
tion sheet packed in the box with the thermostat. Run the
thermostat lead wires inside the blower compartment and
connect to low voltage terminals as shown on the wiring di-
agram. Never install the thermostat on an outside wall or
where it will be influenced by drafts, concealed hot or cold
water pipes or ducts, lighting fixtures, radiation from fire-
place, sun rays, lamps, televisions, radios or air streams
from registers.
ELECTRICAL WIRING
REVERSING ELECTRICAL CONNECTION & THERMOSTAT
ST-A0804-01
HEAT COOL FAN
M2 M1 H/C
EAC L1B XFMR HUM
SPARK
IGNITION
TOWER
NEUTRALS
LINE
P2
ST-A1194-26-X0
FIGURE 40
LINE VOLTAGE CONNECTIONS
FIGURE 41
ISOLATION RELAY
Electrical Wiring
ST-A1227-04
FIGURE 42
TYPICAL THERMOSTAT WIRING
77
Summary of Contents for 92MSP SERIES
Page 34: ...34 Field Conversions ...
Page 35: ...35 Field Conversions ...
Page 36: ...36 Field Conversions ...
Page 37: ...37 Field Conversions ...
Page 38: ...Field Conversions 38 ...
Page 99: ...99 ...
Page 100: ...100 CM 0716 ...


