background image


09. Filter  change  indicator


2  SET button


With the Set button you can select from the sub-men- 
us Taste (21, 22, 23 ) in programming mode. If no 
other settings are made, after 10 seconds the display 
automatically jumps back to the standard display fig- 
ure, i.e. indoor atmospheric humidity. Changes that 
have been made to the required humidity setting or 
in programming mode are saved.


3  PROG  button


Pressing  this  button  opens  the  programming  mode 
of the B 500 so that you can select from the main 
menus  (10,  20,  and  30).  See  page  9  for  a  descrip- 
tion of the menus.


4  Flush button


Pressing this button activates the rinsing system. 
(optional extra)


5  ON/OFF-Taste


The appliance can be switched on or off by pres- 
sing this button.


Supplied with two 24G Size AAA 1.5V batter-


ies.Please do not use any other type!


and  calcium  (lime)  content.  The  opportunity  should  be 
taken to clean the water tank with a sponge or a wet 
vacuum  cleaner.  The  electrode  rods  require  occasion- 
al  cleaning  to  ensure  they  do  not  indicate  incorrect 
values or cause the humidifier to shut down owing to 
calcification of the voltage electrodes. Distilled water 
must not be used because it leads to malfunctions in 
the water level indicator.


The B 500 atmospheric humidifier has a filter change 
indicator. The  frequency  with  which  the  filter  needs  to


  be changed depends on the length of time for which


the  pump  runs, the  hardness  of  the  water, and  the


(not  applicable  for  humidifiers  with  automatic 
water supply)


The device is filled with water via the upper filler flap 
using  a  watering  can  (only  up  to  the  max. level  mark, 
50 litres). The water level is  indicated by  light emitting 
diodes  (max.  5  stages).  Both  normal  tap  water  and 
softened water can be used  to operate the humidifier.


Do  not  use  distilled  water!  Take  care  to  fill 

correctly, since spilt water could enter the 
equipment  and  cause  a  short  circuit.  The 
maximum  temperature  of  the  water  must 
not exceed 35 °C.


The water level is sensed by copper electrodes and 
is indicated by  LEDs on  the  control  panel.  The  device 
switches off automatically if the red „Top up water“ 
LED  comes  on.  A  small  quantity  of  water  always  re- 
mains  in  the  tank  (approx. 15  litres). It  is  advisable 
to  regularly  (approx.  every  3-4  weeks)  drain  off  the 
residual  water  depending  on  the  degree  of  soiling


fan. Under the best circumtstances it will have to be 
changed after 98  days, in  the worst  after  56 days,  but 
this is only  a recommendation; the  situation can  be 
affected one way or the other by such external factors 
as air pollution or the hardness of the water. In any 
case it is advisable to make regular visual checks of 
the filter Please see the section on „Changing the fil- 
ter”  for  detailed  instructions.  When  you  have  changed 
the filter you have to reset the indicator manually to 
its  initial  position.  Please  proceed  as  described  in  the 
section on „Menu programming“ to Menu 33, where 
you can reset the filter change indicator at any time to 
its initial position of 98 days.


Filter change


Depending  on  the  operating  time  of  the  humidifier, 
the special filter is used up during the course of time 
as a result of mineral deposits in the water and dust 
deposits in the air (every 8-16 weeks depending on 
the  water  hardness,  dust  accumulation  and  operating 
time). The  filter  should  not be washed as  this reduces 
the evaporation capacity of the device. All humidifi-


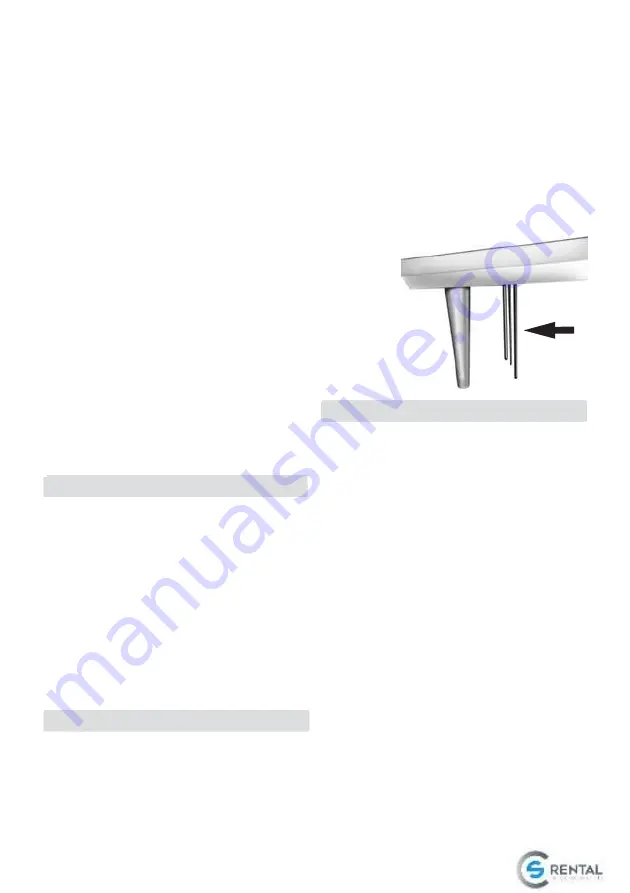
08. Water  level  indicator


Electrode rods


07. Filling


Summary of Contents for B500

Page 1: ......

Page 2: ...gy with calcium conversion cartridge B 14 Changing the UV tubes B 14 21 Parts list B 15 22 Design Exploded view drawing B 16 23 Maintenance check lists B 17 24 Correcting faults B 19 25 Installation suggestions B 20 26 Technical d a t a B 21 m Before you commission your new equip ment please read through the operating in structions Commissioning Check List Within the equipment are the accessories ...

Page 3: ...er change indicator Electronic water level indicator Fan speed indicator Automatic fan Actual required atmospheric humidity dis play Menu in programming mode or Fault code with error message Error message display note fault code The electronic hygrostat radio sensor system auto matically controls the humidifier The required humid ity values can be set by means of the remote control m Disconnect th...

Page 4: ...r level is indicated by light emitting diodes max 5 stages Both normal tap water and softened water can be used to operate the humidifier m Do not use distilled water Take care to fill correctly since spilt water could enter the equipment and cause a short circuit The maximum temperature of the water must not exceed 35 C The water level is sensed by copper electrodes and is indicated by LEDs on th...

Page 5: ...n of the housing thus causing leaks m Before doing any work on the appliance always make sure it is unplugged from the wall socket In the event of a defect in the control panel it may be necessary to replace it completely Please proceed as follows 1 Raise the upper part of the housing 2 Loosen the four screws on the corners of the con trol panel and take the panel out 3 Unplug the plugs 1 2 X9 vfr...

Page 6: ... its own speed depending on the output required It does this by measuring the changes in atmospheric humidity and increasing or decreasing the fan speed accordingly To activate the automatic fan press the side of the Fan button and hold it down until the last bar has disappeared from the indicator and the red diode with the fan symbol has gone out To deactivate it simply increase the fan speed wit...

Page 7: ...toryadjusted to 2 14 Coding the radio sensor system Coding the sensor These appliances are coded in the factory but if two or more are used in direct proximity to one another i e less than 50 metres apart a different coding may be necessary For each slide control there are only two positions ON up and 0FF down which give 16 possible combinations Please note each appliance and its ra dio sensor a b...

Page 8: ...s setting yourself Please refer to the section on Menu programming The following fault codes tell you what problem has occurred and what has to be done m If a fault code is displayed only the On Off button and the PROG and SET key on the re mote control unit can be used Fault code Fault What to do 01 Water tank is empty Check water level and top up if necessary Check water level diodes for dirt an...

Page 9: ...ve humidi ty The programming process can be termi nated at any time by pressing the ON OFF button Please note however that this will result in the loss of all the changes that have been made 10 Hooter setting 11 Hooter active when tank 00 OFF empty 01 ON 01 12 Hooter active when UV 00 OFF Only at version with lamp is defective 01 ON UV C technology 01 13 Hooter active with external 00 OFF With ext...

Page 10: ... switch or other 230V 01 ON switching mechanism REQUIRED humidity level is fixed at 90 The ACTUAL display shows a constant 00 rF The fan can be set freely at any suitable speed 00 35 Setting Changing interval of the fan in auto mode 01 10 min Dependent on the size of the room The immersion pump can be removed from the centre plate by turning it in the direction indicated by the arrow Take particul...

Page 11: ...ection to the local water main must be made by a qualified specialist i e a licensed installation tech nician Please note the water supply utility s regula tions It may be advisable to fit a back flow stop valve We recommend our 1 5 metre long safety pressure hose for the connection between the water pipe and the appliance Product no 1754 The automatic sys tem for topping up the water incorporates...

Page 12: ...ly removed from the clips The service life is approx 6 months which primarily depends on the dirt in the room air e g smoke and dust accumulation Air scoop with flexible hose These accessories are especially used in church or gans The scoop is fitted or screwed to the outlet of the B 500 Provided with a flexible aluminium ventila tion hose 150 mm which carries the humidified air into the critical ...

Page 13: ...perly and insert it into the glass tube again with care The UV lamp is to be disposed of in accordance with legal requirements The UV tube has an operating life of about 5000 hours m Please take care that the quartz glass body in which the source sits is not damaged when fitting and removing the UV source All accessories can be retrofitted at any time at the factory or by an authorised dealer m In...

Page 14: ...ypad foil 1401 Water distribution 1402 Stick on part extension left 1403 Stick on part extension right 1406 Remote control 1411 Filter rods without grooves 6 1412 Filter rods with grooves 4 1413 Clamp bracket with double nib 1500 Fan complete with motor housing and 1507 mounting parts Fan housing 1508 Sheet metal screw M 4 2 x 19 A2 4 1518 Plug body with cable 1520 Gum metal bumper M 4 1522 1 High...

Page 15: ...22 Construction ...

Page 16: ... residues such as lime or dust for instance by means of a needle a screwdriver or even use a vacuum cleaner for this Lift middle part of device off in upward direction Remove remaining water from the water container and clean the tub bottom part This is necessary in particular when using fresh water in order to avoid higher concent rations of residues Visual check of the copper electrode bars see ...

Page 17: ... cartridge Lift the centre plate upwards out of the water tank lower part The UV degermination arrangement is located below the centre plate next to the pump Inspect stainless steel tube visually and remove fouling Withdraw pump hoses from the stainless steel tube and check the passage of the stainless steel tube hoses Remove fouling Take care that the quartz glass body is not damaged The lime con...

Page 18: ...ectly installed Renew filter Check the filter seating Water degermination moni tor lamp does not light 1 UV source defect Replace UV source Device does not respond to the remote control Battery discharged or incorrectly installed Distance between remote control and device too great Check battery and replace note Reduce distance Automatic water feed no longer replenishes water 2 Safety pressure hos...

Page 19: ... must be taken to ensure that adequately large openings are available for air intakes and outlets to ventilate the appliance Living room area Equipment in a specialist shop walk in humidor Possible uses in the museum area or in churches to protect valuable organs 25 Installation suggestions ...

Page 20: ...ent Air flow capacity 900 m h Evaporation capacity 2 6 ltr h on 25o C and 20 r H Evaporation filter area 3 5 m Weight empty approx 24 kg Water reservoir approx 50 ltr Dimensions L 75 5 x H 62 0 x W 36 5 cm m Disconnect the mains plug before openingthe equipment 26 Technical data ...

Reviews: