28
| English
2 610 A15 112 • 12.8.09
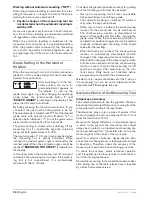
Working with the Laser Receiver (see figure A)
Under unfavourable light conditions (bright environ-
ment, direct sunlight) and for larger distances, use the
laser receiver for improved finding of the laser beam
22
.
When working with the laser receiver, select rotational
operation with a speed setting of at least 600 min
-1
.
Before working with the laser receiver, read and
observe the laser receiver operating instructions.
Working with the Remote Control
While pressing the operator buttons, the measuring
tool can be brought out of alignment so that the rota-
tion is briefly stopped. This effect is avoided when
using the remote control
25
.
The receiption lenses
3
for the remote control are
located on four sides next to the rotation head.
For information on working with the remote control
25
,
see “Remote control”, page 31.
Working with the Tripod (Accessory)
The measuring tool is equipped with a 5/8" tripod
mount
13
each for horizontal and vertical operation.
Place the measuring tool via the tripod mount
13
onto
the 5/8" male thread of the tripod and screw the lock-
ing screw of the tripod tight.
Adjust the tripod roughly before switching on the
measuring tool.
Working with Wall Holder/
Alignment Unit (Accessory) (see figure B)
You can also mount the measuring tool to the wall
mount with alignment unit
24
. For this, screw the 5/8"
screw of the wall mount into one of the tripod mounts
13
of the measuring tool.
Mounting to a wall: Mounting to a wall is recommend-
ed, e.g., for work above the elevation height of tripods
or for work on unstable surfaces and without tripod.
For this, fasten the wall holder
24
, with the measuring
tool mounted, as vertical as possible to a wall.
Mounting on a tripod: The wall holder
24
can also be
screwed onto a tripod with the tripod mount on the
back side. This method of fastening is especially rec-
ommended for work where the rotational plane is to
be aligned with a reference line.
With the alignment unit, the mounted measuring tool
can be moved vertically (when mounted to the wall) or
horizontally (when mounted to a tripod) within a range
of approx. 15 cm.
Working with the Laser Target Plate (Accessory)
With the laser target plate
23
, the laser mark can be
projected on the ground/floor or against a wall. With
the magnetic holder, the laser target plate can also be
fastened to ceiling constructions.
With the zero field and the scale, the offset or drop to
the required height can be measured and projected at
another location. This eliminates the necessity of pre-
cisely adjusting the measuring tool to the height to be
projected.
The laser target plate
23
has a reflecting coating
which improves the visibility of the laser beam from a
larger distance or in case of strong sun rays. The lumi-
nosity can be recognized only if you look to the laser
target plate in parallel to the laser beam.
Work Examples
Sighting Out a Reference Height
At the beginning of your work, mark a reference height
at a suitable distance (furthest possible) on a stable
surface (e.g. on a tree or building), which you can use
as your reference point.
While working, periodically check the working height
to ensure that it has not changed with respect to the
reference height.
Projecting/Checking Heights
Place the measuring tool in horizontal position on a
firm surface or mount it to a tripod (accessory).
Working with expandable tripod: Align the laser
beam to the requested height. Project or check the
height at the target location.
Working without tripod: Determine the height differ-
ence between the laser beam and the height at the
reference point with the laser target plate
23
. Project
or check the measured height difference at the target
location.
Indicating a Plumb Line/Vertical Plane
To indicate a plumb line or a vertical plane, set up the
measuring tool in the vertical position. When the ver-
tical plane is supposed to run at a right angle to a ref-
erence line (e.g. a wall), then align the plumb beam
1
with this reference line.
The plumb line is indicated by the variable laser beam
9
.
OBJ_BUCH-971-001.book Page 28 Wednesday, August 12, 2009 8:46 AM
Summary of Contents for AL-Series
Page 2: ...2 2 610 A15 112 12 8 09 6 5 3 4 3 8 7 2 2 1 9 12 13 16 17 18 14 15 11 10 13 ALGR...
Page 3: ...3 2 610 A15 112 12 8 09 19 21 22 23 24 20 25 B A...
Page 4: ...4 2 610 A15 112 12 8 09 28 27 26 29 30 31 32 33 34 35 37 36 38 39 40 RC400X...
Page 155: ...E 155 2 610 A15 112 12 8 09 f f 10 f f 2 IEC 60825 1 f f UV f f f f f f f CST berger 23 f 23...
Page 158: ...158 E 2 610 A15 112 12 8 09 f f f 163 24 f f ON OFF 6 9 1 5 162 0 00 30 s 5 161 60 s ON OFF 6...
Page 163: ...E 163 2 610 A15 112 12 8 09 30 s 12 20 m 100 m 20 m 20 m Service Bosch 30 m 30 m 0 00 I 30 m...
Page 165: ...E 165 2 610 A15 112 12 8 09 5 8 13 13 5 8 B 24 5 8 13 24 24 15 cm 23 23 23 1 9...
Page 240: ...240 2 610 A15 112 12 8 09 f f 10 f f 2 IEC 60825 1 f f f f f f f f f CST berger 23 f 23...
Page 243: ...243 2 610 A15 112 12 8 09 f f f 248 24 f f 6 9 1 5 247 0 00 30 5 245 60 6...
Page 255: ...255 2 610 A15 112 12 8 09 Bosch 10 oe e e e oe e e e 251 252...
Page 256: ...256 2 610 A15 112 12 8 09 f f 10 f f 2 IEC 60825 1 f f f f f f f f f CST berger 23 f 23...
Page 270: ...270 2 610 A15 112 12 8 09 Bosch 10 C a a c ep i i i C a a c ep i i i 267 267...
Page 285: ...285 2 610 A15 112 12 8 09 f f 10 f f 2 IEC 60825 1 f f f f f f f f f CST berger 23 f 23...
Page 294: ...294 2 610 A15 112 12 8 09 22 600 min 1 25 3 25 297 5 8 13 13 24 5 8 13 24 24 15 cm 23 23 23...

