Setting Up the RS Monitor
Chapter 4: Connecting the RS Monitor to a Computer
34
PowerStation RS Monitor User Guide
2. At the DOS prompt, type
a:install
3. Press Return.
4. The installation program screen will appear. It will
contain a message telling you that you can exit the instal-
lation program at any time by pressing the ESC key on
your keyboard or that you can press any other key to
continue. If you wish to continue, press any other key.
5. Two questions will appear on your screen:
a.
"On which disk drive do you wish to install the DTF
SC3 Touch Screen software?" Drive C is the default.
Select the drive on which you wish to install the soft-
ware and press Return.
b. "Please indicate which COM port your touch screen
controller is connected to." The default is COM1. Se-
lect the port you wish the touchscreen controller to be
connected to and press Return.
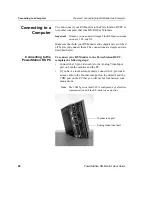
Note
The COM2 port on the PowerStation RS PC is configured,
by default, for communication with the RS touchscreen
monitor.
6. The installation process will begin. At the end of the
process, the system will check three files, and it will ask
if you want to continue to each procedure:
a.
The system will analyze your TOUCH.INI file to de-
termine which changes must be made to it. You can
press ESC to quit the installation or press any other
key to continue. If you wish to continue, press any
other key.
b. The system will analyze your CONFIG.SYS file to
determine if any changes must be made to it. You can
press ESC to quit the installation or press any other
key to continue. If you wish to continue, press any
other key.
c.
The system will analyze your AUTOEXEC.BAT file
to determine which changes must be made to it. You
can press ESC to quit the installation or press any oth-
er key to continue. If you wish to continue, press any
other key.


