Chapter 5: Maintaining and Troubleshooting the RS Monitor
Performing Internal Maintenance
PowerStation RS Monitor User Guide
61
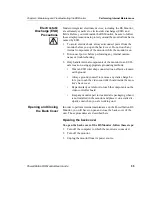
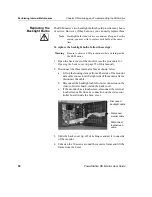
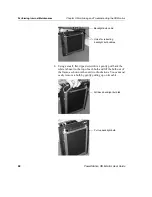
9. Insert the new bulbs.
10. Thread the cable for each new bulb through the hole in the
back of the frame near it and refasten the cable to its place on
the backlight bulb board.
11. Replace the monitor frame over the bezel. Carefully, feed the
touchscreen cable through the space for it at the lower left side
of the frame, outside in.
12. Fasten the frame in place with the 10 screws removed in step
4.
13. Replace the back cover of the monitor onto its hinges.
14. Re-attach the backlight cable and (if necessary) the internal
touchscreen cable to their connections on the video controller
board.
15. Re-attach the monitor cable to its connection at the right side
of the frame. Gently, push down on the monitor cable’s
connector until the locking clamps at each side of the
connector snap into place.
16. Close the back cover of the monitor (see the procedure for
Closing the back cover on page 56 of this manual.)

