Chapter 5 Console Operation
36
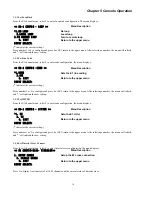
5.2.3 Set Loop Back
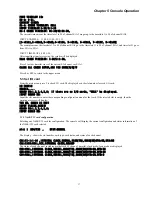
From the E1 channel menu, select 3 to enter Loop mode configuration. The menu displays:
<< E1-1 CONFIG - LOOP >>
Menu Description
*1.NO LOOP
No loop
2.LOCAL LOOP
Local loop
3.TO REMOTE LOOP
Turn to remote loop
0. EXIT
Return to the upper menu
INPUT SELECT:
('*' indicates the current setting.)
Press number 1 to 3 to configure and press 0 or ESC return to the upper menu. After selecting a number, the menu will refresh,
and '*' will indicate the new setting.
5.2.4 Set Line Code
From the E1 channel menu, select 4 to enter code configuration, the menu displays:
<< E1-1 CONFIG -CODE >>
Menu Description
*1.HDB3
Sets the E1 line coding
2.AMI
0. EXIT
Return to the upper menu
INPUT SELECT:
('*' indicates the current setting.)
Press number 1 or 2 to configure and press 0 or ESC return to the upper menu. After selecting a number, the menu will refresh,
and '*' will indicate the new setting.
5.2.5 Set JITTER
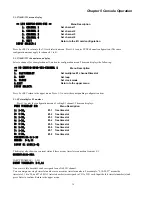
From the E1 channel menu, select 5 to enter code configuration, the menu displays:
<< E1-1 CONFIG - JITTER >>
Menu Description
*1. RX
Setu the E1 Jitter
2. TX
0. EXIT
Return to the upper menu
INPUT SELECT:
('*' indicates the current setting.)
Press number 1 or 2 to configure and press 0 or ESC return to the upper menu. After selecting a number, the menu will refresh,
and '*' will indicate the new setting.
5.2.6 Set Timeslot Cross Connect
From the E1 channel menu, select 6 to enter timeslot cross configuration, the menu displays:
<< E1 CONFIG-E1A1- TIMESLOT>>
Menu Description
1. SETUP CROSS
Setup the E1 cross connection
2. CANCLE CROSS
0. EXIT
Return to the upper menu
INPUT SELECT:
Press 1 to display free timeslots of all 8 E1 channels and the current status of timeslot cross.
Summary of Contents for ERM-MUX
Page 1: ...ERM MUX Plus E1 Multi Service Access Multiplexer ...
Page 2: ......
Page 8: ...Table of Contents ...
Page 20: ...Chapter 2 Installation 20 This page was left blank intentionally ...
Page 30: ...Chapter 3 LED Indicators and Cable Pin Definitions 30 This page was left blank intentionally ...
Page 58: ...Chapter 8 Application Notes 58 This page was left blank intentionally ...
Page 59: ......
Page 60: ......


