Chapter 5 Console Operation
47
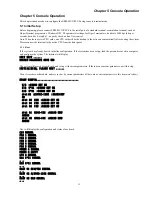
5.14 Save Configuration
All previously outlined modified configurations are saved temporarily in volatile ram. If the chassis is powered off or the CPU
card removed, the settings will revert back to the previously saved ones. Following the settings done previously, the changes
must be written to non-volatile ram. From the main menu, item 4 CONFIG, is the utility to save all the configuration settings.
It is also highly recommended to do save settings following all major configuration sections. For example, save after doing
system configuration, save again after setting E1 parameters, and finally save after setting each I/O card. Configurations which
are modified are only saved temporarily.
After pressing 4 in the main menu, the system asks:
SYSTEM WILL BE CONFIGED,ARE YOU SURE(Y/N)?y
Press N or n to escape.
Press Y or y to start saving the configuration.
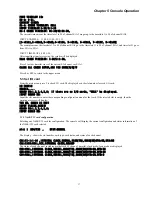
START CONFIG.............................
The system will now check all the new settings for each card and display the results of
save configuration, success or failure.
C/B
:BOARD
SET
OK
E1A 8*E1 :BOARD SET OK
E1B 8*E1 :BOARD SET OK
slot 1 N64/V35 :BOARD SET OK
slot 2 A/SYNC-128K :BOARD SET OK
slot 3 E&M :BOARD SET OK
slot 4 FXO :BOARD SET OK
slot 5 G703-64K :BOARD SET OK
slot 6 FXS :BOARD SET OK
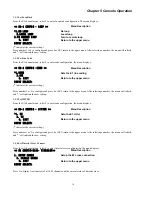
5.15 Reset Device Configuration to Default
After pressing 5 from the main menu, the system asks to recover to default.
YOU WILL RECOVER SYSTEM TO DEFAULT!
ARE YOU SURE(Y/N)?y
Press Y or y to start setting the device to default. Once started, it can not be stopped.
Please Wait....
START CONFIG.............................
The system will check each card and display the result of recovery operation, success
or failure.
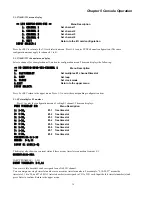
5.16 Browse/Modify System Parameters
From the main menu select "6.SET SYSTEM". The display will show:
<< SYSTEM MENU >>
Menu Description
1. VERSION
Display system version
2. CLOCK
Browse/ modify device clock
3. NMP CONFIG
Modify NMP configuration
4. E1 BACKUP
Modify backup mode of device E1
5. CHANGE PASSWORD
Modify system password
6. SETUP TIME
Modify device time
7. SETUP EXTEND BOX
Modify EXTEND BOX
0. EXIT
Return to the input box of the main menu
INPUT SELECT:1
Press 0 or ESC return to the main menu. Press 1 to 6 to get system info and/or modify the configuration.
Summary of Contents for ERM-MUX
Page 1: ...ERM MUX Plus E1 Multi Service Access Multiplexer ...
Page 2: ......
Page 8: ...Table of Contents ...
Page 20: ...Chapter 2 Installation 20 This page was left blank intentionally ...
Page 30: ...Chapter 3 LED Indicators and Cable Pin Definitions 30 This page was left blank intentionally ...
Page 58: ...Chapter 8 Application Notes 58 This page was left blank intentionally ...
Page 59: ......
Page 60: ......


