Chapter 3. Installation
25
Version 1.2 Apr 2006
3.5.4 External Clock Feature Removal / Replacement
***CAUTION***
This procedure should only be performed by qualified service personnel. In addition, all
power connections must be removed before attempting to open the case.
1. If the unit is installed in a rack, it must be removed.
2. Follow the procedure in 3-5-3 to remove the top cover.
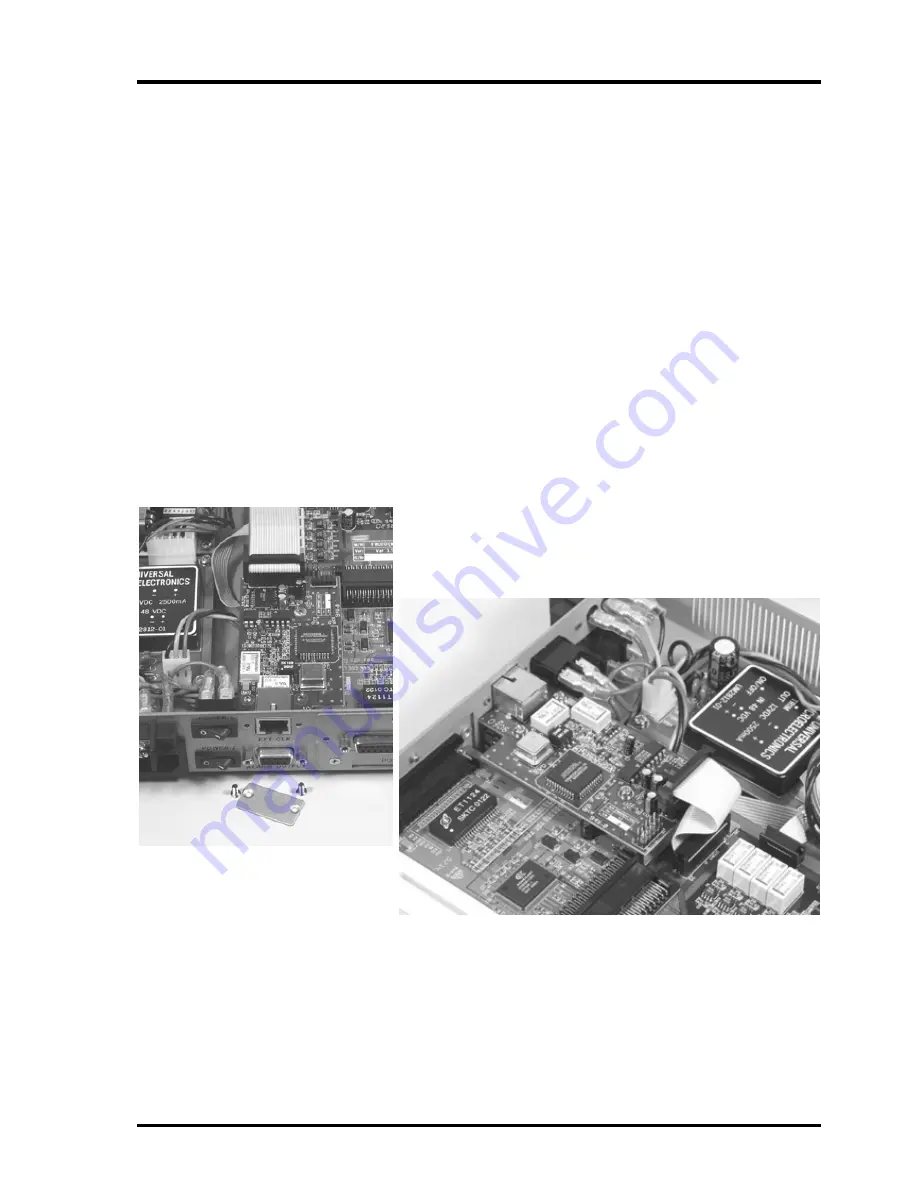
3. Remove the two screws on the cover plate for the external clock feature. Once the feature is
installed, this cover is no longer needed.
4. Place the ribbon cable on the feature card with the cable going away from the back of the
card, noting the polarity of the cable. Place the red stripe to pin #1 on the feature card.
5. Place the RJ-45 connector into the hole cut-out first, align the three holes in the PC board
with the three stand-offs. Insert the three pan-head screws that were supplied with the external clock
feature kit. Tighten firmly but do not over tighten.
6. Connect the ribbon cable to the mainboard and confirm all pins are properly seated.
7. Re-install the top cover by following the reverse order.
Figure 3-7 : External Clock
Rear View
Figure 3-8 : External Clock Option Removal / Replacement


