DUAL ACTION SETUP
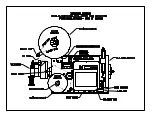
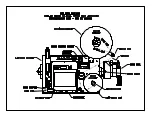
General Setup Procedures
1- Disable tamp (refer to Display Panel section). This way adjustments can be made without
the fear of the tamp actuating and injuring someone. Also load label formats into the printer.
2- The label stop must be properly set for the applicator to work successfully. This is done
through the printer and will be referred to as “Offset”, “Top of Form”, “Pitch Offset”, or
other terms dependant on the printer model.
a) With printing information in the buffer and the tamp disabled, press “jog” to
dispense a label.
b) If the label stop is correct, the label should feed off the liner. If the next label out
is flagged past the peel edge, the label stop must be decreased. If the label doesn’t
dispense completely off, then increase label stop. Refer to printer manual as to
how to change label stop
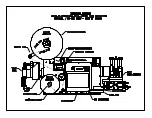
3- Tamp height needs to be set so a label feeds out in contact with the label pad. If the pad is
too high, the label will not land consistently on the pad and the trailing edge of the label could
come into contact with the peel bar of the printer when the tamp slide extends. If the label
pad is too low, the label will dispense into the back of the pad and jam.
4- The inboard edge of the label pad must match the inboard side of the label. Refer to the side
to side adjustments in the next section to move the pad.
5- Position the air assist tube so the hole or holes are centered on the label and pointing
approximately ¼”in from the label pad. The air pressure should be set at 20-30 P.S.I. Press
“Jog” to dispense a label. If the label doesn’t feed out against the label pad and the vacuum
doesn’t capture it, try increasing the air pressure. Continue until the vacuum captures the
label.
Warning:
There are other factors that can keep the label from staying on
label pad. You may need more vacuum, increased or decreased
label dive, or the air assist tube may need to be rotated. This will take
patience here but will pay big rewards later.
6- Air pressure for the tamp slide and rotary actuator should start at 40 P.S.I., for the air blast at
30-40 P.S.I., and for the vacuum pump at 20-40 P.S.I.
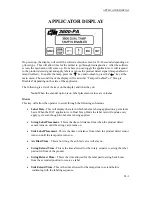
7- Air blast time is set through the display and should be set long enough to apply a label firmly
to the product. Setting the time too high will result in less labels/min. Start at .03 seconds.
The same air blast time applies to both the swing and tamp sequences.
b5-3
Summary of Contents for 3600-PA
Page 8: ......
Page 9: ......
Page 10: ......
Page 11: ......
Page 12: ......
Page 13: ......
Page 14: ......
Page 15: ......
Page 16: ......
Page 17: ......
Page 66: ......
Page 67: ......
Page 68: ......
Page 69: ......
Page 70: ......
Page 71: ......
Page 72: ......
Page 73: ......
Page 74: ......
Page 75: ......
Page 76: ......
Page 77: ......
Page 78: ......
Page 79: ......
Page 80: ......
Page 81: ......
Page 82: ......
Page 83: ......
Page 84: ......
Page 85: ......
Page 86: ......
Page 87: ......
Page 88: ......
Page 89: ......
Page 90: ......
Page 91: ......
Page 92: ......
Page 93: ......
Page 94: ......
Page 95: ......
Page 96: ......
Page 97: ......
Page 98: ......
Page 99: ......
Page 100: ......
Page 101: ......
Page 102: ......
Page 103: ......
Page 104: ......
Page 105: ......
Page 106: ......
Page 107: ......
Page 108: ......
Page 109: ......
Page 110: ......
Page 111: ......
Page 112: ......
Page 113: ......
Page 114: ......
Page 115: ......
Page 120: ......
Page 121: ......
Page 122: ......
Page 123: ......
Page 143: ......
Page 144: ......
Page 145: ......
Page 146: ......
Page 147: ......
Page 148: ......
Page 149: ......
Page 150: ......
Page 151: ......
Page 152: ......
Page 153: ......
Page 154: ......
Page 155: ......
Page 163: ...APPLY SEQUENCE Figure 28 c3 4 ...
Page 164: ......
Page 165: ......
Page 166: ......
Page 167: ......
Page 168: ......
Page 169: ......
Page 170: ......
Page 177: ......
Page 178: ......
Page 179: ......
Page 180: ......
Page 181: ......
Page 182: ......
Page 183: ......
Page 184: ......
Page 185: ......
Page 186: ......
Page 187: ......

