APPLICATOR DISPLAY
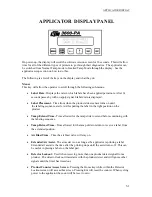
Home/Tamp
:
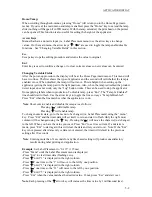
When scrolling through sub-menus, pressing “Home” will return you to the Home Page (main
menu). If you’re at the main menu and tamp is enabled, press the “Home” key to extend the tamp
slide (nothing will happen if in ITB mode). With the tamp extended, the print head on the printer
can be opened. This function is also useful for setting the height of the applicator.
Arrow Keys
:
Menus that have a numeric input (i.e. Label Placement menu) use the arrow keys to change
values. On the main menu, the arrow keys “
“ “
“ are used to toggle the tamp enable/disable
functions. See “Changing Variable Fields” in this section.
Esc
:
Escape key stops the editing procedure and returns the value to original.
Ent
:
Enter key is used to confirm a change or to clear current values so new values can be entered.
Changing Variable Fields
After the power-up procedure, the display will be at the Home Page (main menu). This menu will
have two lines. The first shows the type of applicator and the second will tell whether the tamp is
enabled or not. When disabled, the tamp will not move. This is helpful when setting up the
applicator (getting the tamp pad in the right position). Also, when the tamp is disabled the product
detect input does not work, only the “Jog” button works. This can be used to stop the applicator
from applying labels when in production. To disable tamp, press “Ent”. The “Tamp Is Enabled”
line should start to flash. Use the arrow keys to toggle the line so it says ”Tamp Is Disabled”.
Press “Ent” when the line matches what the applicator is to do.
Note
: Short cuts to enable and disable the tamp are as follows:
Pressing “
” will disable tamp.
Pressing “
” will enable tamp.
To change numeric data, go to the menu to be changed (i.e. Label Placement) using the “menu”
key. Press “Ent” and the timer data will set itself to zero and start to flash. Only the right most
column will be changed using the “
” key. Pressing the”
” will move the character just changed
to the left. When you have the value you want, Press “Ent” to set it as current. If a mistake is
made, press ”Ent” to start again; this will clear the data and let you start over. Note: If the “Ent”
key is not pressed after data entry or data is not entered, the timer will default to the previous
setting after 10 seconds.
Note
: Entering more than 32 seconds for any time based setting will produce unsatisfactory
results during label printing and application.
Example
: Set Label Placement to “0.115” (115 ms)
-Press “Menu” until the Label Placement menu is displayed.
-Press ”Ent” to clear timer data (flashing zero).
-Press “
” until “1” is displayed in the right column.
-Press “
” one time so the “1” will move to the left by one position.
-Press “
” until “1” is displayed in the right column.
-Press “
” one time so the “11” will move to the left by one position.
-Press “
” until “5” is displayed in the right column.
-Press “Ent” when the value matches the desired value. If not, press “Esc” and start over.
Note
: Each pressing of the “
“arrow key will increase the time value by 1 millisecond (ms).
5-2
Summary of Contents for 3600-PA
Page 8: ......
Page 9: ......
Page 10: ......
Page 11: ......
Page 12: ......
Page 13: ......
Page 14: ......
Page 15: ......
Page 16: ......
Page 17: ......
Page 66: ......
Page 67: ......
Page 68: ......
Page 69: ......
Page 70: ......
Page 71: ......
Page 72: ......
Page 73: ......
Page 74: ......
Page 75: ......
Page 76: ......
Page 77: ......
Page 78: ......
Page 79: ......
Page 80: ......
Page 81: ......
Page 82: ......
Page 83: ......
Page 84: ......
Page 85: ......
Page 86: ......
Page 87: ......
Page 88: ......
Page 89: ......
Page 90: ......
Page 91: ......
Page 92: ......
Page 93: ......
Page 94: ......
Page 95: ......
Page 96: ......
Page 97: ......
Page 98: ......
Page 99: ......
Page 100: ......
Page 101: ......
Page 102: ......
Page 103: ......
Page 104: ......
Page 105: ......
Page 106: ......
Page 107: ......
Page 108: ......
Page 109: ......
Page 110: ......
Page 111: ......
Page 112: ......
Page 113: ......
Page 114: ......
Page 115: ......
Page 120: ......
Page 121: ......
Page 122: ......
Page 123: ......
Page 143: ......
Page 144: ......
Page 145: ......
Page 146: ......
Page 147: ......
Page 148: ......
Page 149: ......
Page 150: ......
Page 151: ......
Page 152: ......
Page 153: ......
Page 154: ......
Page 155: ......
Page 163: ...APPLY SEQUENCE Figure 28 c3 4 ...
Page 164: ......
Page 165: ......
Page 166: ......
Page 167: ......
Page 168: ......
Page 169: ......
Page 170: ......
Page 177: ......
Page 178: ......
Page 179: ......
Page 180: ......
Page 181: ......
Page 182: ......
Page 183: ......
Page 184: ......
Page 185: ......
Page 186: ......
Page 187: ......


