background image


FCC Warning 


This equipment has been tested and found to comply with the limits for a Class 
A  digital  device,  pursuant  to  Part  15  of  the  FCC  Rules.    These  limits  are 
designed  to  provide  reasonable  protection  against  harmful  interference  when 
the  equipment  is  operated  in  a  commercial  environment.  This  equipment 
generates,  uses,  and  can  radiate  radio  frequency  energy  and,  if  not  installed 
and used in accordance with this user’s guide, may cause harmful interference 
to  radio  communications.  Operation  of  this  equipment  in  a  residential  area  is 
likely  to  cause  harmful  interference  in  which  case  the  user  will  be  required  to 
correct the interference at their own expense. 


CE Mark Warning 


This is a Class A product. In a domestic environment, this product may cause 
radio  interference  in  which  case  the  user  may  be  required  to  take  adequate 
measures. 
 

Trademarks 


CTS is a registered trademark of Connection Technology Systems Inc


All trademarks belong to their respective proprietors

.


Contents are subject to change without prior notice. 
 

Copyright Statement 

 
Connection Technology Systems Inc Copyright ©  1998-2015 

 
This  publication  may  not  be  reproduced  as  a  whole  or  in  part,  in  any  way 
whatsoever  unless  prior  consent  has  been  obtained  from  Connection 
Technology Systems Inc.  


Summary of Contents for ESW-3128 Series

Page 1: ...ESW 3128 Series 24 PORTS 10 100 1000BASE T RJ 45 WITH 4 COMBO PORTS 10 100 1000BASE T 100 1000BASE X SFP UPLINK MANAGEMENT SWITCH User s Guide Version 0 91...

Page 2: ...area is likely to cause harmful interference in which case the user will be required to correct the interference at their own expense CE Mark Warning This is a Class A product In a domestic environme...

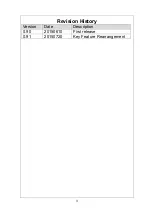
Page 3: ...3 Revision History Version Date Description 0 90 20150610 First release 0 91 20150720 Key Feature Rearrangement...

Page 4: ...1 5 Network Management 8 2 INSTALLATION 10 2 1 Requirement 10 2 2 Checking the Package Contents 10 2 3 Install the Managed Switch 11 2 4 Power ON 12 2 5 Connect the Switch to network 14 3 OPERATION 15...

Page 5: ...ombo ports 10 100 1000Base T 100 1000Base X SFP in front panel This Managed Switch provides high performance store and forward switching capability plus other advanced features such as QoS VLAN etc Cl...

Page 6: ...s support up to 2K VLAN Groups Support jumbo frame on all ports up to 9K bytes size QoS classification based on IEEE802 1p VID TOS DSCP Ethertype and L4 port Q in Q VLAN double tag Rate limit control...

Page 7: ...port can be used to manage the device and the interface should be configured to 9600 N 8 1 5 LED Please refer to chapter 3 1 LED Definitions Rear Panel The Managed Switch provides one fixed power modu...

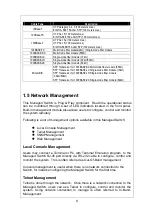
Page 8: ...Switch is Plug Play compliant Real time operational status can be monitored through a set of LED indicators located in the front panel Built in management module also allows users to configure control...

Page 9: ...ork you can login and monitor the status of it through a web browser remotely or locally Local console type Web management especially for the first time use of the Managed Switch to set up the needed...

Page 10: ...ne power outlet Proper ventilation Proper isolation to electrical noise radio etc UTP cables should not run in the same duct with power and phone line cables Required SFP Transceiver or UTP cables Rac...

Page 11: ...onnector Make sure that there is proper heat dissipation from and adequate ventilation around the switch Do not place heavy objects on the Managed Switch Desktop Installation The switch can be placed...

Page 12: ...with mounting bracket into the selected mounting rail position 4 Then use the screws provided with the equipment rack to mount the switch into the selected mounting rails position carefully and firmly...

Page 13: ...13 Power Failure In the event of power failure unplug the power that is plugged into the switch at the back of the device When power is resumed plug the power back to the switch...

Page 14: ...rts in front panel These 24 RJ 45 ports can be plugged with 10 100 1000Base T UTP connector Uplink combo ports 25 28 can be plugged with 155Mbps 1 25Gbps SFP Fiber transceiver or 10 100 1000Base T UTP...

Page 15: ...for internal Power A and lower one is for internal power B LED Color Operation PWR A B Off Without fixed in power module or power is off Green Power module is in normal operation Orange Fixed in Powe...

Page 16: ...k ACT Speed TP Off No connection or the port link speed is in 10Mbps Green The link is up and the speed is in 100Mbps Orange The link is up and the speed is in 1000Mbps Blinking Green Orange Traffic i...

Page 17: ...the port 3 Check Status LED of the port 4 Check cable connection between the port and the connected device 5 Reset power When local Console fails to function 1 Check COM LED status 2 Check Console po...

Page 18: ...e this warning could result in personal injury or death from electrical shock Failure to observe the above warning will immediately void any Warranty 4 3 Firmware Upgrade This Managed Switch may perfo...

Reviews: