33
3.
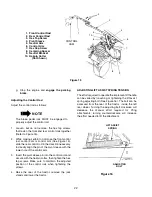
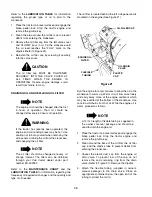
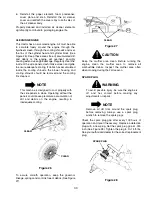
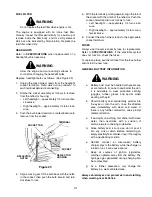
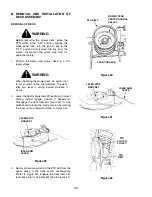
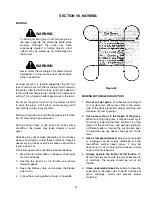
Rotate the mounting rod fully upward toward the
dash panel to provide clearance for battery
removal (See Figure 31).
4.
Pull downward on the bottom of the battery
holddown strap to release it from the tab beneath
the battery tray.
5.
Loosen the hose clamp and pull the drain tube
from the battery.
6.
Lift the battery upward and remove from the left
side of the tractor.
Figure 31
7.
Install the new battery from the left side of the
tractor and lower into the battery tray.
8.
Install the drain tube onto the battery and secure
with the hose clamp.
9.
Stretch the battery holddown strap downward
across the front of the battery and hook to the tab
below the battery tray.
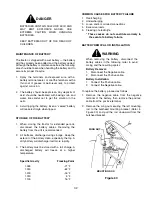
10. Rotate the mounting rod downward and insert
through the bottom of the hole in the bulkhead
mounting bracket (See Figure 30).
11. Install the wing nut onto the mounting rod, but do
not tighten until after the side panels are installed.
12. Connect the positive cable to the positive terminal
of the battery, then connect the negative cable to
the negative terminal.
JUMP STARTING
WARNING
Failure to use this jump starting procedure
could cause sparking, which could result in an
explosion of either battery.
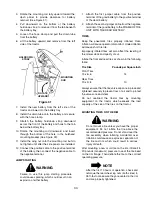
1.
Attach the first jumper cable from the positive
terminal of the good battery to the positive terminal
of the dead battery.
2.
Attach the second jumper cable from the negative
terminal of the good battery to the FRAME OF THE
UNIT WITH THE DEAD BATTERY.
TIRES
Keep the pneumatic tires properly inflated. Over-
inflation will cause operator discomfort. Under-inflation
will cause short tire life.
Improperly inflated tires will also affect the leveling of
the mower deck and quality of cut.
Inflate the front and rear tires as shown in the following
table:
Tire Size
Pounds per Square Inch
Front Tires
15 x 6–6
14
Rear Tires
20 x 9–8
10
Always ensure that the tire valve caps are in place and
tightened securely to prevent loss of air and to protect
the valve core and stem.
Do not overload the tractor tires by mounting
equipment on the tractor which exceeds the load
capacity of the size of the tires on the tractor.
MOUNTING TIRES ON THE RIM
WARNING
Do not mount a tire unless you have the proper
equipment. Do not inflate the tire above the
recommended pressure. Do not stand over the
tire assembly when inflating. Accidental over
inflation could cause an explosive separation of
the tire and rim, which could result in serious
injury of death.
After mounting a new or old tire on the rim, inflate it to
20 pounds (maximum) pressure to seat the tire bead
on the rim flange. Then deflate the tire to the corrrect
operating pressure.
NOTE
After the first 10 hours of operation, check and
retorque the rear wheel lug nuts (both sides) to
35 ft-lbs to make sure they are seated in the rim
and are properly tightened.
HOLDDOWN
STRAP
MOUNTING
ROD
ROTATE
UPWARD

