Big Country 4 x 2
4
3.9.
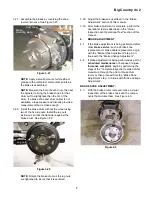
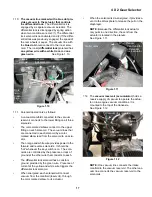
Inspect the brake cables for any damage or
wear. Inspect the hardware securing the cables
to the brake pedal assembly.
See Figure 3.9.
3.10. Release the parking brake.
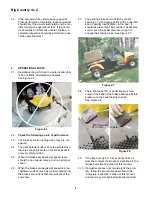
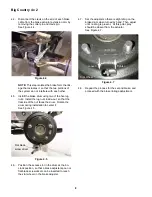
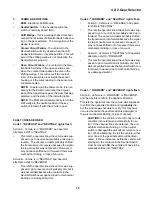
3.11. Inspect the brake cables at the rear drive
wheels. Inspect the clevis pin, cotter pin, E-clip,
cotter pin, and washer securing the the brake
cables and the brake actuator hardware. See
3.11..
3.12. Remove the rear wheels.
3.13. Remove the brake drums. If the brake drum will
not slide easily over the brake shoes, perform
the following two steps.
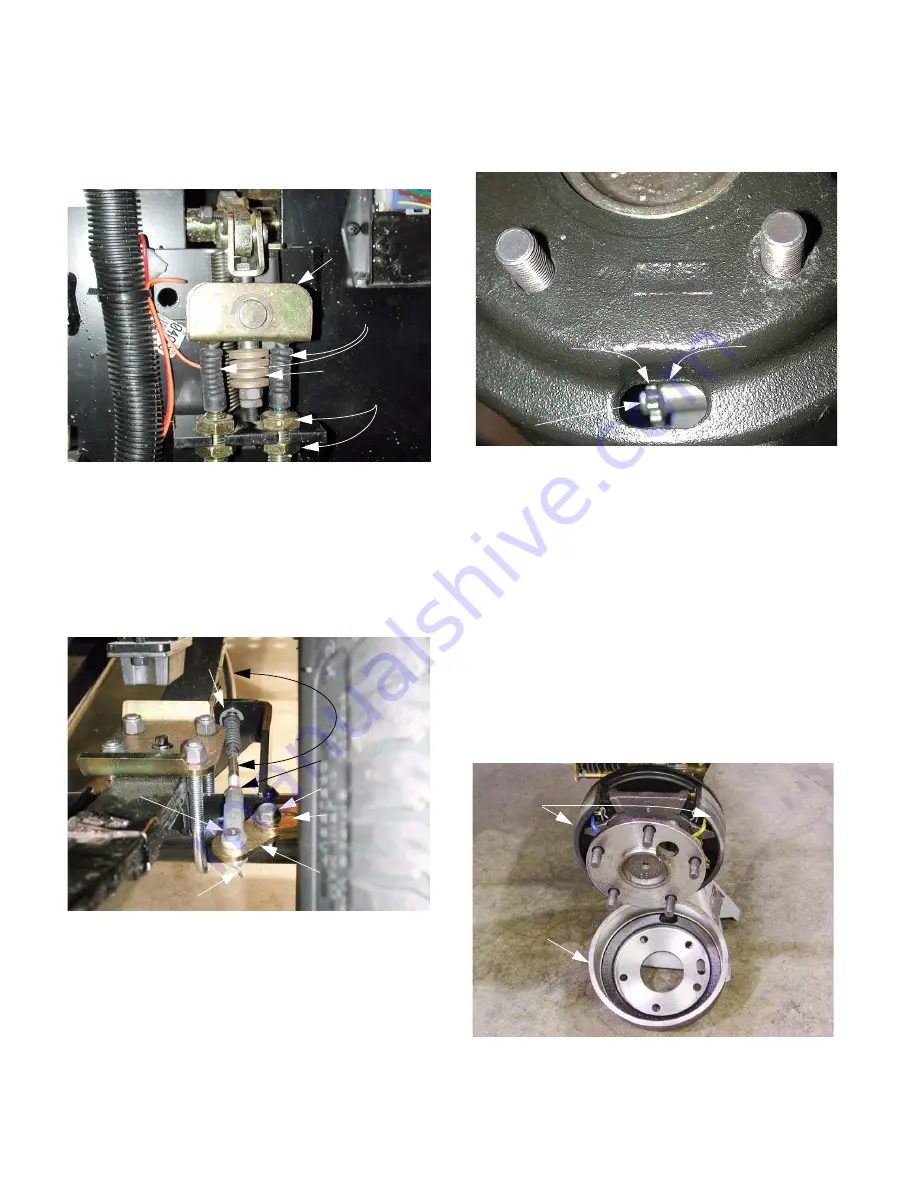
3.14. Rotate the brake drum until the access hole
(closest to the outer edge of the hub) is at the 6
O’clock position.
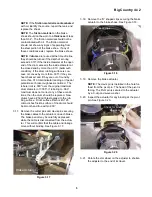
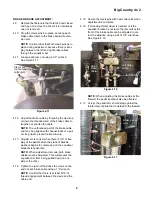
3.15. Slacken the brake adjuster using a brake
adjuster spoon or flat blade screw driver.
See Figure 3.15.
NOTE:
The brake adjuster is the same on both
sides of the Big Country, but is installed in oppo-
site directions. The adjuster is installed with the
star wheel toward the
front
of the
left
side brake
assembly. The adjuster is installed with the star
wheel towards the
rear
of the
right
side brake
assembly. There is a conventional right hand
thread on the shaft attached to the star wheel.
Walk the teeth of either star wheel down in
order to loosen the brake shoe adjustment.
Walk the teeth up in order to tighten the
adjustment.
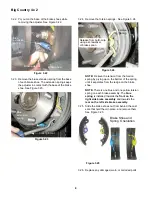
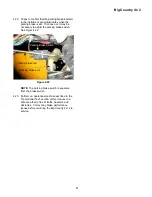
3.16. Inspect the brake shoes and drum for wear. The
shoes should be free of oil. See Figure 3.16.
Figure 3.9
Brake cables
Jam nuts
Bellville washers
Equalizer bar
Cable
E-clip
Jam nut
Brake actuator
Brake actuator
extension arm
Mounting bolts
Clevis pin
Cotter pin
Figure 3.11
Figure 3.15
brake drum
W
indow in
Brake
adjuster
Star
wheel
Figure 3.16
Brake
drum
Brake
shoes
Summary of Contents for BIG COUNTRY 4X2
Page 2: ......
Page 4: ......
Page 16: ...Big Country 4 x 2 12...
Page 38: ...4 X 2 Gear Selector 34...


