Battery Pack and Charger
123
To install the batteries:
NOTE:
Before installing the batteries, remove the month
and year from the label or write the date of installa-
tion on the side of the batteries with a permanent
marker. This will be helpful in diagnosing the bat-
teries after they have been in service for a while.
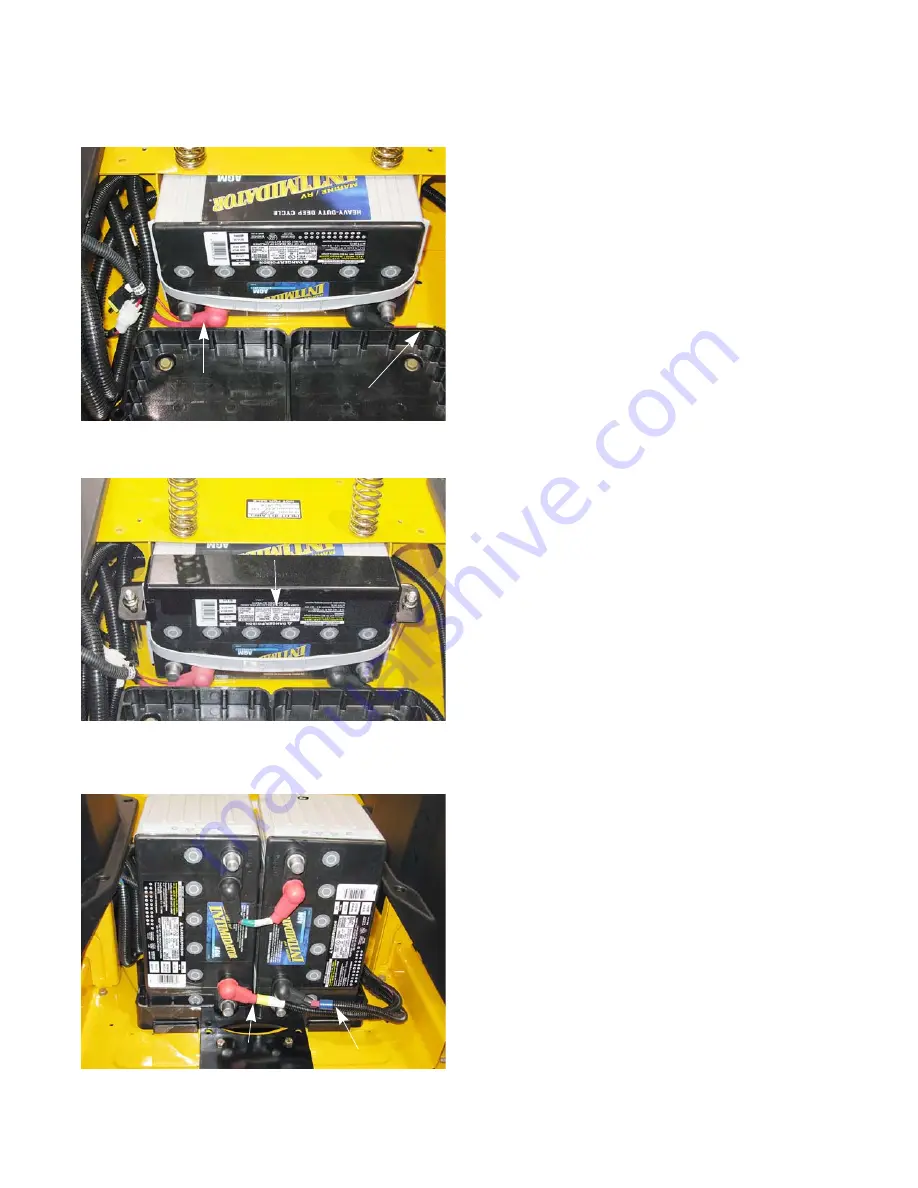
1. Insert 1
st
battery under seat box so that the terminals
are down, facing rear of tractor. See Figure 6.18.
2.
Connect the red wire coming from under left pod, the
one with the fuse attached to it, to the positive termi-
nal of 1
st
battery. See Figure 6.18.
NOTE:
Only use the stainless steel nuts that come with
the batteries to attach the battery cables to the bat-
teries. Tighten the nuts to a torque of 120-180 in
lbs (14 - 20 Nm).
3.
Attach the wire with the yellow tape to the negative
terminal of 1
st
battery.
4.
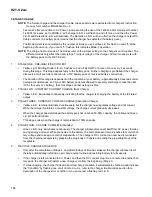
Attach the battery bracket: See Figure 6.19.
4a.
Install the J-bolts, if they were removed.
4b.
Slide the bracket over the battery.
4c.
Install the two nuts that hold the bracket to the
J-bolts.
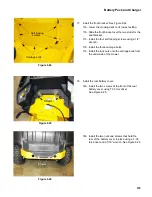
5.
Set Rear Batteries in Bottom Tray.
NOTE:
The batteries should be standing on end, so that
the terminals are next to each other.
6.
Attach the wire with the yellow tape (from the 1
st
bat-
tery) to the positive terminal of 2
nd
7.
Attach the wire with the blue tape to the negative ter-
minal of 3
rd
battery.
8.
Connect the jumper (green tape) across the two top
terminals of the 2
nd
and 3
rd
batteries.
Figure 6.18
Positive
Yellow tape
1
Figure 6.19
Battery bracket
Figure 6.20
2
3
Green
-
+
Yellow
Blue
Summary of Contents for RZT-S Zero
Page 2: ......
Page 42: ...RZT S Zero 38 ...
Page 112: ...RZT S Zero 108 ...
Page 154: ...NOTES ...
Page 155: ......
Page 156: ...MTD Products Inc Product Training and Education Department FORM NUMBER 769 08008 02 05 2013 ...


