S
ection
5 — o
peration
23
Using the Mower Deck
WARNING!
Make certain the area to be mowed is
free of debris, sticks, stones, wire or other objects
that can be thrown by the rotating blades.
NOTE:
Do not engage the mower deck when lowered in grass.
Premature wear and possible failure of the ‘V” belt and PTO
clutch will result. Fully raise the deck or move to a non grassy
area before engaging the mower deck.
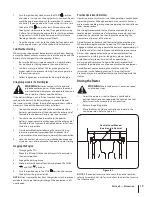
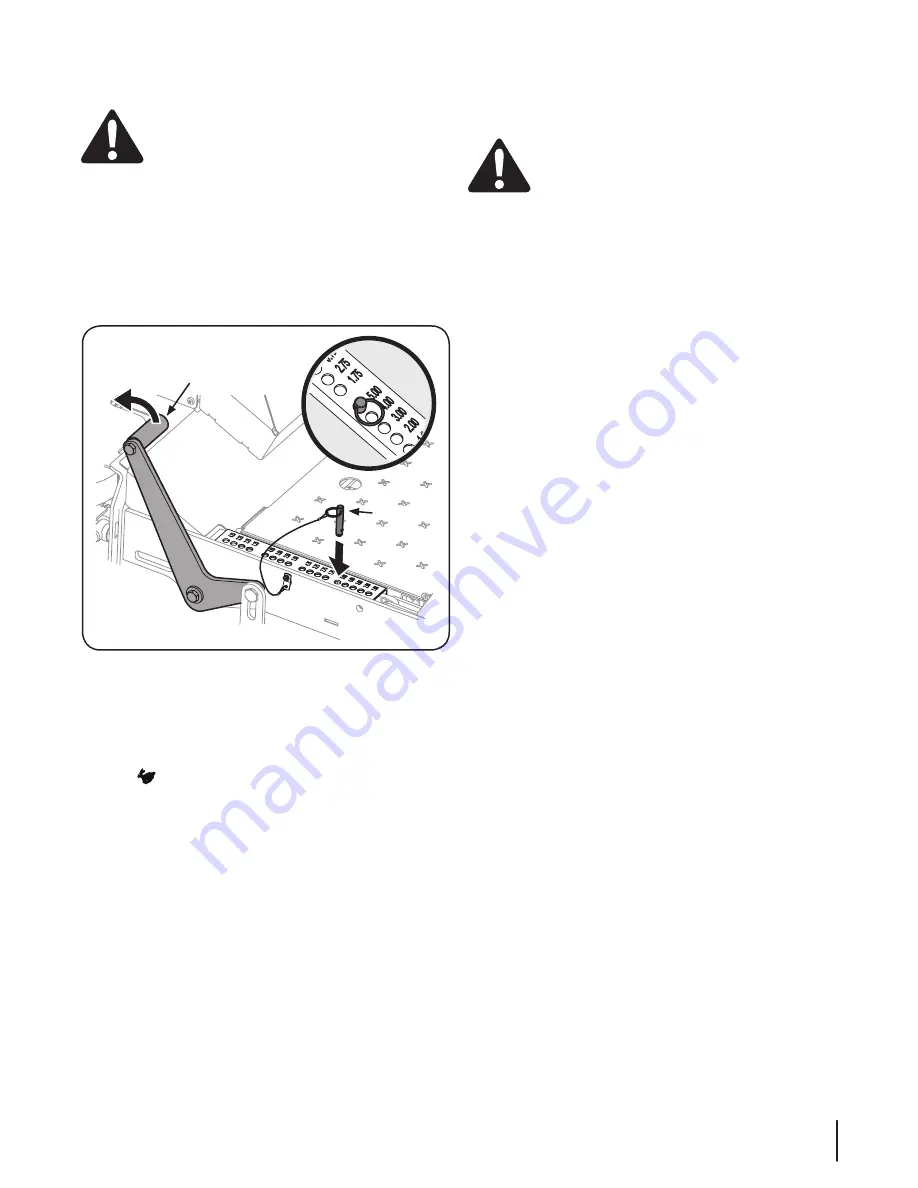
1.
Use the deck lift pedal to raise the deck to its highest
position, place the clevis pin attached to the tractor into
the desired index hole on the deck height index, then
slowly release the deck lift pedal. See Fig. 5-10.
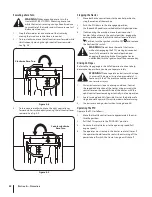
Deck Lift Pedal
Clevis Pin
Figure 5-10
2.
Mow across slopes, not up and down. If mowing a slope, start
at bottom and work upward to ensure turns are made uphill.
3.
On t
he first pass pick a point on the opposite side of the
area to be mowed.
4.
En
gage the PTO clutch and move the throttl
e control to the
fast
position.
5.
Lower the mower deck to the desired height setting using
the deck lift pedal.
6.
Slowly and evenly push the RH and LH drive control levers
forward to move the tractor forward, and keep the tractor
headed directly toward the alignment point.
NOTE:
The speed of the tractor will affect the quality of the
mower cut. Mowing at full speed will adversely affect the cut
quality. Control the ground speed with the control levers.
7.
When approaching the other end of the strip, slow down
or stop before turning. A U-turn is recommended unless a
pivot or zero turn is required.
8.
Align the mower with an edge of the mowed strip and
overlap approximately 3”.
9.
Direct the tractor on each subsequent strip to align with a
previously cut strip.
10.
To prevent rutting or grooving of the turf, if possible, change
the direction that the strips are mowed by approximately 45°
for the next and each subsequent mowing.
WARNING!
Be careful when crossing gravel paths
or driveways. Disengage the PTO and raise the deck
to the highest position before crossing.
NOTE:
When stopping the tractor for any reason while on a grass
surface, always:
•
Place the shift lever in neutral.
•
Engage the parking brake.
•
Shut the engine off and remove the key.
•
Doing so will minimize the possibility of having your lawn
‘‘browned’’ by hot exhaust from your tractor’s running engine.
Checking the Safety Interlock Circuits
Periodically check the safety interlock circuits to ensure they are
working properly. If a safety circuit is not working as designed,
contact you Cub Cadet dealer to have the tractor inspected. DO
NOT operate the machine if any safety circuit is not functioning
properly. To check the safety circuits, proceed as follows:
1.
Sitting in the tractor seat with both drive control levers
opened fully outward, disengage the parking brake and
momentarily turn the ignition switch to the start position.
The engine should not crank.
2.
Engage the parking brake and pull the PTO upward to the
engaged position. Momentarily turn the ignition switch to
the start position; the engine should not crank.
3.
Push the PTO downward to the disengaged position and
engage the parking brake. Start the engine and move one
of the drive control levers from the fully outward neutral
position. The engine should stop running. Repeat the
procedure with the opposite control lever.
4.
Move both control levers fully outward in the neutral
position and disengage the parking brake; then lift upward
from the operator’s seat. The engine should stop.
5.
With both control levers fully outward in the neutral position
and the parking brake engaged, engage the PTO. Lift
upward from the operator’s seat; the engine should stop.


