15
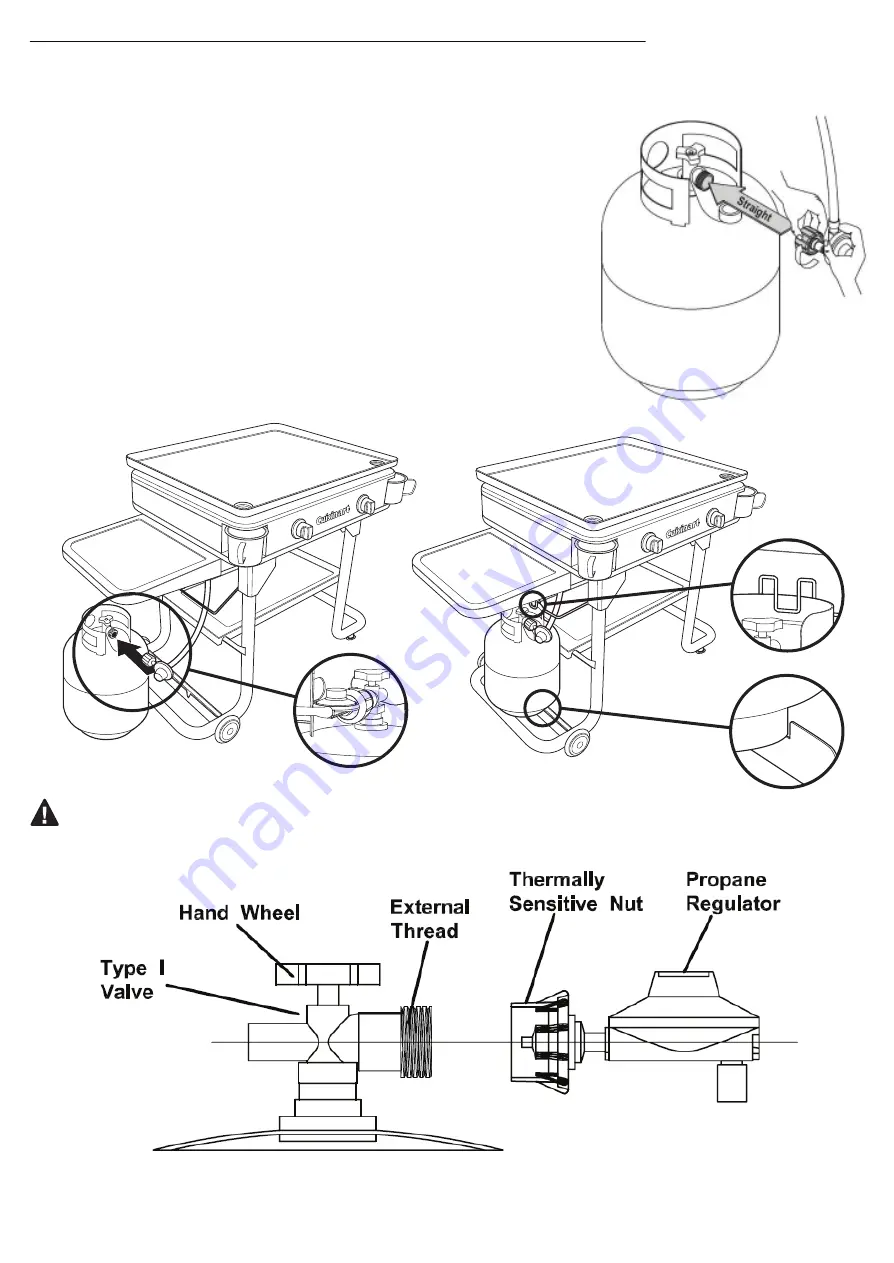
CONNECTING REGULATOR TO THE LP TANK
1. Check the tank valve to ensure it has proper external ma�ng threads to fit the hose and regulator assembly
provided (Type 1 connec�on per ANSI Z21.58b-2002).
2. Make sure all burner knobs are in the OFF posi�on.
3. Remove the protec�ve cap from the LP tank valve and coupling
nut. And inspect the valve connec�on port of the regulator
assembly. Look for damage or debris. Remove any debris. Inspect
hose for damage. Never use damaged or plugged equipment.
4. Hold regulator by one hand in a straight line with LP tank valve
and insert nipple into LP tank valve. Be sure the nipple is centered
in the valve outlet. (see Fig. 1). Hand-�ghten the coupling nut clockwise
un�l it comes to a full stop. DO NOT use tools!
5. Open the tank valve fully (counterclockwise).
6. Perform leak test before a�emp�ng to light your grill.
See “CHECKING FOR LEAKS " on page 20.
Fig. 1
Fig. 2
WARNING
: The Type I connec�ve coupling (see Fig. 2) supplied with your grill must not be replaced
with a different type of grill/tank connec�on system. Removal will result in loss of warranty, gas leakage, fire
and severe bodily harm.
Summary of Contents for CGG-0028
Page 7: ...7 EXPLODED VIEW...


