12
English
1350 W 230 V 50 Hz
Dear Customer
Thank you for having chosen a
Cuizimate product. The Cuizimate
products have been produced to
think about the welfare of the
consumer privileging the most raised
standards of quality, functionality
and assign. We are sure you will be
happy with this appliance.
To guarantee your appliance works
perfectly at all times and for your
personal safety, we suggest the
following: Please read these instructions
carefully before using the appliance
for the first time, and above all follow
the safety instructions as well as any
warning notices on the appliance.
If you pass this appliance on to
anybody else in the future, please also
give him or her, these instructions.
A. Cup warming plate
B. Ready indicator
C. Power indicator
D. ON/OFF button
E. Coffee/steam knob
F. Steel mesh
G. Metal funnel
H. Funnel handle
I. Removable cup shelf
J. Drip tray
K. Tank cover
L. Handle
M. Detachable tank
N. Steam wand
O. Plastic sleeve
P. Press bar
Q. Measuring spoon
Read this manual thoroughly
before using and save it for future
reference
Before using the electrical
appliance, the following basic
precautions should always be
followed including the following:
1. Read all instructions.
2. Before using check that the
voltage of wall outlet corresponds
to rated voltage marked on the
rating plate.
3. This appliance has been
incorporated with a grounded
plug. Please ensure the wall outlet
in your house is well earthed.
4. To protect against fire, electric
shock and injury to persons do not
immerse cord, plug in water or
other liquid.
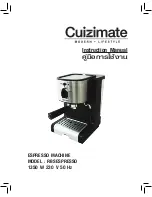
ESPRESSO MACHINE
Model: RBSESPRESSO
Description
Tip&safty precautions
Summary of Contents for RBSESPRESSO
Page 1: ...Instruction Manual ESPRESSO MACHINE MODEL RBSESPRESSO 1350 W 230 V 50 Hz...
Page 2: ...1...
Page 3: ...1350 230 50 CUIZIMATE CUIZIMATE A B C D E F G H I J K L M N O P Q Espresso RBSESPRESSO 2...
Page 4: ...1 2 3 4 5 6 7 8 9 10 11 12 13 14 15 16 17 18 19 3...
Page 5: ...20 21 22 23 1 Max 2 Insert Lock 1 3 4 5 6 1 4...
Page 6: ...20 1 Max 2 Insert Lock 1 3 4 5 O 6 1 1 1 1 2 Insert Lock 1 3 4 5...
Page 7: ...5 2 6 7 1 2 3 100 70 5 2 4 2 5 2 6 OFF 6...
Page 8: ...7 fig 2 1 Max 2 3 4 5 6 7 1 2 3 4 OFF OFF 7...
Page 9: ...1 2 3 2 Max 4 1 100 3 3 4 5 2 2 5 6 2 15 7 4 6 3 8 9 Max 4 6 3 15 6 10 9 3 OFF 8...
Page 10: ...9...
Page 11: ...10...
Page 12: ...2 11...
Page 23: ...9 9 14 17 9 10310 46 178 3 12 10230 0 2363 7757 62...

