14
to close the throat while the
appliance is running to prevent
dust or drops of liquid from
escaping through the throat.
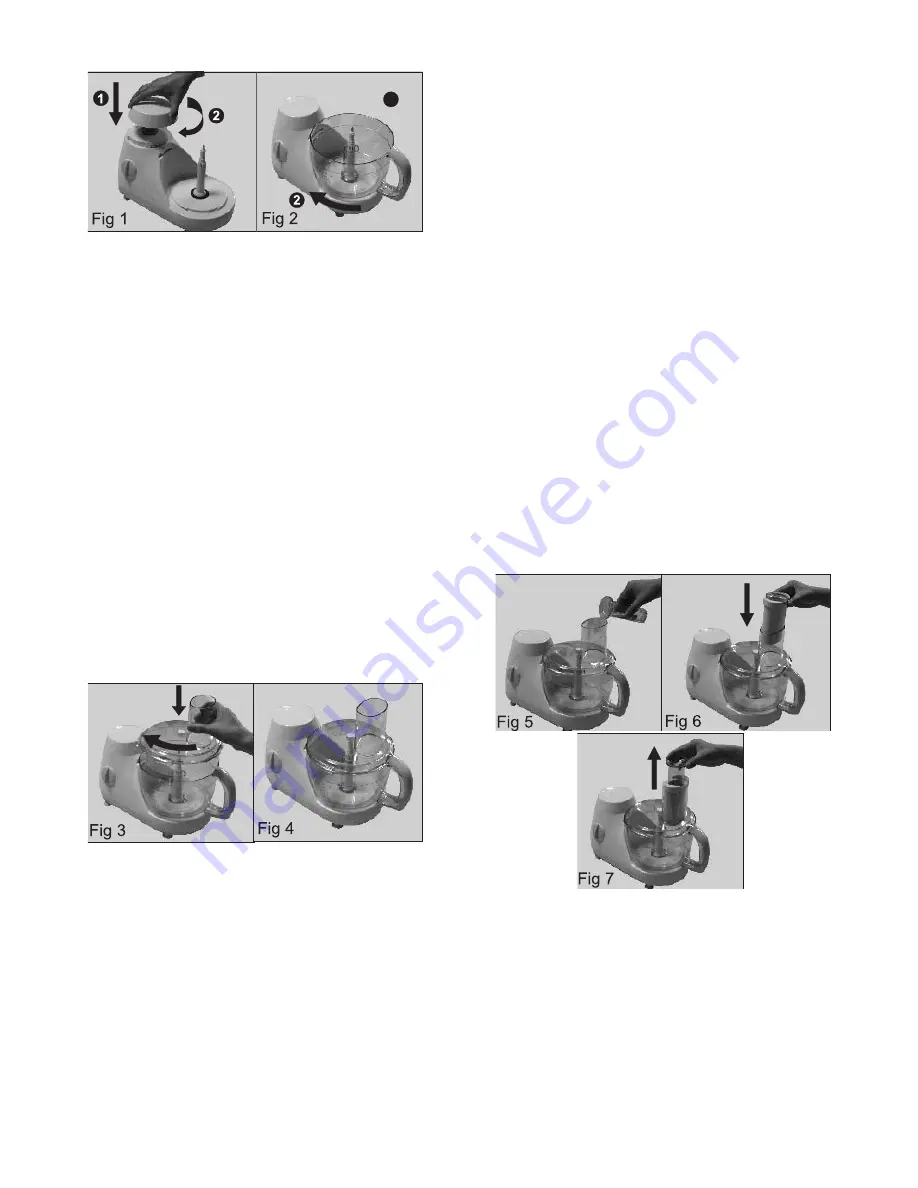
4) The pusher has been
provided with a pusher cap.
(fig.7)
- The pusher cap can be
removed to create a narrower
throat.
- A narrower throat may be
handy when you want to cut
or when the amount of
ingredients used is too small to
use the normal throat.
2. Placing the bowl lid
- Put the lid on the bowl as
shown in fig.3
- Turn the lid with some force
clockwise until the lid will not
move any further and you hear
a “click” (fig.4)
- Make sure that the mark on
the lid and the arrow on the
bowl are directly opposite each
other. The projection of the lid
will now lid the opening in the
handle of the bowl.
3. Throat and pusher
1) The throat can be used to
add liquid and solid ingredients.
(fig.5)
2) Use the pusher to push
ingredients through the throat.
(fig.6)
3) You can also use the pusher
4. Attachments
1) The housing cap or the
blender have been properly
mounted onto the housing.
2) If both the blender and the
bowl have been mounted
correctly onto the housing,
Summary of Contents for rbsfooprep
Page 1: ......
Page 2: ...1...
Page 4: ...3...
Page 5: ...4 1 D fig 1 H fig 2 2 I H fig 3 fig 4 3 1 fig 5 2 fig 6 3 4 fig 7...
Page 6: ...4 1 2 fig 10 F 9 Max 9 10 60 A S N S S Pastry S S fig8 S fig 9 1 3x3x3 2 3 4 S 5...
Page 8: ...1 2 3 4 R French fry Fig 20 F Max 1 3 C M Fig 17 Fig 18 19 D C 1 2 3 4 80 7...
Page 9: ...5 1 5 6 7 8 3 Fig 21 Fig 22 Fig 23 Fig 24 25 Fig 26 F 1 2 8...
Page 10: ...9 Fig 27 Fig 28 1 2 3 4 5...
Page 11: ...2 10 Off 15...
Page 22: ......


