40
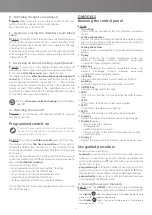
D - Switching the light on (optional)
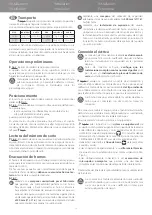
Fig.15.
When necessary, it is possible to switch on the oven
light to check the cooking, acting on the light key .
Press the same key to switch it off.
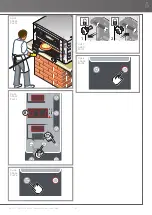
E - Opening / closing the chamber steam bleed
valve
Fig.16.
On the front left of the oven there is a valve that opens
and closes the steam bleed valve: this is used to maintain in the
cooking chamber the humidity level most suitable for the type
of product to be cooked.
To open the valve and get the steam out of the chamber, pull the
valve outwards “
1
”. To close it again, simply push the valve to the
initial position ”
2
”.
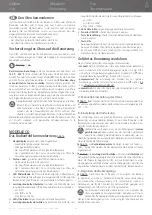
F - Activating an end-of-cooking signal (buzzer)
Fig.17.
If you wish, you can enable a buzzer that will go off
when the set time expires, warning that cooking is complete.
To activate it,
with the oven on
, press the “clock” key.
The display will show
after how long the acoustic signal will
sound
(e.g. 3.3 that is three minutes and thirty seconds): if you
want to change this default time, use the “+” or “-” keys until the
display shows the desired time (e.g. 5.2 that is five minutes and
twenty seconds). After setting it, the countdown starts, at the
end of which a buzzer will sound to highlight the end of cooking.
To stop the buzzer, press the “clock” key.
Warning!
the oven continues heating
when the buzzer
goes off!
G - Switching the oven off
Fig.18.
To switch the oven off, keep the ON/OFF key pressed
for about 2 seconds.
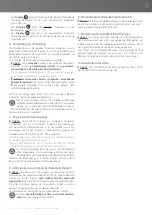
Programmed switch-on
The programmed switch-on function is very useful because
the oven can be already hot, and therefore ready to bake,
when the restaurant is opened.
Fig.19.
To activate it,
with the oven off
, press the “clock” key.
The display will show
the time to switch-on
: if you wish to
change this default time, use the “+” or “-” keys until the display
shows the desired time (maximum time 99.5 that is 99 hours and
50 minutes).
Once set, the countdown starts, at the end of which the oven will
switch on automatically with the temperature and power param-
eters used
for the last cooking
.
If you wish to change them:
• exit programmed switch-on pressing the “clock” key,
• switch the oven on with the ON/OFF key,
• set a cooking cycle with the desired parameters
• switch the oven off with the ON/OFF key,
• set the programmed switch-on as explained above.
To exit the function and cancel programmed switch-on, touch
the “clock” key again.
D MODELS
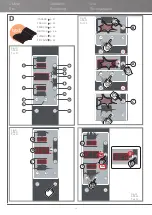
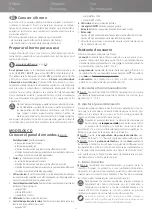
Knowing the control panel
Fig.20.
1
Top setting
Allows entering and exiting the top elements percentage
setting.
2
Setting the chamber
Pressing it once allows entering the chamber temperature setting;
pressing it a second time, if done within two seconds of the first,
allows entering program selection.
3
Setting the bottom
Allows entering and exiting the bottom elements percentage
setting.
4
Up key
Allows increasing the chamber temperature values, top
elements percentage, bottom elements percentage,
countdown time and program number.
5
Down key
Allows decreasing the chamber temperature values, top
elements percentage, bottom elements percentage,
countdown time and program number.
6
Clock key
Allows activating the “buzzer” and “countdown” function.
7
Light key
Switches the light in the cooking chamber on and off
8
ON/OFF key
Activates and deactivates the oven.
10
LED 1
If ON, it shows that the user is setting the chamber tempera-
ture.
11
LED 2
If ON, it shows that the user is selecting a program.
12
LED 3
If ON, it shows the elements are heating
13
LED 4
If flashing, it shows the countdown has been activated.
14
Display 1
Displays the value of top elements operation percentage.
15
Display 2
displays:
• temperature in the chamber,
• set temperature,
• number of selected program,
• intervention time of the end-of-cooking warning (buzzer),
• countdown time.
16
Display 3
Displays the value of bottom elements operation percentage
Use guided procedure
The oven can be switched on:
•
manually
: switching the oven on when it must be used it is
necessary to wait at least an hour for the oven to preheat and
get the right temperature Check the following use procedure
(points A, B, C, D, etc.)
•
programming it
: setting the number of hours missing to the
next switch-on the oven will switch on automatically for fur-
ther explanation on use refer to the extended digital manual.
•
automatically
: using a clock or SMS (with external modules
not supplied by the Manufacturer).
A - Turning the oven on manually
Fig.21.
Press the
ON/OFF
button: the oven turns on displaying
the parameters of the last program used before it was turned off.
• the
display
A
shows the percentage of the upper elements (top
power) set for the program being used;
• the
display
B
shows the current temperature in the cooking
chamber (e.g. 25°C - 77°F);


