6. ATTACH THE DRAPERY
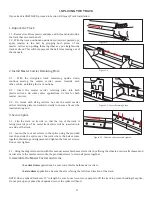
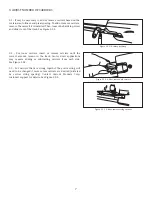
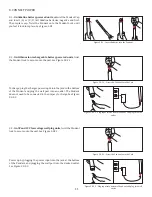
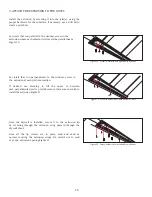
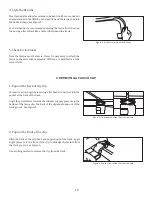
6.1 - Snap or hook the drapery into each carrier starting with the
master carrier arm and ending with the hardstop and control end.
See Figure 2.6.1.
If using Pin Ripple, be sure the first carrier gets pinned away from
the carrier arm, then alternate pin directions on each carrier.
Figure 2.6.1 - Hook or snap drapery onto carriers
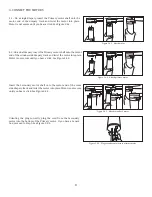
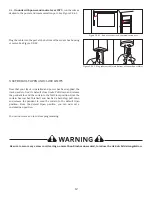
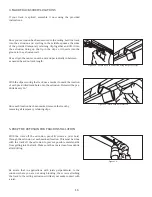
Figure 2.6.2 - Return Clip placement options
6.2 - If desired, snap in the return clips and pin return through the
openings. See Figure 2.6.2
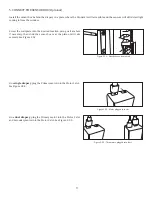
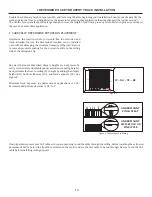
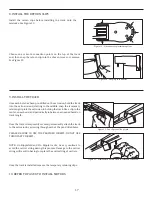
Figure 2.6.3- Screw in eyelet then insert pin through the opening
6.3 - If desired, screw the provided eye hook into the wall where the
last pin will go, then insert the pin through the eyelet. See Figure
2.6.3.
You are now ready to start up the drapery track.
7. ATTACH THE BATON (Optional)
7.1 - If using the font baton, the plastic reinforcer must be sewn
into the drapery and the grommet punched in advance of drapery
installation.
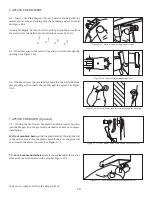
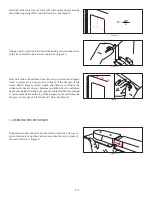
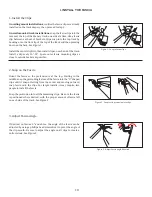
For front mounted baton
, slide the plastic wedge through the slat
in the carrier arm. Place the plastic baton hook over the grommet
and screw in the screw to secure. See Figure 2.7.1.
Figure 2.7.1 - Front mount baton components and install order
Figure 2.7.2 - Hook back baton into carrier arm eyelet
7.2 - For a back mounted baton
, locate the eyelet under the carrier
arms and connect the baton with a clip. See Figure 2.7.2.
1
2
3
4
10


