background image

18

e4.5 Owner's Manual.indd, Last Modified: December 28, 2012 10:49 AM

Battery fAQ 

Q: Do I need to “break-in” my batteries?

A: Yes, it is recommended that you perform a “break-in” cycle consisting of ~ three discharge/charge cycles to allow your 

batteries to reach optimum performance. This involves three complete discharges and three complete recharges. After 

this initial “break-in” cycle the batteries will have maximum possible performance and less line voltage fluctuations under 

load.

Q: Is it normal that the batteries get warm when recharging?

A: Yes, it is normal that the batteries will become warm to the touch during the recharging process. This is because the 

increase of internal resistance and lower energy conversion efficiency from electric energy to chemical energy.

Q: How long will my batteries last before needing replacement?

A: Average battery life depends on use and conditions. Even with proper care, rechargeable batteries do not last 

forever. Conservatively, an SLA battery will come to the end of its useful life after ~200 full discharge/charge cycles. A 

partial charge/discharge counts fractionally against those numbers; running the battery down halfway then recharging it 

completely uses up one half of a charge cycle. 

“End of useful life” refers to the point at which a battery can no longer supply 80% of its original rated capacity in 

ampere-hours. After this point, the aging process will accelerate and the battery will need to be replaced.

Summary of Contents for e4.5 eZip

Page 1: ......

Page 2: ...tion 4 Scooter Components 5 Scooter Assembly 6 11 Tire inflation 8 Quick release levers clamps 10 11 Scooter Use 12 Safety 13 15 Battery Care 16 19 Battery charging 19 Maintenance 20 23 Brake adjustment 21 23 Troubleshooting 24 25 Limited Warranty 26 27 Additional Instructions and Warnings 28 29 Contents ...

Page 3: ... this manual along with the original sales receipt Record the product serial number S N place of purchase and date of purchase below Model Name __________________________________________ S N __________________________________________________ Place of Purchase ______________________________________ Date of Purchase _______________________________________ Stamped on scooter frame between front wheel...

Page 4: ...old Maximum Rider Weight 180 lbs 81 6 kg Maximum Speed 12 mph 19 kph Maximum range 5 miles 8 km Battery 24V 7Ah SLA Charging time 4 6 hours Maximum range and speed varies based on rider weight and terrain Charge time is based on new batteries charged with a standard charger Technical Information ...

Page 5: ...lever Top cap Steering mast Throttle Handlebar Quick release On Off switch Chain guard with access door for tire inflation Battery controller compartments underneath deck Seat mast Saddle Charger port XLR 3 plug type Locking pin ...

Page 6: ...5 1 Slide the steering mast onto the scooter frame Make sure the silver locking pin engages then close the quick release securely to hold the mast in place See the next section of this manual for more information on properly tightening quick release clamps 1b 1a Steering mast Locking pin ...

Page 7: ... in photo 2b When the binder bolt is properly tightened the seat mast will not be able to twist out of position or pull out of the scooter 2a 2b 3 Before riding for the first time you should check the tightness of all nuts and bolts on the scooter Most important are the front wheel axle nuts any nuts or bolts around the rear brake the motor and the rear wheel Make sure the brake levers and throttl...

Page 8: ...a hand pump usually sold for inflating bicycle tires to avoid overfilling To inflate the front tire 1 Remove the valve cap from the air valve 2 Add air as needed checking the pressure regularly to avoid overfilling 3 Reinstall the valve cap To inflate the rear tire 1 Move aside the door on the chainguard covering the valve Align the tire valve with the hole in the chainguard and remove the valve c...

Page 9: ...9 Attention Before riding your scooter for the first time you must connect the battery located under the deck plate 1 2 3 ...

Page 10: ... while keeping the cam lever from rotating increases clamping force turning it counterclockwise while keeping the cam lever from rotating reduces clamping force Less than half a turn of the tension adjusting nut can make the difference between safe clamping force and unsafe clamping force 1 With the quick release clamp in the OPEN position position the steering mast so that the handlebar is perpen...

Page 11: ...ension adjusting nut with your other hand about 1 2 turn clockwise 5 Attempt to swing the lever into the CLOSED position If the lever cannot be pushed all the way to the CLOSED position return the lever to the OPEN position then turn the tension adjusting nut counterclockwise one quarter turn and try tightening the lever again Repeat steps 3 4 5 until proper quick release tension is achieved ...

Page 12: ...cooter on by flipping the power switch on the deck 1 To get going just twist the throttle on the right side of the handlebars 2 To stop pull the left hand brake lever to slow the rear wheel Try not to skid the wheel the tire can develop flat spots and cause a bumpy ride In order to ensure your scooter s battery lasts as long as possible you should fully charge the battery after each and every ride...

Page 13: ...rate this product at a speed which is too fast for your skills Always drive at low speed on dusty surfaces This product is not intended designed or licensed for roadway use This product is intended for use outdoors and on a private closed course only Ride only on dry smooth solid paved surfaces without motor vehicle traffic Never use this product on roadways paved gravel or dirt sidewalks driveway...

Page 14: ...so may result in denied warranty claims Before every ride make sure the handlebars are properly secured to the scooter as instructed in the assembly portion of this product manual This product is designed to be used by only one person at a time Never carry passengers or allow more than one person to use this product at a time Always wear an approved helmet that fits and is worn properly when using...

Page 15: ...ooter Do not lean the scooter excessively as this may allow parts of the scooter to contact the ground and may result in lose of control or damage to the scooter Do not touch the motor or brakes as they can become hot from use WET WEATHER RIDING This product is not meant for use in the water damp roads puddles rain streams etc Never immerse this product in water as the electrical and brake systems...

Page 16: ...teries do not last forever Every time the battery is discharged and subsequently recharged its relative capacity decreases by a small percentage You can maximize the life of your battery by following the instructions in this guide Batteries should be fully charged immediately when they are received for the full recommended charge times E4 5 SLA recommended charge time 4 6 hours Never charge batter...

Page 17: ...e information on free battery dropoff locations Storage When storing your batteries for a long period of time longer than two months Charge your batteries every 90 days to avoid capacity loss Batteries slowly self discharge when left unused for a long period of time if the battery cells are allowed to reach a critically low voltage their lifespan and capacity will be permanently reduced Always dis...

Page 18: ...ging process This is because the increase of internal resistance and lower energy conversion efficiency from electric energy to chemical energy Q How long will my batteries last before needing replacement A Average battery life depends on use and conditions Even with proper care rechargeable batteries do not last forever Conservatively an SLA battery will come to the end of its useful life after 2...

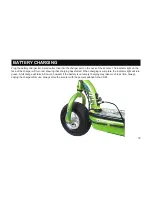
Page 19: ...the charger will turn red showing that charging has started When charging is complete the indicator light will turn green A full charge will take 4 6 hours however if the battery is not empty charging may take much less time Always unplug the charger after use Always store the scooter with the power switched turned OFF Battery charging ...

Page 20: ... rear wheels are not cracked or damaged the rear brake operates normally the brake lever is tightened securely to bar and the lever cannot rotate on the handlebar the handlebar clamp bolts are tight and the handlebar cannot move or twist out of alignment with the front wheel If the scooter is being used regularly every month you should clean the drive chain and lubricate it with a light oil check ...

Page 21: ... adjuster nut counter clockwise unscrewing it about 1 2 turn at a time Spin the rear wheel after each turn of the barrel checking for brake drag then use the handlebar brake lever to test stopping power As the barrel adjuster nut is unscrewed braking power will increase but if it is turned too far brake drag will occur The goal of adjusting the brake is to find a setting where the rear wheel spins...

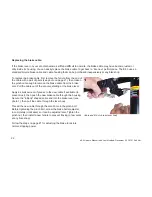
Page 22: ... pinch nut enough to remove the brake cable from the brake arm Pull the cable out of the scooter starting at the brake lever Apply a small amount of grease to the new cable if available to prevent rust then push the new brake cable through the housing Secure the lollipop shaped cable end into the brake lever see photo 1 then pull the cable through the lever body Thread the new cable through the sm...

Page 23: ...djuster is rotated to close gap Cable housing fits into end of barrel adjuster 3 Cable is drawn through brake lever Note the gap in the barrel adjuster that allows the cable to pass through 2 Lever barrel adjuster ...

Page 24: ...ave aged past its useful life See the Battery Care section of this manual for more information The rear brake may be rubbing forcing the motor to work much harder than normal to propel the scooter See the section of this manual discussing brake adjustment for more information Scooter makes grinding noises under power Check that the chain is not rubbing the scooter frame or chainguard Lubricate the...

Page 25: ...25 This page intentionally left blank ...

Page 26: ...arranty does not include damage from normal road hazards flat tires tire cuts and the like skid wear or blowouts from over inflation or other such misuse or normal wear Batteries factory installed in an EZIP scooter are warrantied to the original owner to be free from defects in materials and workmanship for a period of Three months 90 days from the date of purchase by the original owner The batte...

Page 27: ...laims Those parts and or products which are determined by Currie to be defective and to qualify for warranty replacement will be provided at no charge only after a valid warranty claim is processed by Currie Customer Service Department Warranty claims must be made by the original purchaser by contacting the Currie Customer Service Call Center 800 377 4532 within the warranty period stated above St...

Page 28: ... No passengers are allowed on the scooter Make sure that any and all axle guards chain guards or other covers or guards supplied with the scooter are in place and in good working condition Make sure that tires are in good condition inflated properly and have sufficient tread remaining Persons with following conditions are cautioned not to operate the scooter Those with heart conditions Pregnant wo...

Page 29: ...nst harmful interference in a residential installation This equipment generates uses and can radiate radio frequency energy and if not installed and used in accordance with the instructions may cause harmful interference to radio communications However there is no guarantee that interference will not occur in a particular installation If this equipment does cause harmful interference to radio or t...

Page 30: ...3850A Royal Ave Simi Valley CA 93063 Phone 1 800 377 4532 Fax 1 805 915 4321 www CurrieTech com ...

Reviews: