background image

PERIODICALLY CHECK THIS RECEIVER HITCH TO ENSURE ALL FASTENERS ARE TIGHT AND ALL STRUCTURAL COMPONENTS ARE SOUND

CURT Manufacturing LLC. warrants this product to be free of defects in material and/or workmanship at the time of retail purchase by the original purchaser. If the product is found to be defective, Curt Manufacturing LLC. may repair or replace
the product at their option, when the product is returned, prepaid, with proof of purchase.  Alteration to, misuse of, or improper installation of this product voids the warranty. Curt Manufacturing LLC.'s liability is limited to repair or replacement
of products found to be defective, and specifically excludes liability for incidental or consequential loss or damage.

MAKE:

STYLE:

120

WARNING: NEVER EXCEED YOUR VEHICLE MANUFACTURER'S RECOMMENDED TOWING CAPACITY

WEIGHT CARRYING:

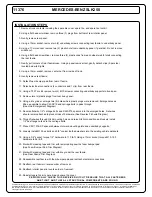
   INSTALLATION TIPS:

   INSTALLATION REQUIRES:

   VEHICLE PHOTO:

   REPRESENTATIVE PHOTO


TRAILER HITCH

 ILLUSTRATION:

   MAKE SURE YOUR HITCH MATCHES

   LEVEL OF DIFFICULTY: CHALLENGING

EASY

MODERATE

CHALLENGING

  1.  BEFORE YOU BEGIN INSTALLATION, READ ALL

     INSTRUCTIONS THOROUGHLY.

  2.  TO EASE INSTALLATION, 2 PEOPLE MAY BE

     REQUIRED.

  3.  USING PROPER TOOLS WILL GREATLY IMPROVE

  THE QUALITY OF THE INSTALL AND REDUCE THE


   TIME REQUIRED.


Safety glasses should be 

worn at all times while

installing this product

.

YEARS: 2014

MERCEDES-BENZ

MODEL: SLK250

CONVERTIBLE

1,000

100

TRAILER WEIGHT:
TONGUE WEIGHT:

11376

INSTALLATION INSTRUCTIONS

LBS.
LBS.

MIN.
MIN.

240

IF YOU  ARE  HESITANT  TO UNDERTAKE

THIS TASK ON YOUR OWN, CONTACT AN AUTHORIZED

CURT INSTALLER FOR ADDITIONAL ASSISTANCE.

   NOVICE INSTALL TIME:

   PRO INSTALL TIME:

RATCHET

SOCKET

EXTENSION

6 in.

SOCKET

3/4 in.

10mm

17mm

SCREW

DRIVER

TORQUE

WRENCH

MASKING

TAPE

SAFETY

GLASSES

DIE GRINDER

TAPE

MEASURE

PART REMOVAL

DRILLING / HOLE ENLARGEMENT

REQUIRED

FISHWIRE HARDWARE

CLEAN EXISTING WELDNUTS

TEMPORARILY REMOVE TRUNK 

CONTENTS, INTERIOR PANEL, 

BUMPER COVER

TRIM FOAM BUMPER PAD

AND REAR FASCIA

PANEL REMOVAL

TOOL

RECIPROCATING

SAW

Summary of Contents for 11376

Page 1: ...REPRESENTATIVE PHOTO TRAILER HITCH ILLUSTRATION MAKE SURE YOUR HITCH MATCHES LEVEL OF DIFFICULTY CHALLENGING EASY MODERATE CHALLENGING 1 BEFORE YOU BEGIN INSTALLATION READ ALL INSTRUCTIONS THOROUGHLY...

Page 2: ...4 CONICAL TOOTHED WASHER 3 8 2 5 250 x 1 25 x 3 00 SQUARE HOLE SPACER CM SP19 2 6 1 2 FISHWIRE 1_2 FISHWIRE 2 7 1 Remove trunk contents including the spare tire cover spare tire and spare tire tool ki...

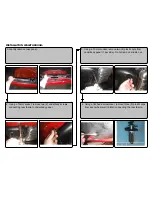
Page 3: ...2 underbody screws connecting rear fascia to underbody panel 5 Using a 10 mm socket remove two 2 plastic nuts from underbody panel 1 per side Do not remove middle nut 6 Using a flat head screwdriver...

Page 4: ...ers of rear fascia loose Using a panel removal tool gently detach clips 5 per side located below tail lights 8 Using a 10mm socket remove center nut from inside of trunk 9 Gently remove rear fascia 10...

Page 5: ...ove two 2 M10 screws connecting underbody supports to trunk pan 13 Remove two 2 plastic plugs from rear body panel 14 Using a die grinder enlarge two 2 holes where plastic plugs were removed Enlarge h...

Page 6: ...through hitch mounting holes and raise hitch into position and loosely install 1 2 hex flange nuts onto the carriage bolts 17 Place CM 11376 SP spacers between forward mounting plate and underbody su...

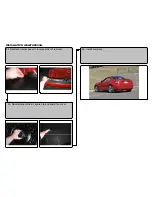
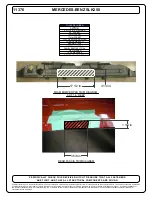
Page 7: ...m Diagram 20 Mark with masking tape and trim with die grinder the rear fascia See Rear Fascia Trim Diagram 21 Reassemble rear fascia with foam bumper pad and reattach electrical connections 22 Reattac...

Page 8: ...INSTALLATION WALKTHROUGH 24 Reattach interior panel in reverse order of removal 25 Reinstall spare tire kit spare tire and spare tire cover 26 Install complete...

Page 9: ...eir option when the product is returned prepaid with proof of purchase Alteration to misuse of or improper installation of this product voids the warranty Curt Manufacturing LLC s liability is limited...

Page 10: ...with proof of purchase Alteration to misuse of or improper installation of this product voids the warranty Curt Manufacturing LLC s liability is limited to repair or replacement of products found to b...

Page 11: ...s 8 Using a 10mm socket remove center nut from inside of trunk 9 Gently remove rear fascia 10 Detach foam bumper pad from rear of fascia 11 Detach electrical connections 4 connectors and 1 clip from r...

Reviews: