34
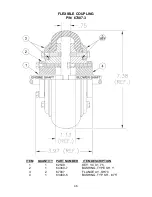
HI-FLEX COUPLING INSTALLATION INSTRUCTIONS
FLANGE AND BUSHING INSTALLATION
Make sure the bore and tapered cone surface of the bushing and flanges are free of all
foreign substances such a paint or dirt.
1. Place *QD bushing on the shaft over the key with flange end first. The end of
bushing should be flush with the end of the shaft for best results. NOTE : If shaft
end project beyond the bushing, be sure to allow for end float and misalignment.
2. Either loosen flange assembly screws as much as possible or disassemble. Slip
flange over *QD bushing and assemble in the following manner:
CAUTION : NEVER ALLOW THE FLANGE ASSEMBLY TO BE DRAWN IN
CONTACT WITH THE FLANGE OF THE *QD BUSHING. THERE
SHOULD BE A GAP FROM 1/8" TO 1/4" BETWEEN THEM. IF THE
GAP IS CLOSED, THE SHAFT IS SERIOUSLY UNDERSIZED.
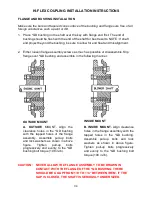
OUTSIDE MOUNT
A. OUTSIDE
MOUNT. Align the
clearance holes in the *QD bushing
with the tapped holes of the flange
assembly. Assemble pull-up bolts
and lock washers as shown in above
figure.
Tighten
pull-up
bolts
progressively and evenly to the *QD
bushing bolt torque (108 in-lb).
INSIDE MOUNT
B. INSIDE MOUNT.
Align clearance
holes in the flange assembly with the
tapped holes in the *QD bushing.
Assemble pull-up bolts and lock
washers as shown in above figure.
Tighten pull-up bolts progressively
and evenly to the *QD bushing bolt
torque (108 in-lb).
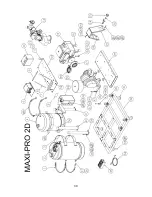
Summary of Contents for MAXI-PRO 2D ULV
Page 6: ...6 MAJOR COMPONENTS DIAGRAM ...
Page 9: ...9 ...
Page 39: ...39 ...
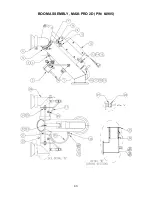
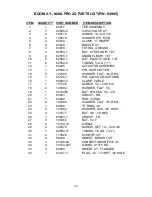
Page 43: ...43 BOOM ASSEMBLY MAXI PRO 2D P N 64905 ...
Page 50: ...50 ...

