background image

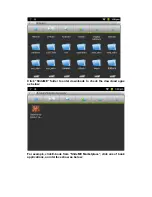
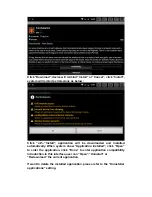
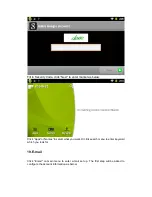
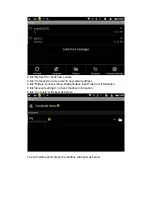
Connect device to PC via USB, the default connection method is the synchronous 

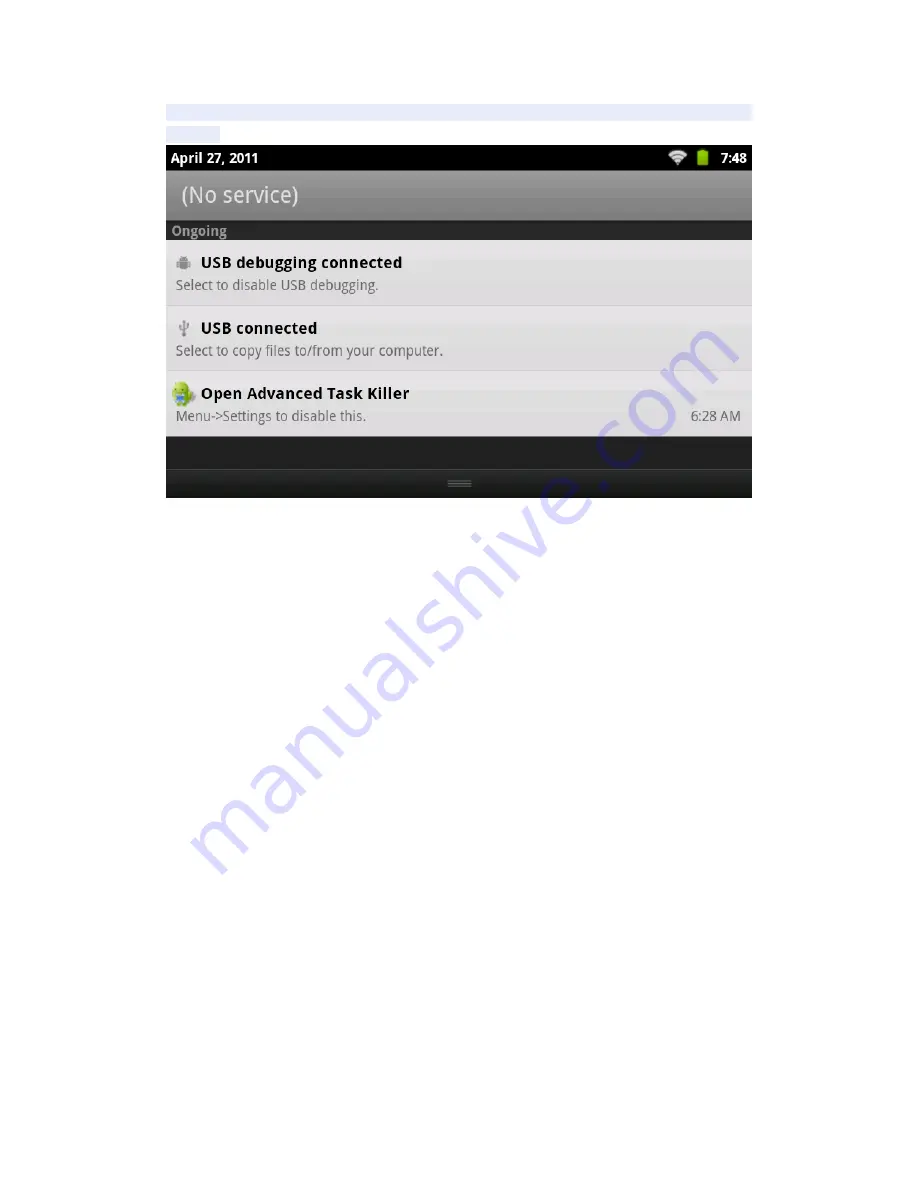
mode.Drag the top status bar and pull-down,an interface come out as below: 


"USB connected ":means intenal memory 

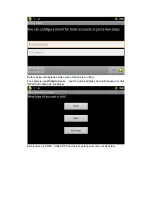
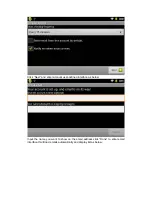
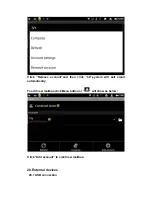
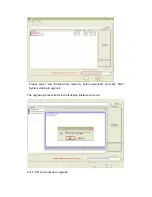
Click “USB connected” to enter “USB Mass storage”,click “Turn on USB storage” 

and “OK” to enter device disk on PC. Load files to the disk you want , when finished 

loading, click “turn off USB storage “ and check files in /nand folder of ES Explorer. 


20.2 OTG 

Support FAT32 format mobile devices: such as U disk. Removable disk. 

Plug and Play connection method: 

Connect device USB OTG port and external device by OTG cable. 


20.3 Keyboard Mouse 

Support    plug and play USB mouse, keyboard equipment


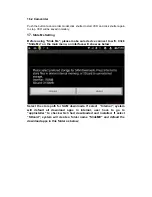
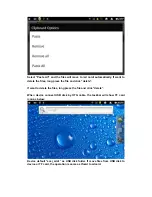
21. TF Card and USB Disk Setting 

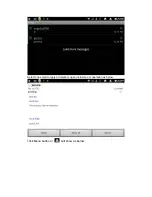
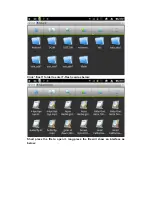
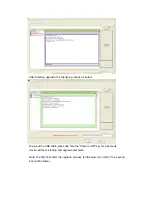
Insert T-Flash card or USB Disk,unit will scan automatically. Don’t open tfcard 

or USB folder before finishing scanning,or device will remind data wrong and 

can’t recognize the contents. When the taskbar stop scanning means finishing 

scanning. 


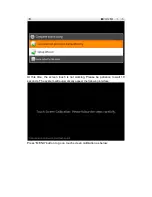
Click “ES File Explorer” to enter local disk /sd card/ interface as below: 

Summary of Contents for LT7029

Page 1: ...eration 6 6 Button 7 7 System Settings 8 7 1 Wifi Wireless Connection 8 7 2 Display 10 7 2 1 Screen brightness 10 7 2 2 Standby screen 11 7 2 3 HDMI settings 11 7 3 Applications 12 7 3 1 Instanll applications 12 7 3 2 Unstall applications 15 7 4 Privacy 16 7 4 1 Factory data reset 16 7 5 Language keyboard 17 7 5 1 Select language 17 7 5 2 Android keyboard 17 7 5 2 1 Input languades 17 7 6 Touch Ca...

Page 2: ...l do not use other chemical cleaning solution This product should not be dripping or splashing water such as glass filled with a liquid items To use the headphone volume in large might cause permanent hearing damage In order to avoid traffic accidents do not cross the road driving motor vehicle or bicycle when use headphones Please only use permitted battery charger and accessory the other type of...

Page 3: ...deo format AVI H 264 DIVX DIVX XVID rm rmvb WMV MOV MP4 H 264 MPEG DIVX XVID DAT VCD VOB DVD MPEG MPG FLV Audio 3 5mm headphone jack High quality stereo loud speaker Built in microphone Headset maximum output power of 40mW Frequency response 20Hz 20KHz SNR greater than 90db Audio format MP3 WMA MP2 OGG AAC M4A MA4 FLAC APE 3GP WAV Pictures JPG JPEG GIF BMP PNG Screen Size 7 0 inch Resolution WVGA ...

Page 4: ...below Boot logo startup System has been starting entering the Android system ...

Page 5: ...ptions as below Click OK you can safely shut down Sleep the machine under normal operating conditions Short press the power button enter hibernation and screen will close Short press the power button again and screen open make sure unit in normal mode In this way can reduce power consumption ...

Page 6: ...of shortcut icons form The status bar to display the current system of network status Battery Time information Quick search bar for Web search by typing key words Middle right of the screen is the main menu table stop click or drag to the main menu bar to start the default 5 1 Main Menu Operation Press and drag the main interface of the desktop the main menu will be from bottom to top as below ...

Page 7: ...lication start the touch calibration music player video player web browsing games and other operations 6 Button 1 Volume increase volume 2 Volume reduce volume 3 Power key Press and switch machines Short press to enter or leave the hibernation 4 Return Return to last interface ...

Page 8: ... any 7 System Settings Click the Settings icon on the main menu interface enter system settings interface as below 7 1 WIFI Wireless Connection Click Wireless Networks on settings menu to enter Wi Fi setting as below click the Wi Fi column can open or close the WIFI feature When Wi Fi turn on click ...

Page 9: ...ttings and interface will appear Network notification as below Choose one working networks in your area enter password like below After input correct password and networks will appear Wi Fi Connected Like below ...

Page 10: ... 2 1 Screen brightness Click Display on settings menu enter the display settings interface select Brightness and show below Scroll left to reduce the brightnees scroll right to increase the brightness then click OK ...

Page 11: ...he video mode the screen auto shut down is not available 7 2 3 HDMI Device supports LCD and HDMI 1080p mode The system default at LCD Before connecting device to HDMI equipment by HDMI cable please default at HDMI model Click Display on Settings menu and click Output settings will show as below Click HDMI and device screen will show on HDMI equipment After finishing HDMI ...

Page 12: ...rmat can be choosed in HDMI settings Enter Output settings select Resolution as below 7 3 Applications 7 3 1 Installation Android system can install the applications by variety of ways such as USB third party software or google market Below is one of installations by Appinstaller 1 Click the Settings and enter Applications menu like below ...

Page 13: ... OK like below 3 Copy the apk to MicroSD or Local sdcard or download from market place system will default NAND FLASH as search list If download from market place click appInstaller on main menu and check the apps in Installer as below ...

Page 14: ...f the apk in microSD card or local sdcard user can check the apps from appInstaller or change the search list to local sdcard as below 5 Select all available applications to install and will show as below ...

Page 15: ...pt Users can install application by Android Market PC or online download 7 3 2 Uninstall applications Click appInstaller Uninstaller check the installed apps as below Click the uninstall apps system will unstall automatically by promt as below ...

Page 16: ... check the download or installed applications or uninstall applications or Running ect information 7 4 Privacy 7 4 1 Factory data reset Click Privacy on settings menu to enter Privacy settings as below Click Factory data reset to enter reset connect device to DC power and click Reset device after several minutes unit will reset automatically ...

Page 17: ...leted and return to the factory default 7 5 Language keyboard 7 5 1 Select language On settings menu click Language keyboard Select language to choose the language as below 7 5 2 Android keyboard Click Android keyboard on Language keyboard settings choose the operation like below 7 5 2 1 Input languades ...

Page 18: ...languages you want slide finger on spacebar to change language like bow 7 6 Touch Calibration Click Settings Touch calibration to enter calibration procedure Follow the instruction to operate twice after calibrating successful system will prompt and exit automatically as below ...

Page 19: ... there are Set date Select time zone Set time Time format date format functions The operations are same For example choose to set the date as below Click increase month day and year Click reduce month day and year The year form can use input mode Click year number and an interface will come out as below enter the desired number and select Done ...

Page 20: ...e on Set date 8 Calendar Before entering calendar please choose the coporate or google account If company email server compatible with google user can use coporate to sign in If not choose personal googal account to sign in or creat a new account or sign in 9 Clock Click Clock on the main menu to enter an interface as below ...

Page 21: ...lick set as below Click Repeat and select the day want to repeat click OK Click Ringtones to select the ringtones click OK and back to Set alarm interface click Done and back to the Alarms menu alarm setting time will show on the alarm interface Click and select Gallery to fast enter gallery interface as below ...

Page 22: ...or only Gallery is working Video can t play pictures click to enter music play interface click back to desktop 10 Music Click Music on main menu and enter music play interface The system will list all default audio files and user data Like below ...

Page 23: ...files by network Click Songs long press the song name and will appear as below Click Add to playlist and an interface will appear as below Move the songs to existing folder you want If want to establish new folder please click New input the folder name and click Save as below ...

Page 24: ...Click play the song playing interface will appear as below Click to enter Now playing menu long press song name and appear same interface as click Songs please refer to above operation ...

Page 25: ... main menu and enter video menu system will list all the video files and pictures like below Select video file and enter play menu like below Click Play Pause Fast forward Fast back Progress bar ect buttons to control playing ...

Page 26: ...ce system will list all pictures and video files like below Click picture and enter picture play interface like below Select Zoom in Zoom out Previous Next Delete ect operation Click More and select Details Set as Crop Rotate Left Rotate Right Settings ect function ...

Page 27: ...tware by Google Market or other ways and install on the unit Open the installed software can watch video online TV or listen to the online radio User also can download other third part network software including web browse video play website client side Instant communication software ect 14 Wallpaper System support static and 3D wallpaper On the desktop press Menu button and will list Add Manage a...

Page 28: ...lery choose the system provide picture as static wallpaper Click Live wallpapers choose the 3D wallpaper from system provide Click Wallpapers choose User defined picture as wallpaper Or click Add on the desktop by press Menu button an interface will come out as below ...

Page 29: ...nter recorde interface like below Note When recording need to insert Micro SD card and record files will be saved in mirco SD card Click Record button starting click Stop button and select Paly to play the record file Click Use this recording button to save file and find the record file in micro SD ...

Page 30: ...to Click Camera on main menu to enter camera interface as below Click the camera shutter like below picture will be saved in Gallery Click the square on the right top and see the pictures When take photos user can set photo mode by the list on the right of screen ...

Page 31: ...ke sure device connect to wifi Click Slide Me on the main menu an interface will show as below Select the store path for SAM downloads If select Internal system will default all download apps in internal user have to go to appInstaller to check which had downloaded and installed If select SDcard system will create a folder name SlideME and default the download apps in this folder as below ...

Page 32: ...Click SlideME folder to enter downloads to check the download apps as below For example click E book from SlideME Marketplace click one of book applications an interface show as below ...

Page 33: ...wnloaded and installed automatically When system show Application installed click Open to enter the application click Done to enter application compatibility introduction In this interface user can Open Uninstall or Redownload the current application If want to delete the installed application please refer to the Uninstaller applications setting ...

Page 34: ...Market Before using market please make sure network is working Click Market on main menu an interface will come out as below Click Next and come out as below If have no Gmail account click create as below ...

Page 35: ...Enter first name last name and account name like below make sure user name if available Select Next and come out as below ...

Page 36: ...Set password for the above account click Next as below Click I agree Next as below ...

Page 37: ...ket as below Click Apps or Games to select what you want Or click search menu to enter keyword which you look for 19 E mail Click Email on main menu to enter e mail set up The first step will be asked to configure the account information as below ...

Page 38: ...l please make sure email link is working For example ivy7735 126 com input the email address and valid password click Next and come out as below Email server is POP3 Click POP3 and server setting will come out as below ...

Page 39: ...Next to enter inspect server setting If setting correct an interface outgoing server settings will come out as below SMTP server 126 com change to smtp 126 com revise port 587 to 25 drag the scroll bard and click Next to enter Check outgoing server settings interface If the settings is correct will enter the following interface ...

Page 40: ...k Next and enter account user defined interface as below Input the name you want to show on the email address click Done to enter email interface It will load emails automatically and display list as below ...

Page 41: ...Select one email to reply or delete or open inclosure ect operation as below Click Menu button or will show as below ...

Page 42: ...to write email to new email address Click Folders to check Inbox Drafts Outbox Sent Trash ect information Click Account settings to check mailbox information Click Accounts will show as below To exit mailbox short press the mailbox will show as below ...

Page 43: ...Remove account and then click ok system will exit email automatically To add new mailbox click Menu button or will show as below Click Add account to creat new mailbox 20 External devices 20 1 USB connection ...

Page 44: ...lder of ES Explorer 20 2 OTG Support FAT32 format mobile devices such as U disk Removable disk Plug and Play connection method Connect device USB OTG port and external device by OTG cable 20 3 Keyboard Mouse Support plug and play USB mouse keyboard equipment 21 TF Card and USB Disk Setting Insert T Flash card or USB Disk unit will scan automatically Don t open tfcard or USB folder before finishing...

Page 45: ...Click tflash folder to enter T Flash card as below Short press the file to open it long press the file will show an interface as below ...

Page 46: ... operation you want For example move the file from TF card to local disk sd card Click Cut or Copy back to sd card interface as below Click to see the Cut or Copy files long press one file and will show as below ...

Page 47: ...e file and click delete If want to delete the files long press the file and click delete When device connect USB disk by OTG cable the taskbar will show TF card icon as below Device default scsi_sda1 as USB disk folder If move files from USB disk to device or TF card the operation is same as tfcard to sdcard ...

Page 48: ...ver and install After decompress the drive file vtcdrv rar appear the two files as follow double click VTC Driver Installer 4 1 for 2000_XP EXE driver file Upgrade file include lk rom and tcc8900_mtd img Upgrade process is as follows in order to upgrade the Windows XP example 1 Download and unzip upgrade tool 2 Download and extract the upgrade files 3 In the PC side running the upgrade tool FWDN I...

Page 49: ...n device connect device to PC by USB cable At this point PC side FWDN program interface appears as follows Initialization complete loosen the Home key and click FWDN interface to the right of Nand Data area interface as below ...

Page 50: ...diagram of each ImageFilePath Nand Data files store the resulting path can be chosen at random Number Of Partion 1 Partion 1 Select FAT format Partion Lable a When finish setting click CreateImage button as below Click OK and interface come out as below ...

Page 51: ...Please select Low format whole memeory before download and click Start System starting to upgrade The upgrade process similar to the following interface come out Click OK and continue to upgrade ...

Page 52: ...rompts as below Draw out the USB cable press and hole the Power on off key for 6 seconds device will be re starting and upgrade complete Note the first boot after the upgrade process is little slow it s normal The second boot will be faster ...

Page 53: ...Volume button meanwhile long press the Power ON OFF button without loosen until the screen appear below interface loosen Volum key 4 Short press Home button on front of device will appear as below 5 Short press Volum can select rotative when select 2nd apply sdcard update zip short press the VOL to confirm upgrade system will upgrade automatically as below ...

Page 54: ...erface automatically Short press Volume and select 1st reboot system now short press Volume to confirm system will restart automatically The first boot after the upgrade process is relatively slow When finish restarting the interface will appear as below ...

Page 55: ...t this time the screen touch is not working Please be patience to wait 10 seconds The system will automatically appear the following interface Press MENU button to go on touch screen calibration as below ...

Page 56: ...e point of red round one by one until touch screen calibration complete Press Return button to exit and restart device Note the first boot after the upgrade process is relatively slow it is normal The second boot much faster ...

Page 57: ...stem version of device A Device verson is Android 2 3 built in hardware 3D acceleration and run most android apks 5 Device if can charge via USB A yes the machine can be charged by connecting to PC via USB But it s better to charge by Ac adapter 5V 2A 24 Troule Shooting Problem Potential Reason Solution Device can t open screen 1 Battery low power 2 Device short 3 Battery broken or unit can t char...

Page 58: ...e bottom operation 2 3 WIFI lax inside or broken change or repair by local service MicroSD card not read 1 Device didn t scan successful MicroSD card 2 Wrong data operation before device finishing scanning 3 MicroSD card is inferior or short 1 Don t open tflash folder before finishing scanning 2 Restart or reset device and insert MicroSD card to scan again 3 Change better or format MicroSD card US...

Page 59: ...file 2 Device should be default at LCD mode Device can t connect to TV by HDMI 1 Device wrong defalt mode 1 If only connect to TV by HDMI device must be default at HDMI mode Device earphone output no sound 1 Earphone broken 2 Device earphone jack broekn 1 Change new earphone 2 Repair by local service Device video recording weak Device Mic short design If only device audio recording no problem it s...

Page 60: ...Press Home button and select wipe data factory rest by press V as below Click Power and Select Yes delete all user data by V button will appear as below ...

Page 61: ...ppear Data wipe complete click Power button and device will starting automatically NOTE The first time starting device will be slow after rebooting The second time will be fast Before entering main menu do not do any action until device appear touch calibration as below ...

Page 62: ...ating restart the device and will come into effect 2 Wifi IP address setting When device connect to wifi but no function please check mac address Press Menu button on the wifi settings interface will appear as below Click Advanced and click Use static IP will appear as below ...

Page 63: ...orrect IP address Gateway DNS 1 and will work normal Pictures for reference only product appearance function please refer to the real device the product rules and design are subject to change without prior notice ...

Reviews: