background image

– Problem
• Solution

No sound /power

– Volume not adjusted
• Adjust the VOLUME

– power cord not securely connected
• Connect the AC power cord properly

– Batteries dead/ incorrectly inserted
• Insert (fresh) batteries correctly

Display does not function properly /
No reaction to operation of any of 
the controls

– Electrostatic discharge 
• Switch off and unplug the set. Reconnect after a

few seconds

no disc 

indication

– No CD inserted
• Insert a CD, CD-R or CD-RW

– CD  badly scratched or dirty
• Replace/ clean CD, see Maintenance

– Laser lens steamed up
• Wait until lens has cleared

– CD-R is blank or the disc is not finalized
• Use a finalized CD-R

CD playback does not work

– CD badly scratched/ dirty
• Replace/ clean CD (see maintenance)

– Laser lens steamed up
• Wait until lens has adjusted to room temperature

The CD skips tracks

– CD damaged or dirty
• Replace or clean CD

– Program is active
• Quit Program mode(s)

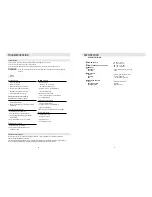
Troubleshooting

If a fault occurs, first check the points listed below before taking the set for repair. 
Do not open the set as there is a risk of electric shock.
If you are unable to remedy a problem by following these hints, consult your dealer or service center.

WARNING: 

Under no circumstances should you try to repair the set yourself, as this will invalidate the
warranty.

Environmental information

We have done our best to reduce the packaging and make it  easy to separate into 3 materials: cardboard,
paper pulp and expandable polyethylene.
Your set consists of materials which can be recycled if disassembled by a specialized company. Please observe
the local regulations regarding the disposal of packaging, dead batteries and old equipment..

TROUBLESHOOTING

Poor cassette sound quality

– Dust and dirt on the heads, etc.
• Clean deck parts etc., see Maintenance
– Use of incompatible cassette types (METAL

or CHROME)

• Only use NORMAL (IEC

Recording does not work

– Cassette tab(s) may be broken
• Apply a piece of adhesive tape over the

missing tab space

I

) for recording

10

SPECIFICATIONS :

POWER SUPPLY

RADIO FREQUENCY COVERAGE

GENERAL
Headphone
Speakers 

CD PLAYER
Pick up
Encoding
D/A

CASSETTE PLAYER
Tape
Recording System
Erasing System

:  AC 230 V,  50 Hz  


DC 12V (UM-1 x 8)

:  AM 530  - 1710 kHz. 
:  FM   88  -  108 MHz.

:  3.5mm Stereo jack plug 8-32 ohm
:  8 ohm

:  3-Beam. Semiconductor Laser
:  8 x Over Sampling
:  1 - Bit Dual D/A Converter

:  Standard normal bias
:  DC bias
:  Magnetic erase

SPECIFICATION

11

Summary of Contents for RCD4400

Page 1: ...rer 12 Unplug this apparatus during lightning storms or when unused for long periods of time 13 Refer all servicing to qualified service personnel Servicing is required when the apparatus has been damaged in any way such as power supply cord or plug is damaged liquid has been spilled or objects have fallen into the apparatus the apparatus has been exposed to rain or moisture does not operate norma...

Page 2: ... 13 Unplug this apparatus during lightning storms or when unused for long periods of time 14 Refer all servicing to qualified service personnel Servicing is required when the apparatus has been damaged in any way such as power supply cord or plug is damaged liquid has been spilled or objects have fallen into the apparatus the apparatus has been exposed to rain or moisture does not operate normally...

Page 3: ... power cord from the wall outlet Unplug the power cord from the wall outlet to protect your set during heavy thunderstorms 1 VOLUME adjusts volume level POWER SELECTOR selects power on off switch DBBS Dynamic Bass Boost enhances bass response CASSETTE RECORDER KEYS RECORD starts recording PLAY starts playback F FWD REW fast winds rewinds the tape STOP EJECT stops the tape opens the cassette compar...

Page 4: ...1 To select your sound source adjust the source selector to CD TAPE RADIO 2 Adjust the sound with the VOLUME and DBBS Dynamic Bass Boost controls 3 To switch off the set adjust the source selector to off position RADIO RECEPTION Tuning to radio stations 1 Slide the FUNCTION selector to RADIO For FM pull out the telescopic antenna Incline and turn the antenna Reduce its length if the signal is too ...

Page 5: ...og and prog briefly followed by your selected track number 3 Repeat steps 1 to 2 to select and store all desired tracks in this way 4 To play your program press Reviewing your set program In the STOP mode press PROG MODE Erasing a program You can erase the contents of the memory by opening the CD door selecting RADIO source pressing twice during playback or in the stop Position The display shows y...

Page 6: ... problem by following these hints consult your dealer or service center WARNING Under no circumstances should you try to repair the set yourself as this will invalidate the warranty Environmental information We have done our best to reduce the packaging and make it easy to separate into 3 materials cardboard paper pulp and expandable polyethylene Your set consists of materials which can be recycle...

Reviews: