2
Holter ABPM
Hardware, description of device for custo screen 400
MHW 0004 – DK 1663 | Version 001 – 12/01/2018 | custo med GmbH
[2] Holter ABPM Hardware, custo screen 400 |
page 13
2.5
Attaching devices to the patient
2.5.1
custo screen 400 Holter ABPM recorder
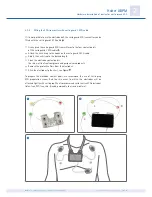
For a Holter ABPM recording, the patient must wear
the custo screen 400 recorder with a blood pressure
cuff and the custo guard ECG transmitter.
A blood pressure cuff is not needed for purely Holter
recordings.
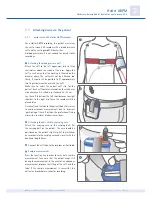
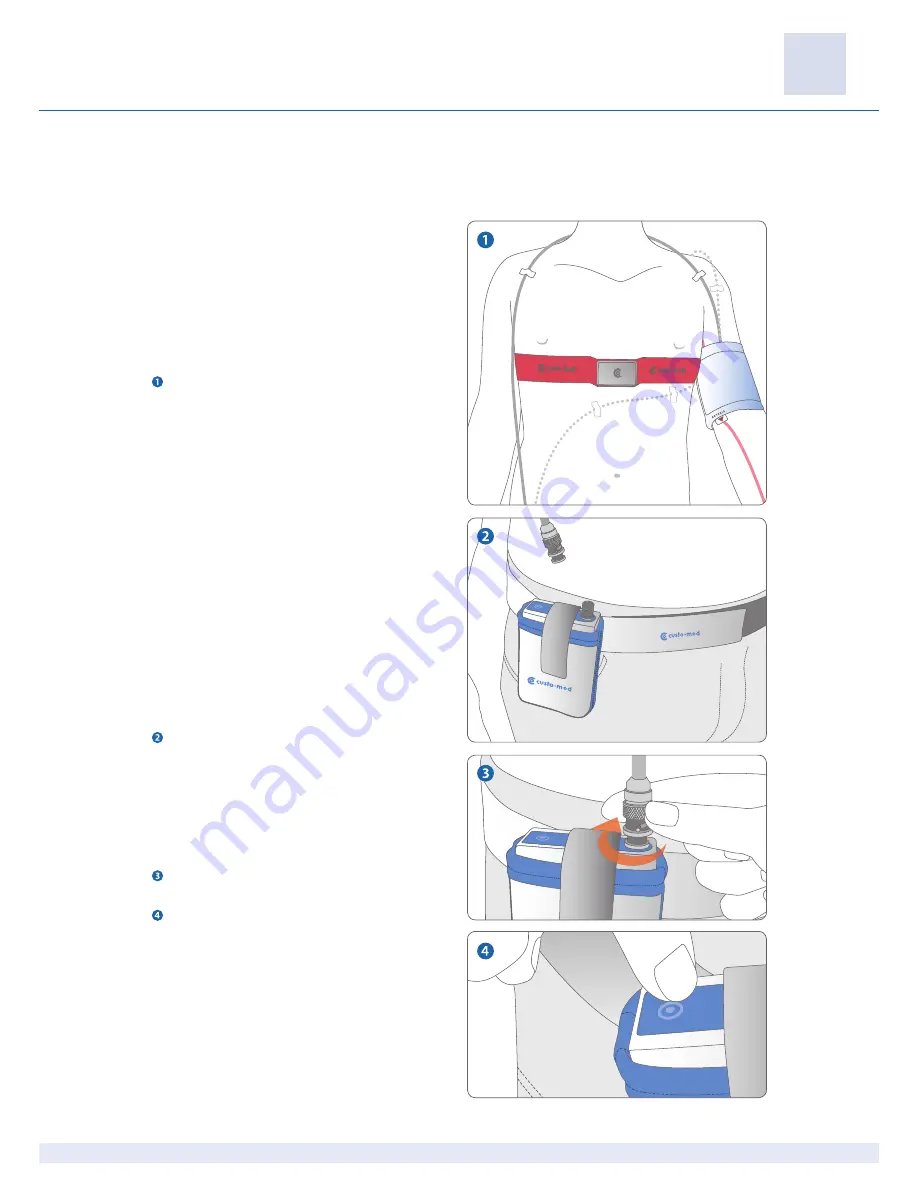
Attaching the blood pressure cuff
Attach the cuff to the left upper arm, two to three
centimetres above the crook of the arm. Apply the
cuff in such a way that the marking is situated on the
brachial artery. The cuff must not be attached too
firmly. It should still be possible to fit approximately
two fingers between the arm and the cuff.
Make sure to select the correct cuff size for the
patient. Each cuff contains information for which arm
circumference it is suited, e.g. standard 24 – 32 cm.
Lay the cuff tube from the left shoulder over the right
shoulder to the right hip. There the recorder will be
placed later.
Fix the cuff and the tube to the patient’s body. This serves
to avoid erroneous measurements due to incorrect
positioning of the cuff or tube. Use professional fixing
aids with a low level of adhesive residues.
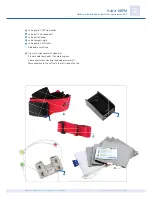
Attaching the belt with the carrying case
Attach the carrying case to the carrying belt. Put
the carrying belt on the patient. The case should be
positioned on the patient’s right hip. Put the switched-
on recorder into the carrying case and close it with the
hook and loop fastener.
Connect the cuff tube to the recorder as illustrated.
Sample measurement
Press the function key in order to carry out a sample
measurement. Take care that the patient keeps still
during the measurement. In the event of an erroneous
measurement, improve the fitting of the cuff and the
tube. If the sample measurement is successful, the
patient and recorder are ready for recording.

