Installation Instructions
-
Page 2
Questions? Call us at: 1 (800) 382
-
1388 M
-
TH 8:30AM
-
5:30PM / FR 9:30AM
-
5:30PM EST
02/2021
Non
-
Fairing Installation:
1.
Disconnect the vehicle battery negative [
-
] terminal.
2.
Review detailed service manual for instructions on replacing factory head-
lamp.
3.
Remove the factory headlamp trim ring and headlamp from the headlamp
bucket.
4.
Drill a
5/8”
hole in the back of the headlight bucket.
5.
Route the ProGLOW
™
wiring harness through the hole in the headlamp
bucket and install the grommet.
6.
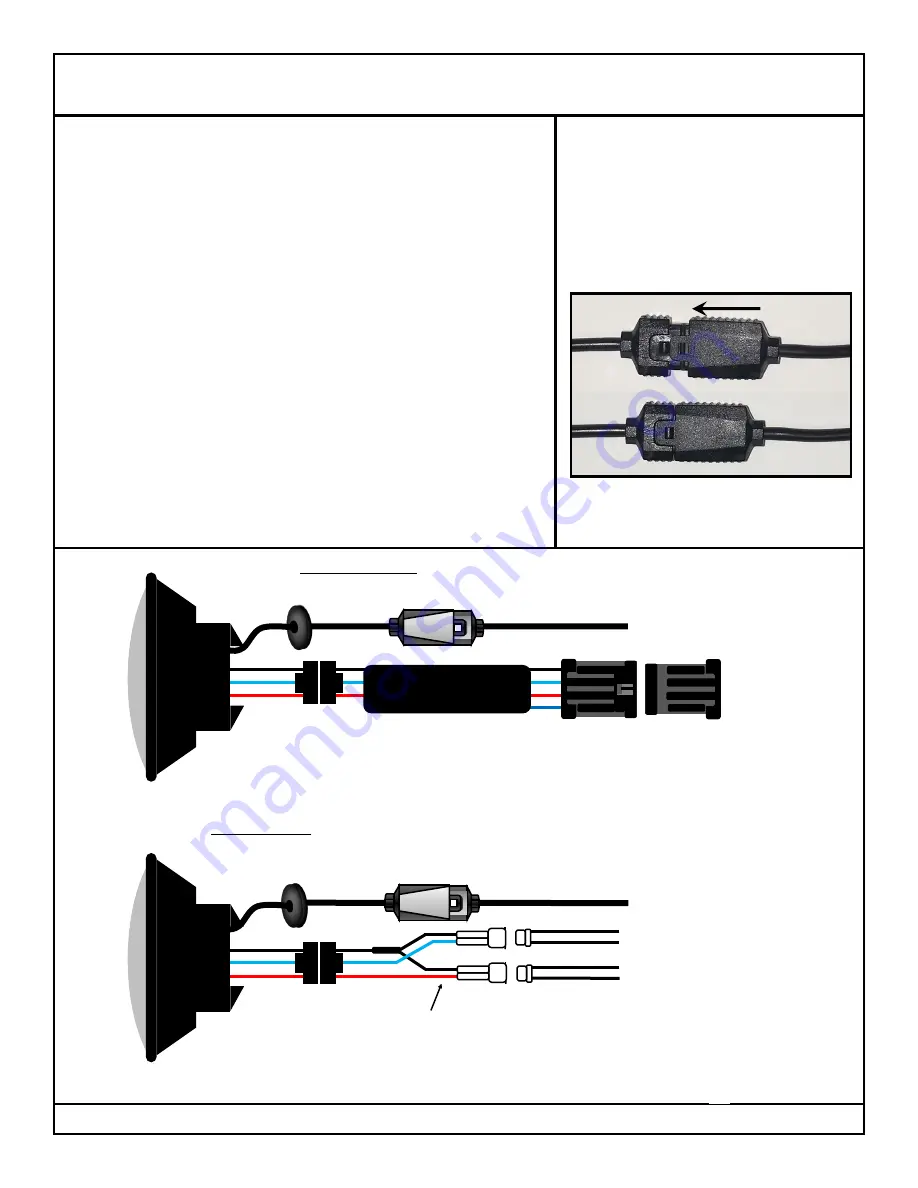
Connect the
7”
LED headlamp to the existing factory H4 plug.
7.
Install headlamp and trim ring on the headlamp bucket.
8.
Connect the ProGLOW
™
wiring harness to Channel 1 of the ProGLOW
™
Bluetooth Controller. Note: If the Brake Signal Sync is turned on in the App,
The Channel 1 Override will need to be turned ON as shown in Photo1.
9.
Re
-
connect vehicle battery negative [
-
] terminal.
10.
Test high and low beam functions of headlamp.
11.
If the Brake Signal Sync is turned on in the App, test the Brake Sync Chan-
nel 1 Override to ensure the Headlamp halo does not turn Red when the
Brake is applied.
12.
Properly Aim the headlamp for maximum performance.
Red
Black
Blue
Using The H4
-
TOUR
-
ADAPTER on 2014
-
2021 H
-
D
™
Touring Models
H4
Plugs
H4
-
TOUR
-
ADAPTER
4 Pin
Plugs
Red
Black
Blue
Using The CDTB
-
H42H9H11 (sold separately). on 2014
-
2021 H
-
D
™
Road King Models
CDTB
-
H42H9H11
Adapter Harness
(sold separately).
Black
Blue/Yellow
Black
Blue/White
Headlamp Harness Connectors
Low Beam Connector
High Beam Connector
~
To Channel 1 of the ProGLOW
™
Bluetooth Controller
~
To Channel 1 of the ProGLOW
™
Bluetooth Controller
ProGLOW
™
Wiring Harness
NOTE:
Use caution when connecting the mating
ProGLOW
™
accessory connectors, confirm
the mating connector is connected correctly
or damage will occur to the lighting accesso-
ries. The locking tab should slide onto the
lock and lock into position. See Photos be-
low.
LOCKED
ProGLOW
™
Wiring Harness
Grommet
H4
Plugs
Grommet


