HB1030E Manual Revision: 7 Page 11 of 28
Pre-start Inspection
Before use each day or at the beginning of each shift, the machine shall be given a visual inspection and
functional test. Repairs (if any) must be made prior to operating the machine, as it is critical to ensure safe
operation of the machine. A checklist for pre-start inspection can be found in the Maintenance section of this
manual.
DANGER
THE OPERATOR MUST BE AWARE OF THE
ENVIRONMENT. DO NOT RAISE THE PLATFORM IF
THE MACHINE IS NOT ON A FIRM, LEVEL SURFACE.
Start Procedure
x
Check that the work area is safe.
x
Check that battery switch is in “ON” position.
x
To operate, ensure that the key in the lower control panel is in the
"ON" position.
x
An audible alarm sounds when the machine is tilted. Machine must
be on a hard, level, surface before operation.
x
Enter the work platform in the stowed position using a constant three
point dismount/grip.
x
Follow all general rules and precautions stated in this manual.
Shutdown Procedure
x
When finished with the machine, place the platform in the stowed
position.
x
Park the machine on a level surface.
x
Carefully exit the platform using a constant three point dismount/grip.
x
Remove key from lower control panel to prevent unauthorized use.
Driving and Steering
WARNING
CHECK THAT THE ROUTE OF TRAVEL TO BE TAKEN IS CLEAR
OF PEOPLE, OBSTRUCTIONS, DEBRIS, HOLES, AND DROP
OFFS, AND IS CAPABLE OF SUPPORTING THE MACHINE.
Always check front steer wheel direction before driving.
To activate drive function, depress the Drive Enable Bar on the Joystick. Moving the joystick handle away from
the operator will cause FORWARD travel and pulling the joystick toward the operator will cause REVERSE travel.
Travel speed is proportional and is controlled by the joystick. The farther it is moved, the faster the speed will be.
The joystick returns to the neutral position when released.
Use the Thumb Steering Switch on the end of the Joystick to steer left and right. Pressing the switch to the left
causes the wheels to turn left, to the right, wheels turn right. The steer switch returns to neutral position when
released. Steer wheels do not center themselves after a turn; they must be returned to the straight-ahead
position with the steer switch.
Press the horn button on the upper controls for an audible warning.
Battery Disconnect Switch:
“On” position
HB1030E Manual Revision: 7 Page 12 of 28
Braking
WARNING
PUSHING THE EMERGENCY STOP BUTTON WILL APPLY
BRAKES IMMEDIATELY. THIS MAY CAUSE UNEXPECTED
PLATFORM MOVEMENT AS THE MACHINE COMES TO A
SUDDEN STOP. BRACE YOURSELF AND SECURE OBJECTS ON
THE PLATFORM DURING OPERATION OF THE MACHINE.
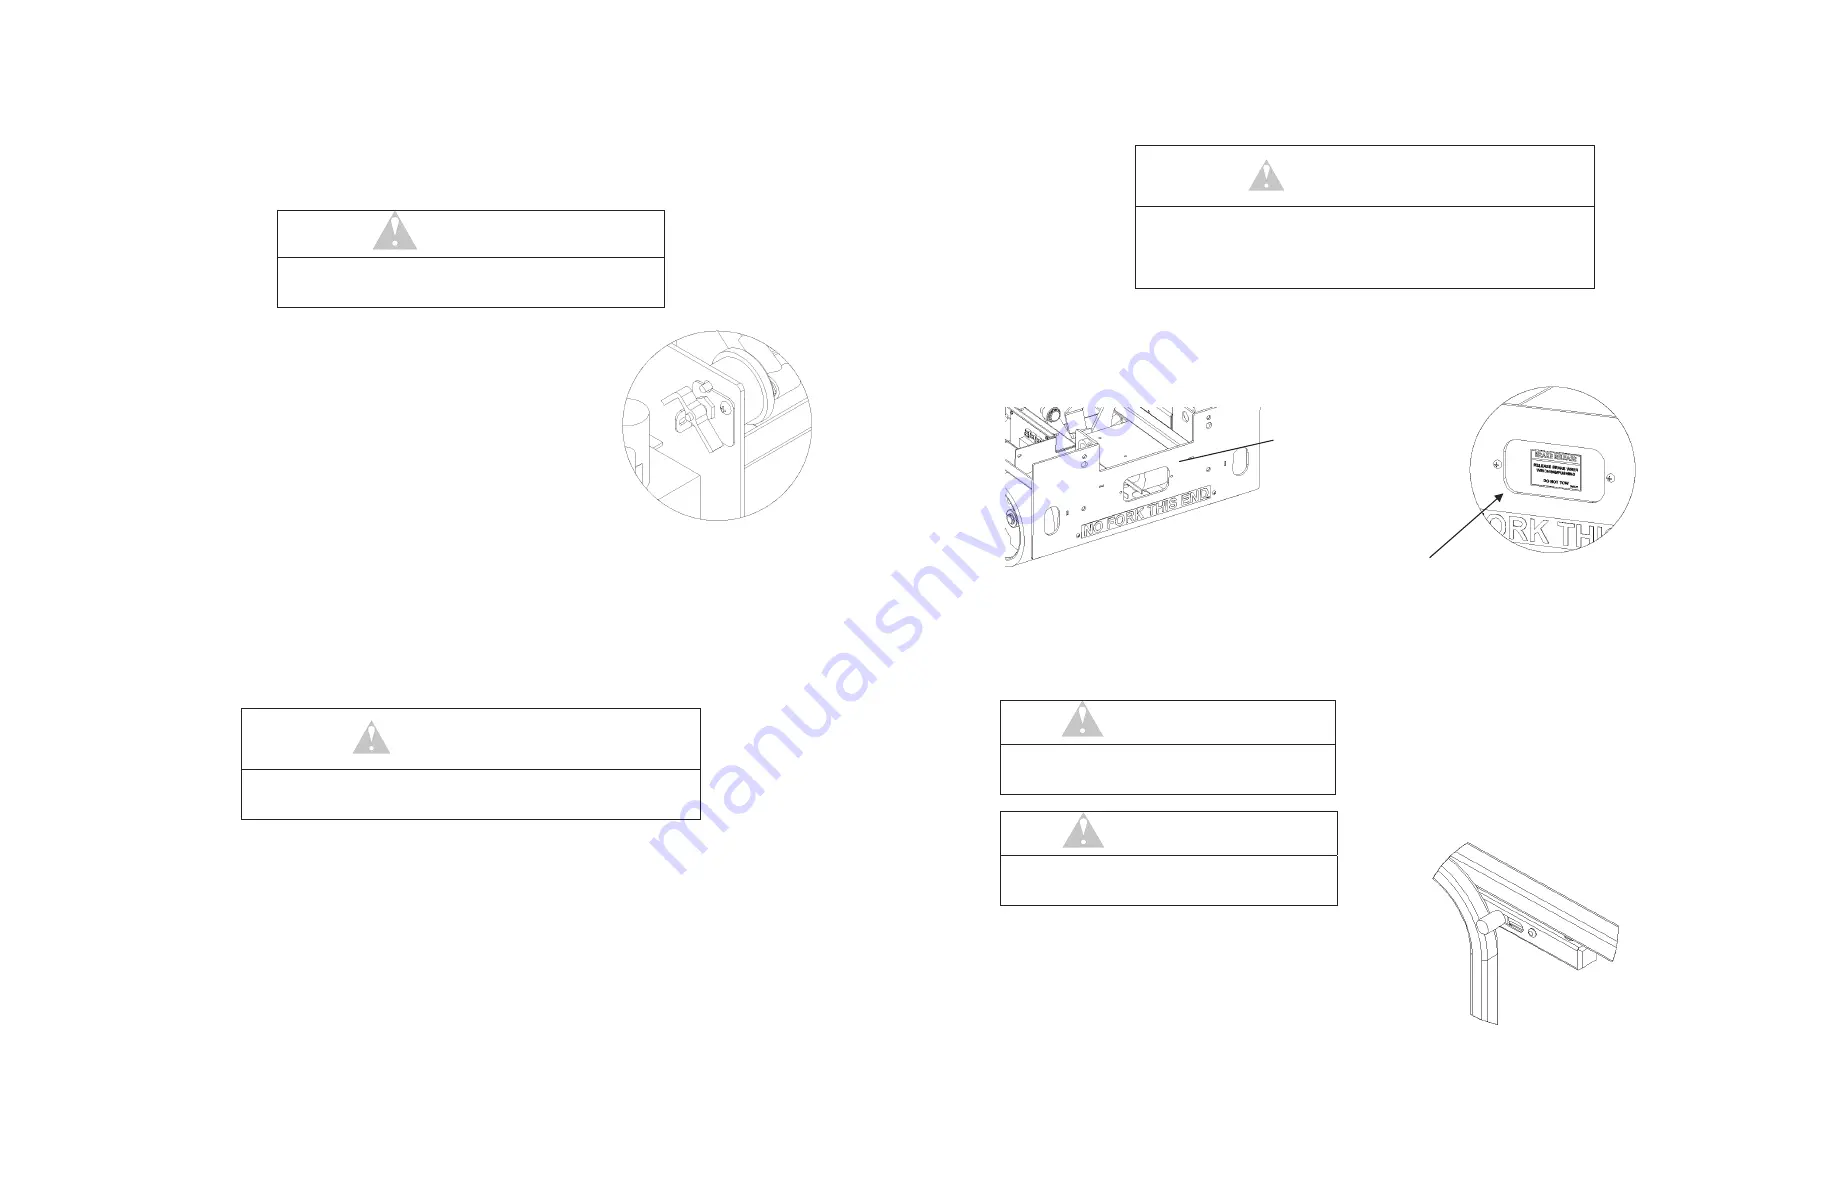
For parking, the brake is automatically applied when the forward/reverse drive controller is positioned in the
center (neutral) position. In the event of a machine failure, the machine can be pushed by releasing the parking
brake at the rear of the machine.
NOTE: The drive system will not function if the parking brake is in the release position.
Extending the Slide-Out Deck
x
Stand on the platform deck.
x
Grip the Slide Lock Handle to allow the deck to
slide.
x
Slide the deck out up to 76 cm.
x
Release the Handle to keep deck in place.
WARNING
DO NOT EXCEED THE RATED CAPACITY. THE
CAPACITY OF THE SLIDE OUT DECK ID
MAXIMUM 250 LBS. OR ONE PERSON.
WARNING
IF THE SLIDE-OUT DECK IS EXTENDED,
CHECK FOR CLEARANCE UNDER AREA
BEFORE LOWERING PLATFORM.
The brake release is
behind a cover that
requires the use of a
screwdriver to remove.
Figure 13: Brake Release Cover
Figure 12: Brake Release
To release brake for
winching or pushing,
rotate brake handles.
Do not push at speeds
more than 2 mph (0.9
m/s).
Figure 14: Slide-Out Lock


