background image

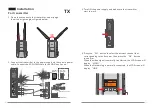
TX

CC8980

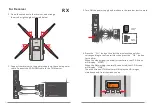
RX

CC3865

17

18

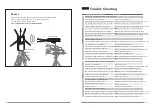
The transmitter and the antennas are in horizontal direction
The receiver and antennas are in vertical direction                                                                           
Transmission range : 150 meters

Worst: 

This installation is not recommended!

Trouble Shooting

Solutions:

Power on transmitter.

Place the TX or RX onto the base and replace them erectly.

Move the receiver closer to the transmitter.

Reduce the number of solid walls between TX and RX.

Move the receiver closer to the transmitter.

Rematch the code of transmitter and receiver.

Power off other independent transmitter, place the 
receiver away from the other sources of interference.

Connect the transmitter to video source  by SDI/HDMI cable.

Power ON the video source.

Switch the Video source to SDI/HDMI output.

Remove and then re-plug the cable of  transmitter

Reboot the transmitter.

Change the SDI/HDMI cable.

Switch the output video resolution to other modes. 

Replaced with HDCP-certified TV/Monitor. 

Power on receiver.

Connect receiver to TV/Monitor via SDI/HDMI cable.

Switch TV/Monitor to SDI/HDMI input.

Remove then re-plug the SDI/HDMI cable.

Switch the TV/Monitor to normal operation mode.

Reboot the receiver.

Re-plug the cable of the receiver or TV/Monitor

Reboot the receiver

Please contact your retailer 

Unplug and then plug the HDMI cable of the receiver or TV.

Unplug and then plug the HDMI cable of the TX  and player.

Reboot the transmitter and receiver.

O

S

D I

n

fo

r

m

a

ti

o

n o

n T

V

Im

a

g

e

Displaying  “Link Connecting...”  for long time 

Transmitter is not electrified.

Transmitter or receiver is not placed erectly.

The transmitter and receiver are too far away.

Several solid wall partition TX and RX.

There are too many obstacles between TX and RX.

Haven't matched the code of  TX and RX.

There is other transmitter which is under working  
condition near the receiver.

No Video Signal received

Transmitter and video source are not connected.

The video source is turned OFF.

Video source were NOT switched to SDI/HDMI output.

Bad contact of cable of transmitter

Abnormal working of  transmitter

Problem with cable between TX  and video source 

Player NOT support the output resolution format.

The TV/Monitor NOT support HDCP authentication. 

No signal input to Receiver or  TV/Monitor

Receiver is turned OFF.

Receiver and TV are not connected.

TV/Monitor NOT switched to SDI/HDMI input.

No image appear on TV/Monitor

Bad contact of the cable of receiver or TV/monitor

TV/Monitor turn into standby mode

Abnormal working of receiver.

Abnormal color on TV screen

Bad contact of receiver or cable.

Abnormal working of receiver

Receiver failure

Bad contact of cable of receiver or  TV/moniter.

Bad contact of cable of transmitter or video source.

Abnormal working of transmitter or receiver

Troubles & Possible Reasons:

Summary of Contents for CC3865

Page 1: ...Wireless HD Video Link This user manual applies to Transmitter CC8980 Receiver CC3865 Version 1 0 2016 12 ...

Page 2: ......

Page 3: ...e 300m 1000ft Line of sight Compatible for EDID strcture 1 1 support HDMI 1 3version Plug Play full hardware design no software is required As the widely use of live broadcasting there is some problem exsited in the process of cable wiring such as the high cost and short life usage of the cable Also the cable trod by the crowd under insufficient site protection is the major cause of cable performa...

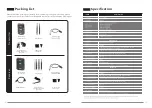
Page 4: ...n ITEM Specification Time Code Functional Interface Locating Structure LCD Screen Working Voltage Dimensions Functional Interface Locating Structure LCD Screen Working Voltage Dimensions Transmitter 300m Line of sight External Antenna X 2 pcs HDMI Input SDI Input SDI Loop Output Mini USB LEMO Power IN Antenna RPSMA Socket Power ON OFF 1 4 Hot shoe connection V Mount Optional Wireless Channel Info ...

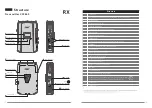
Page 5: ...ower ON OFF Antenna Socket Display information about the Channel Signal INPUT Capacity Signal status Select the correct Channel Switch HDMI or SDI Signal as the signal source OK For Confirm the selection Support connecting to the power supply of the camera or power adaptor Notice DO Make sure the Voltage was connected correctly Connect to the HD Digital Camcorder with HDMI OUT Connect to the HD Di...

Page 6: ... connect the antenna Support V Mount Connection Support to connect with more methods Power ON OFF For system updating Structure LCD Screen Channel Switch HDMI SDI Signal Switch OK For Confirm Display information about the Channel Signal INPUT Capacity Signal status Select the correct Channel Switch HDMI or SDI Signal as the signal source OK For Confirm the selection Mini USB Power Supply IN Lemo M...

Page 7: ...e HD Video Source 3 Turn ON the power supply and make sure the transmitter start to work 4 Press the CH button to select the wireless channel that corresponding to the Receiver then press the OK button to confirm When the video signal is normally transferred the LCD Screen will display VIDEO When the Networking is normally connected the LCD Screen will display LINK TX TV Monitor HD Video Source Po...

Page 8: ... and make sure the receiver start to work 4 Press the CH button to select the wireless channel that corresponding to the Transmitter then press the OK button for confirm When the video signal is normally transferred the LCD Screen will display VIDEO When the Networking is normally connected the LCD Screen will display LINK Then the screen of TV Monitor will display the HD images simultaneously fro...

Page 9: ... key to manually switch SDI audio mode When there is no audio from SDI input you can manually switch SDI audio mode This function is only valid for the SDI interface and does not affect the HDMI interface Auto SDI Audio mode is set to 0 by default Long press HDMI SDI key to switch to SDI audio mode 1 Auto Supports full PSF resolutions Supports full PSF resolutions 25PFS in 25PFS out 29 97PSF 29 97...

Page 10: ...o not match The range can drop to as low as 150 meters in the worst case Optimal The transmitter and receiver are both in vertical direction The antennas at both sides are in vertical direction The transmitter and the receiver are facing directly Line of sight Transmission range 600M The transmitter and receiver are both in vertical direction The antennas at both sides are in vertical direction TX...

Page 11: ... the HDMI cable of the receiver or TV Unplug and then plug the HDMI cable of the TX and player Reboot the transmitter and receiver OSD Information on TV Image Displaying Link Connecting for long time Transmitter is not electrified Transmitter or receiver is not placed erectly The transmitter and receiver are too far away Several solid wall partition TX and RX There are too many obstacles between T...

Page 12: ...19 ...

Reviews: