21/40
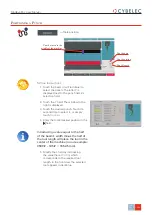
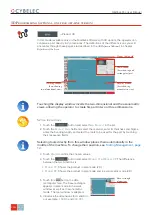
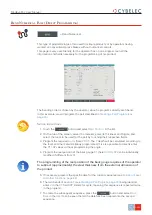
Function active indicator
Touching this segment
will attach the new face
here
Touch this segment to add
the second side here
Touch this segment to add
the third side here
Touch this segment to add
the fourth side here
Enter a negative angle
value
Touch this segment to add
the last side here
ModEva Pac User Manual
A
pril
2016
V2.3
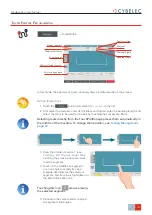
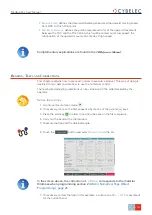
7. Touch this
button again to add a
rectangular face.
The red rectangle to the right of the
icons lights up and indicates that the
function is active.
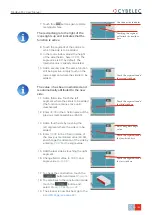
8. Touch the segment of the outline to
which the side is to be added.
9. In the tool window, adjust the height
of the side (field
a
, here
45.00
). The
angle value is 90° by default. The
internal radius is already calculated.
10. Add a second side. The same function
still being active, simply touch on the
lower segment where the side is to be
added.
The value
a
has been memorized and
is automatically attributed to the new
side.
11. Add a third side. Touch the left
segment where the side is to be added
(the function remains active until
deactivated).
12. Enter
40.00
in the
a
field in place of the
previous memorized value (45.00).
13. Add a fourth side by touching the
left segment where the side is to be
added.
14. Enter
30.00
in the
a
field in place of
the previous memorized value (40.00),
and change the direction of the side by
entering
-90.0°
for the angle value.
15. Add the last side by touching the right
segment.
16. Change field
a
value to
20.00
, and
angle value to
-135.0°
.
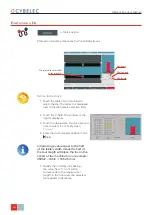
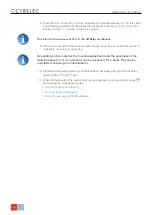
17. To check the construction, touch the
button and select
V
iSuaLiZe
.
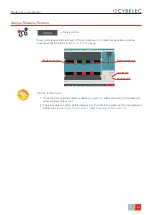
18. To come back to the construction mode,
touch the
button and
select
M
odiFy
1F
or
M
odiFy
2F
.
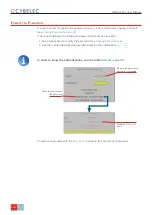
19. The product is now finished, go to the
.

