background image

ca5648 manual_3rd.FH9   Tue May 27 16:23:02 2008      Page 6     

Composite

C

M

Y

CM

MY

CY CMY

K

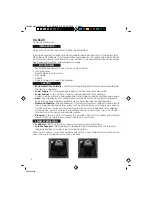
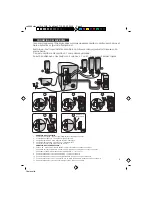
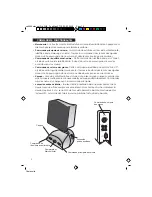
CONTROLS & FEATURES

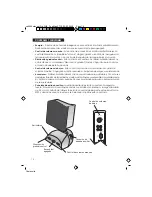
• Power –

 The on/off button is on the right satellite speaker. Press in to turn on. Press again to

turn the system off.

• Master Volume Control –

 This control is on the right satellite speaker and is indicated by the

word “Volume”. Rotate clockwise to turn volume up or counter-clockwise to turn volume 
down.

• Fader Control – 

This control is on the right satellite speaker and is indicated by the word 

“Fader”. Rotate to control sound from front to rear.

•

Bass Volume Control – 

This control is on the subwoofer jack panel and is indicated by the 

word “Sub V/C”. Rotate clockwise to turn volume up or counter-clockwise to turn volume 
down.

•

Headphone


Input Jack –

  The right satellite speaker has a headphone input jack. Connect

your favorite headphones to this jack and they will mute the speaker system automatically.
The master volume control can then be used to turn up or down the volume to your 
headphones.

• Auxiliary Input – 

 The auxiliary input jack allows connection of a second source. An example

of this would be your speakers are connected to your computer, so the second 3.5mm 
input jack on the side of the speaker allows you to quickly connect an MP3 player.

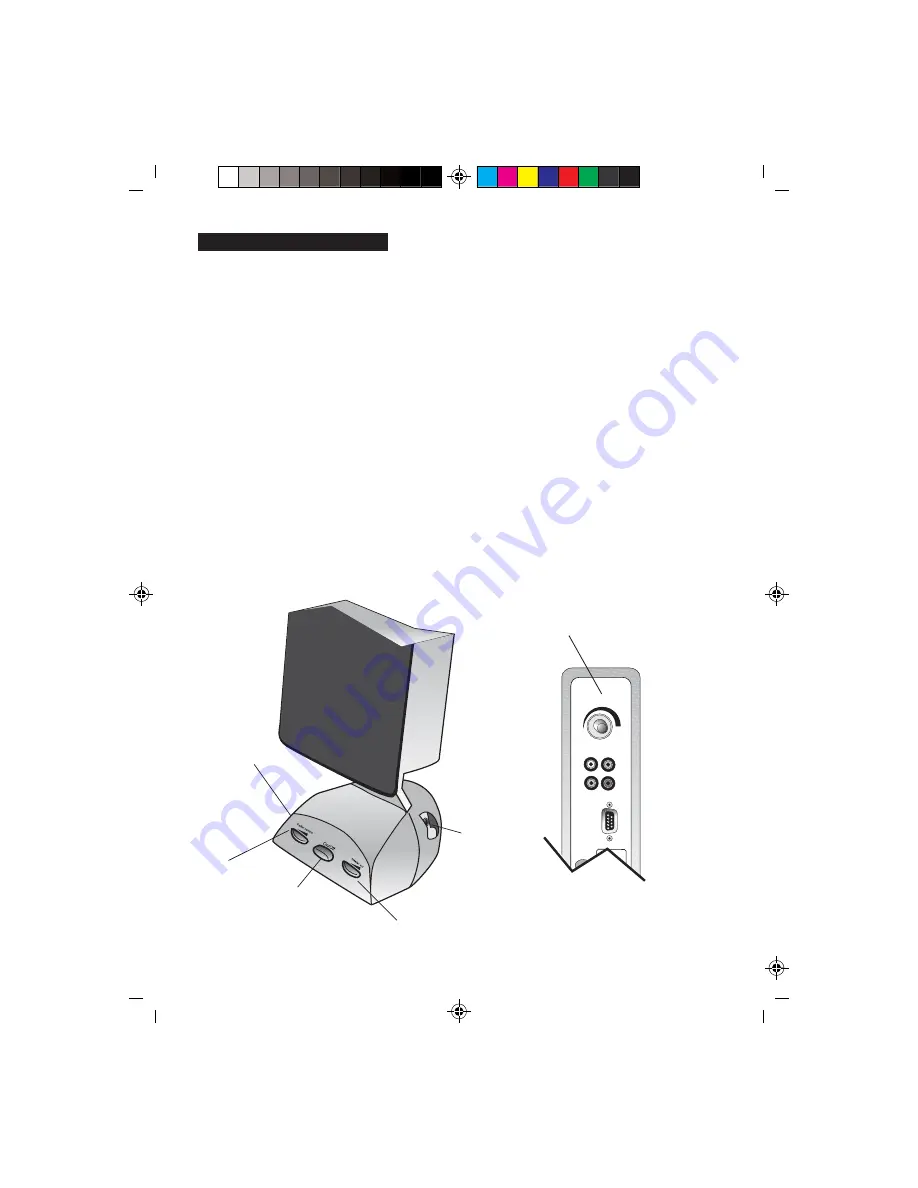
Headphone

input jack

Fader control

Power on / off

Master volume control

Bass volume control

Auxiliary Input

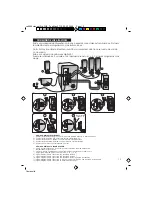
Center

Front

Rear

To Right

Speaker

Sub V/C

Center

Front Left

Rear Left

Rear Right

5

Summary of Contents for CA-5648

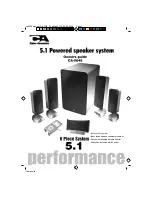
Page 1: ...648 manual_3rd FH9 Tue May 27 16 23 02 2008 Page 1 Composite C M Y CM MY CY CMY K 6 piece 5 1 system Bass reflex wooden subwoofer cabinet Convenient desktop Volume Control Fader Control and On Off Control ...

Page 2: ...ee wire grounding type plug a plug having a third grounding pin This plug will only fit into a grounding type power outlet This is a safety feature If you are unable to insert the plug into the outlet contact your electrician to replace your obsolete outlet Do not defeat the safety purpose of the grounding type plug 1 Read Instructions All the safety and operating instruction should be read before...

Page 3: ...are should be taken to keep from touching such power lines or circuits as contact with them might be fatal 18 Overloading Do not overload wall outlets extension cords or integral convenience receptacles as this can result in a risk of fire or electric shock 19 Object and Liquid Entry Never push objects of any kind into this product through openings as they may touch dangerous voltage points or sho...

Page 4: ...with these speakers Cyber Acoustics will not be held responsible for damage caused by another power supply Heat Keep speakers out of extreme heat and away from sources producing extreme heat such as space heaters radiators stoves and other devices emitting heat Water and Moisture Keep speakers out of the rain and humid conditions to avoid electric shock Keep speakers away from water such as sinks ...

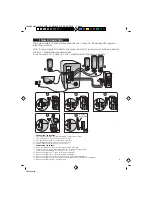
Page 5: ...onnect to Center jack CONNECTING THE SOURCE 6 AC cord Connect to wall socket after all connection are made 7 Cables to source Check which type of source you are connecting to then follow the appropriate diagram either 8 9 10 11OR 12 8 When connecting to a 5 1 sound card follow this diagram 9 When connecting to a 4 1 sound card follow this diagram 10 When connecting to a regular two channel sound c...

Page 6: ...icated by the word Sub V C Rotate clockwise to turn volume up or counter clockwise to turn volume down Headphone Input Jack The right satellite speaker has a headphone input jack Connect your favorite headphones to this jack and they will mute the speaker system automatically The master volume control can then be used to turn up or down the volume to your headphones Auxiliary Input The auxiliary i...

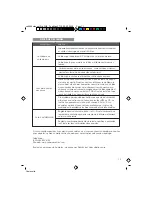
Page 7: ...with the sound source The most common problem when connecting to a computer sound card is the connections are incorrect Make sure you are connected to the audio output jack from your computer sound card Many times it has a green color to it Also make sure your media device or CD DVD device is playing and the volume settings are turned up and not muted If you still have problems disconnect the spea...

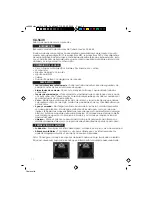
Page 8: ...us les câbles et vérifié le bon fonctionnement du système Lisez attentivement les instructions Lisez toutes les consignes de sécurité et instructions avant d utiliser cet appareil Branchement secteur Effectuez tous les branchements avant de brancher sur le secteur Alimentation Utilisez uniquement l adaptateur AC fourni avec ces enceintes Cyber Acoustics ne pourra être tenu responsables des dommage...

Page 9: ...sur prise Center CONNEXION DE LA SOURCE AUDIO 6 Cordon AC brancher sur la prise secteur une fois les autres connexions effectuées 7 Connexion vers la source audio vérifier sur quel type de source audio vous vous connectez puis suivez le schéma de branchement approprié 8 9 10 11 ou 12 8 Pour un branchement sur une carte audio 5 1 suivez ce schéma 9 Pour un branchement sur une carte audio 4 1 suivez...

Page 10: ... V C est située sur la façade arrière du subwoofer Tournez le bouton dans le sens des aiguilles d une montre pour augmenter le volume ou dans le sens inverse pour le diminuer Casque L enceinte satellite droite est munie d une prise casque Lorsque vous branchez votre casque sur cette prise le son des enceintes est coupé automatiquement Commandez alors le volume du casque avec la commande principale...

Page 11: ...niveau de la source audio Dans le cas d un ordinateur le problème le plus courant est un branchement incorrect à la carte son Vérifiez que vous avez bien branché le câble sur la sortie audio de la carte son La prise est souvent marquée en vert Vérifiez également que votre source audio ou lecteur CD DVD est en lecture et que le son est réglé à un niveau d écoute et non coupé Si le problème persiste...

Page 12: ...terminado de realizar todas las conexiones y haya comprobado que el sistema está funcionando adecuadamente Lea las instrucciones atentamente Debe leer todas las instrucciones de seguridad y de operación antes de hacer funcionar este equipo Alimentación de corriente No enchufe el equipo hasta que haya realizado todas las conexiones Fuentes de alimentación Utilice solamente el adaptador de corriente...

Page 13: ... central Azul conectar a ranura Central CÓMO CONECTAR A LA FUENTE DE AUDIO 6 Cable de alimentación AC Conectar al tomacorriente de la pared después de realizar todas las conexiones 7 Cables a fuente Compruebe el tipo de fuente está conectando a los altavoces y luego siga el diagrama adecuado ya sea 8 9 10 11 ó 12 8 Siga el diagrama para conectar a una tarjeta de sonido 5 1 9 Siga el diagrama para ...

Page 14: ...ntrol Este control se encuentra en el altavoz satelital derecho y está indicado con la palabra Disminución gradual Fader Haga rotar para controlar el sonido de adelante hacia atrás Control de volumen de bajos Este control funciona de manera similar al control de volumen maestro Haga girar el control para subir o bajar los bajos según sus preferencias Auriculares El altavoz satelital derecho tiene ...

Page 15: ... problemas con la fuente de audio El problemas más común al conectar a una tarjeta de audio es que las conexiones son incorrectas Asegúrese de estar conectado a la salida de audio desde la tarjeta de audio de su ordenador A menudo están identificados con color verde También asegúrese de que su dispositivo de medios o dispositivo de CD DVD esté funcionando y que la configuración del volumen esté ac...

Page 16: ...ca5648 manual_3rd FH9 Tue May 27 16 23 02 2008 Page 16 Composite C M Y CM MY CY CMY K Amplified Speaker System ...

Reviews: