STEP 3 :
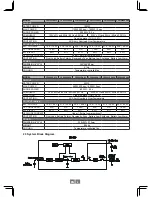
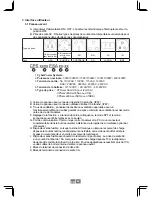
Please refer to Table 4.1 and check whether the "SPF Mode" is set as required.
If yes, please jump to
Step 5
STEP 4 :
The LEDs will change state each when pressing the setting button for 1 second
and then release. Users can Enable or Disable the "SPF Mode" function through
this setting.
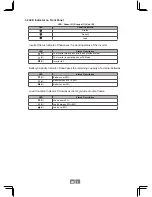
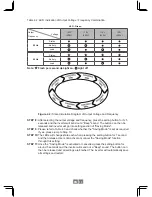
Table 4.1: LED Indication of SPF mode Selection
LED : Green (G), Orange (O)
SPF Mode
Enable
Status
(G)
Battery
(O)
Load
(O)
Disable
Status
Battery
(O)
Load
(O)
Note: Flash per second Light on
Light off
STEP 5 :
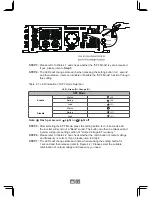
After selecting the SPF Mode, press the setting button for 3~5 seconds and
the inverter will send out a "Beep" sound. The button can then be released and
inverter will go into setting section of "Output Voltage & Frequency ".
STEP 6 :
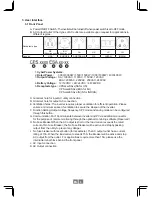
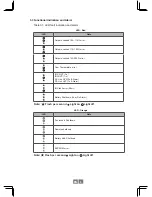
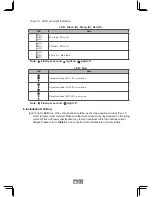
Please refer to Table 4.2 and check whether the combination of output voltage
and frequency is correct. If yes, please jump to Step 8
STEP 7 :
The LEDs will change state each time when pressing the setting button for
1 second and then release (refer to Figure 4.2). Please select the suitable
combination of output voltage and frequency you need.
EN
12
Summary of Contents for CPS1000
Page 1: ...OFF GRID INVERTER Instruction Manual CPS3000 CPS1500 CPS1000 CPS400 ...
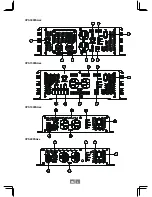
Page 9: ...CPS3000SAxx CPS1500SAxx CPS1000SAxx CPS400SAxx EN 6 ...
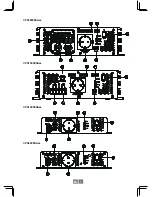
Page 10: ...CPS3000ESAxx CPS1500ESAxx CPS1000ESAxx CPS400ESAxx EN 7 ...
Page 24: ...FR ONDULEUR HORS RESEAU Manuel d instructions CPS3000 CPS1500 CPS1000 CPS400 ...
Page 30: ...CPS3000SAxx CPS1500SAxx CPS1000SAxx CPS400SAxx FR 27 ...
Page 31: ...CPS3000ESAxx CPS1500ESAxx CPS1000ESAxx CPS400ESAxx FR 28 ...
Page 45: ...Note ...
Page 46: ...Note ...
Page 47: ...Note ...


