12
3.10
Parallel installation (Only CPS5000ECH48A-P available)
3.10.1
Parallel board installation
(Following steps just for some customers have installed the inverter, but later need to increase the parallel connection
function, so need install the parallel board by themselves.)
This installation steps are only applied to CPS5000ECH48A-P model.
Step 1
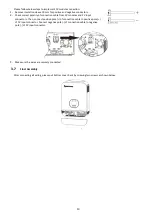
: Remove wire cover by unscrewing all screws.
Step 2: Remove communication board by unscrewing two screws as below chart.
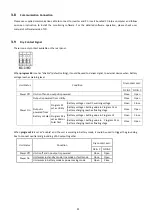
Step 3: Remove two screws as below chart and remove 2-pin and 14-pin cables. Take out the board under the
communication board.
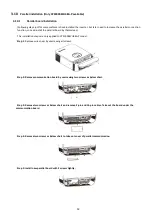
Step 4: Remove two screws as below chart to take out cover of parallel communication.
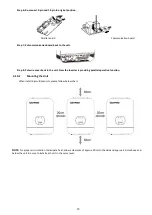
Step 5: Install new parallel board with 2 screws tightly.
Summary of Contents for CPS3000ECH48A
Page 1: ...ALL IN ONE OFF GRID INVERTER User s Manual CPS3000ECH48A CPS5000ECH48A CPS5000ECH48A P ...
Page 2: ......
Page 42: ...39 Note ...
Page 43: ...40 Note ...


