background image


CyberSuite™ LED Keypad User Manual 


25 

CONFIGURATION 


The CyberSuite™ system has many options that are enabled 

by your installer. The following lists the options and how 
your system is configured. Use this location to write your 
user names and any information about your system.  

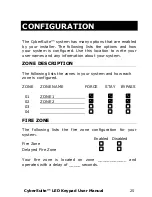
ZONE DESCRIPTION 


The following lists the zones in your system and how each 

zone is configured. 
 
ZONE 

ZONE NAME   


FORCE    STAY  BYPASS 

 
  01  

ZONE 1   


5


5


5


  02  

ZONE 2   


5


5


5


  03  


…


…


…


  04  


…


…


…


FIRE ZONE 


The following lists the fire zone configuration for your 
system. 


Enabled  Disabled 

Fire Zone  


…


…


Delayed  Fire  Zone   


…


…


Your fire zone is located on zone ____________ and 
operates with a delay of _____ seconds.   
 

Summary of Contents for LED Keypad

Page 1: ...LED Keypad User Manual ...

Page 2: ......

Page 3: ...MBERS 13 TROUBLE CONDITIONS 14 ARMING DISARMING 16 EXIT DELAY 16 DISARMING 16 REGULAR ARMING 17 STAY ARMING 17 FORCE ARMING 18 BYPASSING ZONES 19 ONE KEY ARMING 20 SPECIAL FEATURES 21 ALARM MEMORY 21 CHIME ZONES 22 DISABLE AUDIBLE OUTPUT 22 MESSAGES 23 PANIC ALARM 23 FIRE ALARM 24 CONFIGURATION 25 ZONE DESCRIPTION 25 FIRE ZONE 25 ONE KEY ARMING 26 PANIC KEYS 26 TIMERS 27 USERS 27 ...

Page 4: ...fsite communication The elegant and user friendly CyberSuite Keypad maintains complete control of your residence providing easy to understand information All the actions performed in your security system will be executed and displayed through the CyberSuite keypad Therefore before using your CyberSuite security system we highly recommend you read this manual carefully and have your property manage...

Page 5: ...page 5 for how to program user codes Many of the features and options must be enabled by the installation company or property manager If the feature is not programmed or an option is not enabled the system will generate a rejection tone Refer to the system configuration tables on page 25 INDICATOR LIGHTS The CyberSuite LED keypad features three status indicator lights showing the condition of the ...

Page 6: ...arm Indicator FLASHING The system is in alarm and you need to enter your user code ON The system is armed and you may enter your user code to disarm Message Indicator FLASHING Your building manager or concierge has attempted to contact you To clear this indicator please follow the instructions in the message section of the user menu information of this booklet OFF You have no pending requests for ...

Page 7: ...rrectly Contact your building manager or security company for assistance ON The zone is open OFF The zone is closed AUDIBLE TONE When you press a key on the CyberSuite LCD keypad a short audible tone is generated Other tones are generated when certain functions are used you should be familiar with the following audible tones Confirmation Tone When an operation arming disarming is successfully ente...

Page 8: ... disarm functions and modify and delete any user code change user options and modify user card numbers Other users can be given a master code by enabling User Option 2 for each new master user Take care not to disable the master option for all users this will prevent any future management of user codes until a full reset is performed by your security company DURESS CODE If you are forced to arm or...

Page 9: ... master user to log in to the setup menu the sequence is The ARMED status LED will begin to flash once you have successfully logged in informing you that you are in programming mode Logging Out of the Setup Menu To leave programming mode press the CLEAR key until the ARMED status LED stops flashing or do not press any key for 10 seconds and you will be automatically logged out ...

Page 10: ...212 Entering New User Codes or Changing Existing Codes Each user s code can be modified with the following sequence in which the new user code must be entered twice to confirm the new code has been entered as intended To program a new code or modify an existing code Enter SETUP LOGIN mode if you have not done so already see page 6 for details Enter the following key press sequence USER NUMBER USER...

Page 11: ...nd the ARMED LED will return to a slow flash If incorrect a rejection tone will sound and the confirmation process must be repeated To delete a user code Enter SETUP LOGIN mode if you have not done so already see page 6 for details Enter the following key press sequence USER NUMBER ...

Page 12: ...ave not done so already see page 6 for details Enter the following key press sequence USER NUMBER You will now be presented with NUMBER LED s that are lit which correspond to the current user options that are ENABLED To toggle an option on or off press the number corresponding to the option required from the list on the following pages and once all options are correct press to confirm the selectio...

Page 13: ...ipped Systems Only 5 Enabled allows the selected user to disarm the CyberSuite system by presenting the card programmed for that user at the Card Reader 6 Disabled will allow only unlocking of the door where the card is presented and the system will remain armed until disarmed by PIN entry on the keypad or a card being presented by a Single Badge Disarm enabled user Each user may have only 1 of th...

Page 14: ...ion 5 Triple Badge Door Latching For Card Reader Interface Equipped Systems Only 5 Enabled allows the selected user to toggle a door lock open or closed upon presenting their card 3 times in quick succession 6 Disabled prevents triple card presenting from toggling the door lock Option 6 Triple Badge Latch 2 Hours For Card Reader Interface Equipped Systems Only 5 Enabled allows the selected user to...

Page 15: ...ting from latching the door open Option 8 Triple Badge Latch 8 Hours For Card Reader Interface Equipped Systems Only 5 Enabled allows the selected user to hold a door open for 8 hours upon presenting their card 3 times in quick succession 6 Disabled prevents triple card presenting from latching the door open Any user that has a Triple Badge Latch Option enabled may present their card three times w...

Page 16: ...igned a unique card number that is stored on a proximity device Programming or Changing User Card Numbers Enter SETUP LOGIN mode if you have not done so already see page 6 for details Enter the following key press sequence USER NUMBER The card details can now be automatically programmed by presenting the card at a reader interface and pressing to confirm the new card details Deleting a User Card E...

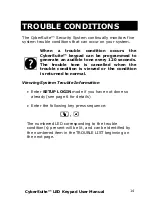
Page 17: ... audible tone every 120 seconds The trouble tone is cancelled when the trouble condition is viewed or the condition is returned to normal Viewing System Trouble Information Enter SETUP LOGIN mode if you have not done so already see page 6 for details Enter the following key press sequence The numbered LED corresponding to the trouble condition s present will be lit and can be identified by the num...

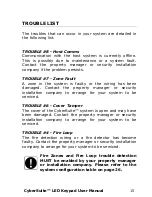
Page 18: ... property manager or security installation company to arrange for your system to be serviced TROUBLE 6 Cover Tamper The cover of the CyberSuite system is open and may have been damaged Contact the property manager or security installation company to arrange for your system to be serviced TROUBLE 4 Fire Loop The fire detection wiring or a fire detector has become faulty Contact the property manager...

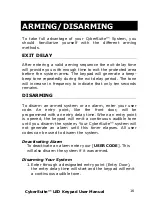
Page 19: ...ten seconds remains DISARMING To disarm an armed system or an alarm enter your user code An entry point like the front door will be programmed with an entry delay time When an entry point is opened the keypad will emit a continuous audible tone until you disarm the system Your CyberSuite system will not generate an alarm until this timer elapses All user codes can be used to disarm the system Deac...

Page 20: ...tion MUST be enabled by your property manager or installation company See the configuration section on page 25 STAY ARMING This method allows you to remain in the protected area while partially arming the system Stay zones are zones that are bypassed when the system is stay armed For example when you go to sleep at night doors and windows can be armed without arming other zones like motion detecto...

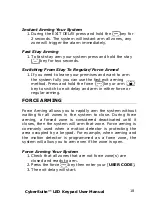
Page 21: ...itch to exit delay and arm in either force or regular arming FORCE ARMING Force Arming allows you to rapidly arm the system without waiting for all zones in the system to close During force arming a forced zone is considered deactivated until it closes then the system will arm that zone Force arming is commonly used when a motion detector is protecting the area occupied by a keypad For example whe...

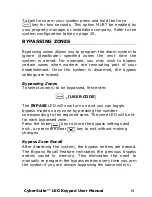
Page 22: ...is disarmed the bypass settings are erased Bypassing Zones To select zone s to be bypassed first enter USER CODE The BYPASS LED will now turn on and you can toggle bypass mode on any zone by pressing the number corresponding to the required zone The zone LED will be lit for each bypassed zone Press the enter key to store the bypass settings and exit or press the clear key to exit without making ch...

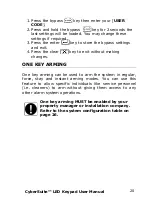
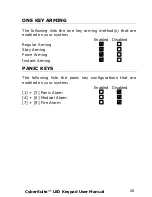
Page 23: ...nd exit 4 Press the clear key to exit without making changes ONE KEY ARMING One key arming can be used to arm the system in regular force stay and instant arming modes You can use this feature to allow specific individuals like service personnel i e cleaners to arm without giving them access to any other alarm system operations One key arming MUST be enabled by your property manager or installatio...

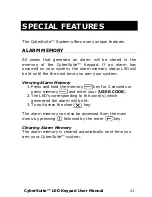
Page 24: ... will be lit until the the next time you arm your system Viewing Alarm Memory 1 Press and hold the memory key for 2 seconds or press memory and enter your USER CODE 2 The LED s corresponding to the zone s which generated the alarm will be lit 3 To exit press the clear key The alarm memory can also be accessed from the main menu by pressing followed by the enter key Clearing Alarm Memory The alarm ...

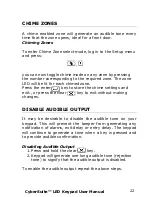
Page 25: ...r key to store the chime settings and exit or press the clear key to exit without making changes DISABLE AUDIBLE OUTPUT It may be desirable to disable the audible tone on your keypad This will prevent the beeper from generating any notification of alarms exit delay or entry delay The keypad will continue to generate a tone when a key is pressed and to provide audible confirmation Disabling Audible...

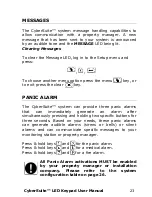
Page 26: ... The CyberSuite system can provide three panic alarms that can immediately generate an alarm after simultaneously pressing and holding two specific buttons for three seconds Based on your needs these panic alarms can generate audible alarms sirens or bells or silent alarms and can communicate specific messages to your monitoring station or property manager Press hold keys and for the panic alarm P...

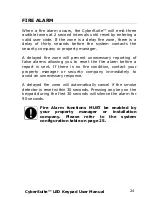
Page 27: ...ecessary reporting of false alarms allowing you to reset the fire alarm before a report is sent If there is no fire condition contact your property manager or security company immediately to avoid an unnecessary response A delayed fire zone will automatically cancel if the smoke detector is reset within 30 seconds Pressing any key on the keypad during the first 30 seconds will silence the alarm fo...

Page 28: ... user names and any information about your system ZONE DESCRIPTION The following lists the zones in your system and how each zone is configured ZONE ZONE NAME FORCE STAY BYPASS 01 ZONE 1 5 5 5 02 ZONE 2 5 5 5 03 04 FIRE ZONE The following lists the fire zone configuration for your system Enabled Disabled Fire Zone Delayed Fire Zone Your fire zone is located on zone ____________ and operates with a...

Page 29: ...ing method s that are enabled on your system Enabled Disabled Regular Arming 5 Stay Arming 5 Force Arming 5 Instant Arming 5 PANIC KEYS The following lists the panic key configurations that are enabled on your system Enabled Disabled 1 3 Panic Alarm 5 4 6 Medical Alarm 5 7 9 Fire Alarm 5 ...

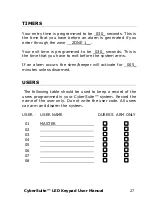
Page 30: ... _030_ seconds This is the time that you have to exit before the system arms If an alarm occurs the siren beeper will activate for _005_ minutes unless disarmed USERS The following table should be used to keep a record of the users programmed in your CyberSuite system Record the name of the user only Do not write the user code All users can arm and disarm the system USER USER NAME DURESS ARM ONLY ...

Page 31: ...may be used in conjunction with products not manufactured by Seller Seller cannot guarantee the performance of the security system Seller s obligation and liability under this warranty is expressly limited to repairing or replacing at Seller s option any product not meeting the specifications In no event shall the Seller be liable to the buyer or any other person for any loss or damages whether di...

Page 32: ...Unit C 6 Ascension Place Mairangi Bay P O Box 302 340 North Harbour Auckland New Zealand Phone 64 9 476 7124 y Fax 64 9 476 7128 www integratedcontroltechnology com ...

Reviews: