17
1. By default, SNMP is OFF. To allow SNMP, navigate to
[ ] Enable
SNMP
and press
Enter
. An
x
appears indicating the option is active.
Press
Enter
again to remove the
x
and disable SNMP.
Note:
If SNMP is not being used, disable it to prevent a security hazard.
2. To use “adminpassword” as the SNMP Community, navigate to
[ ] Use
Concatenated Username & Password as Communities
and press
Enter
. An
x
appears indicating the option is active. Press
Enter
again to
remove the
x
and deactivate the option.
3. To enable write access to Community 1, navigate to
Community 1 [ ]
and press
Enter
. An
x
appears indicating the option is active. Press
Enter
again to remove the
x
and disable writing to Community 1.
Repeat to enable
Community 2 [ ]
.
4. To change “public” as the password string for Community 1, navigate to
public
and press
Enter
.
5. Use
Backspace
and the letter keys to change values. Press
Enter
when done. Repeat to change “private” as the password string for
Community 2.
6. By default, the Trap Host IP is disabled (IP address is
000.000.000.000). To enable it, navigate to
Trap Host IP
and press
Enter
.
7. Use
Backspace
and the number keys to enter a valid IP address and
press
Enter
.
Note:
To disable the Trap Host IP again, enter
000.000.000.000
as the
IP address.
8. Once all values and settings have been set, hit
Backspace
to return to
the System Settings screen.
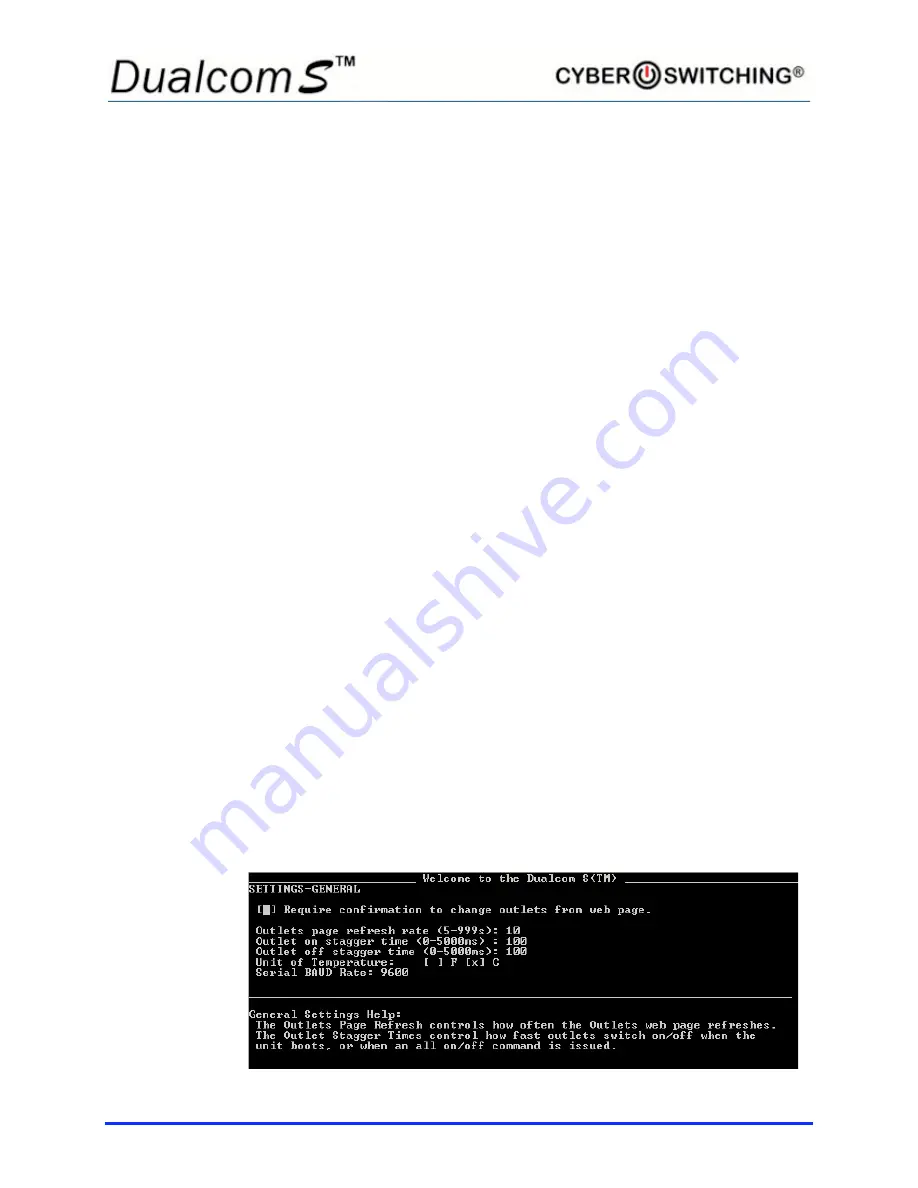
GENERAL Setup
From the System Settings
screen,
type
5
to select
General Settings
. The
following screen appears:
Summary of Contents for Dualcom S
Page 1: ......
Page 3: ...iii CE certificate will go on this page ...
Page 7: ...vii Notes ...
Page 45: ...38 ...