background image

STEP 4 

Set up the CyberGuard SG appliance’s Internet 
connection settings 

First, attach your CyberGuard SG appliance to your modem device or 
Internet connection medium.  If necessary, give the modem device some 
time to power up. 


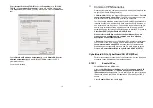
Select your Internet connection type and click 

Next

If connecting using a cable modem, select the appropriate ISP.  Choose 

Generic cable modem provider

 if unsure. 

If connecting using a regular analog modem, enter the details provided 
by your ISP. 

If connecting using an ADSL modem, select 

Auto detect ADSL 

connection type

 and enter the details provided by your ISP.  If auto 

detection fails and you are unsure of your ADSL connection type, 
contact your ISP. 

If you have a direct connection to the Internet (e.g. a leased line), enter 
the IP settings provided by your ISP. 

Note:

 For detailed help for each of these options, please refer to the 

User Manual. 

Once the CyberGuard SG appliance’s Internet connection has been set 
up, click 

Next

, select 

Reboot

 and click 

Next

 again. 

Note:

 If you changed the CyberGuard SG appliance’s LAN connection 

settings in 

STEP 3

, it may become uncontactable at this point.  The next 

step describes how to set up the PCs on your network to access the 
CyberGuard SG appliance and the Internet. 

10


STEP 5 

Set up the PCs on your LAN to access the 
Internet 

If you haven’t already, connect your CyberGuard SG appliance’s 

LAN


port directly to your LAN hub using the straight through Ethernet cable 
(blue). 

Note:

 if you are setting up the 

SG565

, you may also connect PCs 

directly to its 

LAN 

switch. 

To access the Internet, the PCs on your LAN must all be set up to use 
the CyberGuard SG appliance as their default gateway.  This can be 
done a number of different ways depending on how your LAN is set up.   

If your LAN has a DHCP server already, proceed to STEP 5A. 

If your LAN does not have a DHCP server, proceed to STEP 5B.


If you are not sure, you probably want STEP 5B.


STEP 5A  

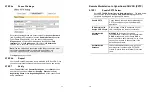
LAN with a DHCP server


Add a lease to your existing DHCP server to reserve an IP address for 
the CyberGuard SG appliance’s LAN connection. 

If you chose to set the CyberGuard SG appliance’s LAN connection 
settings using 

Manual configuration

, you may simply remove this 

address from the pool of available addresses. 

Enter this same IP address as the gateway IP address to be handed out 
by the DHCP server. 

Enter this same IP address as the DNS server IP address to be handed 
out by the DHCP server. 

Restart all the PCs on the network (this will reset their gateway and DNS 
addresses). 

Note:

 The purpose of restarting the PCs is to force them to gain a new 

DHCP lease.  Alternatively you can use a utility such as 

ipconfig 

to 

release then renew a lease, or disable and re-enable the network 
connection. 

Summary of Contents for SG565

Page 1: ...9_Cert_WMIR 103G This document must not be copied or reproduced except in full without the written permission of the Manager EMC Technologies Pty Ltd The certificate on page 3 may be reproduced in ful...

Page 2: ...t up your CyberGuard SG appliance s Internet connection settings Set up the PCs on your LAN to access the Internet Occasionally you will see a box like the following which contains important technical...

Page 3: ...front panel LEDs flashing If these LEDs do not behave in this manner before your CyberGuard SG appliance has been attached to the network you may need to perform a factory reset Press the black Reset...

Page 4: ...appliance s password and LAN connection settings Launch Internet Explorer or your preferred web browser and navigate to 192 168 0 1 The Web Management Console will display Select Quick Setup Wizard f...

Page 5: ...o have automatically configure your CyberGuard SG appliance s LAN connection settings You may skip to STEP 4 Click Next 8 Note This page will only display if you previously selected Manual configurati...

Page 6: ...up the PCs on your LAN to access the Internet If you haven t already connect your CyberGuard SG appliance s LAN port directly to your LAN hub using the straight through Ethernet cable blue Note if you...

Page 7: ...steps for each PC on your network You are now finished 12 Alternatively to activate your CyberGuard SG appliance s DHCP server Launch Internet Explorer or your preferred web browser and navigate to th...

Page 8: ...ive mode for keying and be established going out through the default gateway interface Proceed to CyberGuard SG to CyberGuard SG VPN IPSec Please refer to the IPSec section of the User Manual if you a...

Page 9: ...he remote party has a static IP address enter the other CyberGuard SG appliance s public Internet IP address in The remote party s IP address If you selected The remote party has a dynamic IP address...

Page 10: ...her the connection is Down or Running Status will display Negotiating Phase 1 then Negotiating Phase 2 as the connection is being established 18 Remote Workstation to CyberGuard SG VPN PPTP STEP 1 Ena...

Page 11: ...for the Selected Account field Similarly to delete an existing account Select the account in the Account List then check Delete in the Delete or Change Password for the Selected Account field If you r...

Page 12: ...anship and material except in those cases where the materials are supplied by the Purchaser under normal and proper use and service for the period of one 1 year from the date of original purchase from...

Page 13: ...ADVISED OF THE POSSIBILITY OF SUCH DAMAGES 24 Extended Four Year Warranty If Purchaser buys Extended Warranty at time of purchase of the product or within thirty 30 days from date of original purchase...

Page 14: ...PROPERTY RIGHTS The Software is protected by copyright laws international copyright treaties and other intellectual property laws and treaties SnapGear and its suppliers retain all ownership of and i...

Page 15: ...TIES OF MERCHANTABILITY OR FITNESS FOR A PARTICULAR PURPOSE OTHER THAN AS STATED HEREIN THE ENTIRE RISK AS TO SATISFACTORY QUALITY PERFORMANCE ACCURACY AND EFFORT IS WITH YOU ALSO THERE IS NO WARRANTY...

Page 16: ...520055 07 SPC 1 Product Compliance Information...

Page 17: ...SG710 990136 SG710 990183 Telephone extension cable 6ft 1 8m Ethernet cross over cable 6ft 1 8m grey 1 1 1 1 1 1 Ethernet cross over cable 6ft 1 8m red Ethernet patch cable 6ft 1 8m blue 2 1 1 1 1 1...

Page 18: ...levant to Products SG300 was LITE300 990126 SG630 was PCI630 990071 SG635 was PCI635 990135 SG530 was SME530 990064 SG550 was SME550 990065 SG570 was SME570 990107 SG575 was SME575 990108 SG710 990136...

Page 19: ...gar CyberGuard Corporation att denna ITE st r I verensst mmelse med de v sentliga egenskapskrav och vriga relevanta best mmelser som framg r av direktiv 1999 5 EG Undertegnede CyberGuard Corporation e...

Page 20: ...ult the dealer or an experienced radio TV technician for help This device complies with Part 15 of the FCC rules Operation of this device is subject to the following conditions 1 This device may not c...

Page 21: ...l RENs contact the local telephone company 9 The following information may be required when applying to your local telephone company for leased line facilities Service Type REN USOC Analog 0 3B RJ 11C...

Page 22: ...2th Avenue Deerfield Beach Florida 33442 USA Phone 1 954 375 3500 Fax 1 954 375 3501 Type of Equipment Information Technology Equipment Equipment Description Part Description 990126 KIT SG300 was LITE...

Reviews: