TM
TM
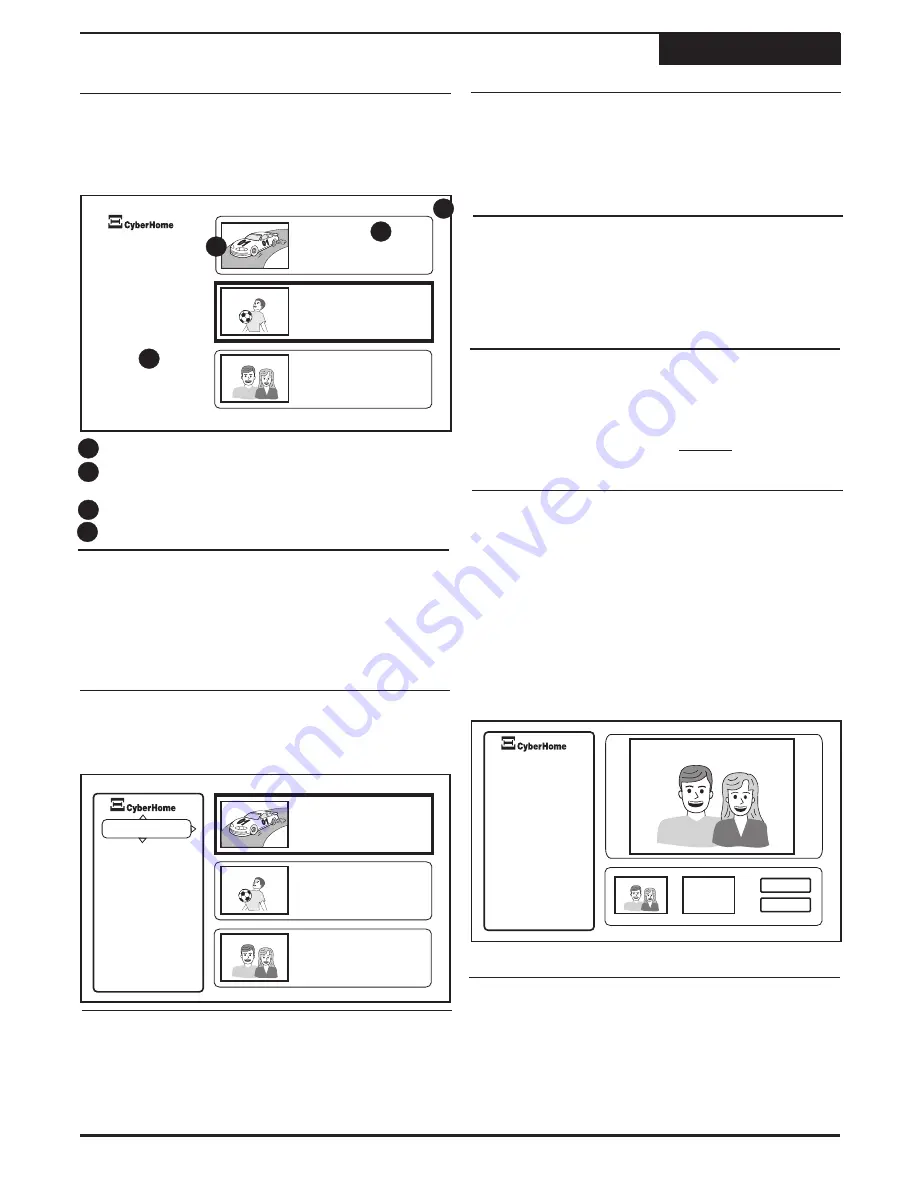
When you insert a DVD+RW or DVD+R disc, the Title
Screen will appear. The Title Screen displays thumbnail
and information for each Title (recording) on the disc.
Playing and Editing Your Recordings
Playing & Editing
Playing a Title
Using the Edit Screen
Delete a Title
Protect / Unprotect a Title
The Title Screen
19
Thumbnail Images
- Displays an image of the title.
Title Information
- Shows the title name, time and
date recording was made length and quality.
Pages
- Shows page position and total pages.
Edit
- Go to EDIT mode.
Select source as DVD, press the
TITLE
key. Use the
5
/
6
keys to select a particular title to play, then press
ENTER
.
Press the
EDIT
key. Use the
5
/
6
keys to select a
particular title to Edit, then press
ENTER
. Use the
5
/
6
keys to select from Edit menu, press
ENTER
to confirm.
4
4
1
1
2
2
3
3
1
1
1
1
2
2
2
2
3
2
2
Use the
5
/
6
keys to select a particular title to Edit,
then press
ENTER
. Use the
5
/
6
keys to select
RENAME
from menu on the left, press
ENTER
.
Use the
5
/
6
keys to select a particular title to
Delete, then press
ENTER
. Use the
5
/
6
keys to
select
DELETE
from menu on the left, press
ENTER.
Use the
5
/
6
keys to select a particular title to
Protect / Unprotect, then press
ENTER
. Use the
5
/
6
keys to select
PROTECT
or
UNPROTECT
from the Edit menu.
Use the
5
/
6
keys to select a particular title to Edit,
then press
ENTER
. Use the
5
/
6
keys to select
A -
B Erase
from the Edit menu.
The title selected will begin to play. Use the
3
/
4
keys to navigate to the "Set A" window, press
ENTER to set point (A). To set point (B), press
ENTER again. Thumbnail pictures will allow you to
view each point created.
Use the
3
/
5
/
6
keys to select
FORMAT DISC
from
menu on the left.
Use the
5
/
6
keys to select
FINALIZE DISC
from
the Edit menu.
A - B Erase allows you to erase a portion of a title. You
simply mark the beginning point (A) and the end point
(B) of the segment to be erased and select OK.
Use the on-screen keyboard to rename the title.
Select
ENTER
on the on-screen keyboard to save.
Select
OK
, then press
ENTER
to confirm.
Select
OK,
then press
ENTER
to confirm.
Select
OK,
then press
ENTER
to confirm.
NOTE: Only DVD+RW and unused DVD+R discs
can be FORMATTED. Only DVD+RW discs can be
erased and re-used.
Select
OK,
then ENTER to confirm.
NOTE: Once you FINALIZE a DVD +R disc, it can
be played on other DVD players. However, you may
no longer add any content. DVD+RW discs do not
need to be finalized.
Renaming a Title
1
1
Format / Erase a Disc
Finalize Disc
A - B Erase
TITLE Video2
2:39AM 12/08/04
0:05:30 SP
TITLE Video2
2:39AM 12/08/04
0:05:30 SP
TITLE Video1
11:07PM 12/09/04
0:15:01 SP
TITLE Video1
11:07PM 12/09/04
0:15:01 SP
TITLEVideo1
12:32PM 12/10/04
1:11:21 SP
TITLE Video1
12:32PM 12/10/04
1:11:21 SP
Press EDIT to edit
01/02
01/02
During playback, press the
DISPLAY
key to display disc
information such as audio & subtitles and navigate
through the Titles and Chapters on a recorded disc.
Delete
Protect
Rename
A-B Erase
Format Disc
Finalize Disc
Press EDIT to quit
TM
Delete
Protect
Rename
Format Disc
Finalize Disc
A-B Erase
A-B Erase
Press EDIT to quit
Set B
OK
Cancel
Select
OK,
then press
ENTER
to erase.
Summary of Contents for DVR 1200
Page 28: ......


