7
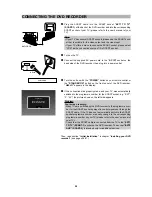
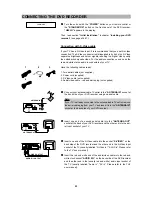
Turn the unit on with the
“POWER”
button on your remote control or
the
“STANDBY/ON”
button on the front panel of the DVD recorder.
“HELLO”
appears in the display.
Then, read section
“Initial installation”
in chapter
“Installing your DVD
recorder”
(see pages 26-27).
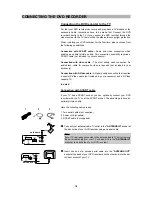
Connection with S-Video cable
If your TV has a S-Video input, it is recommended that you use this video
connection. The S-Video connector is distinguishable by its 4 pins. S-Video
separates brightness and colour signals, resulting in a higher video quality
than standard composite video. For the audio connection you can use the
red and white stereo audio in connectors of your TV.
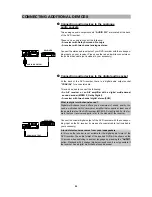
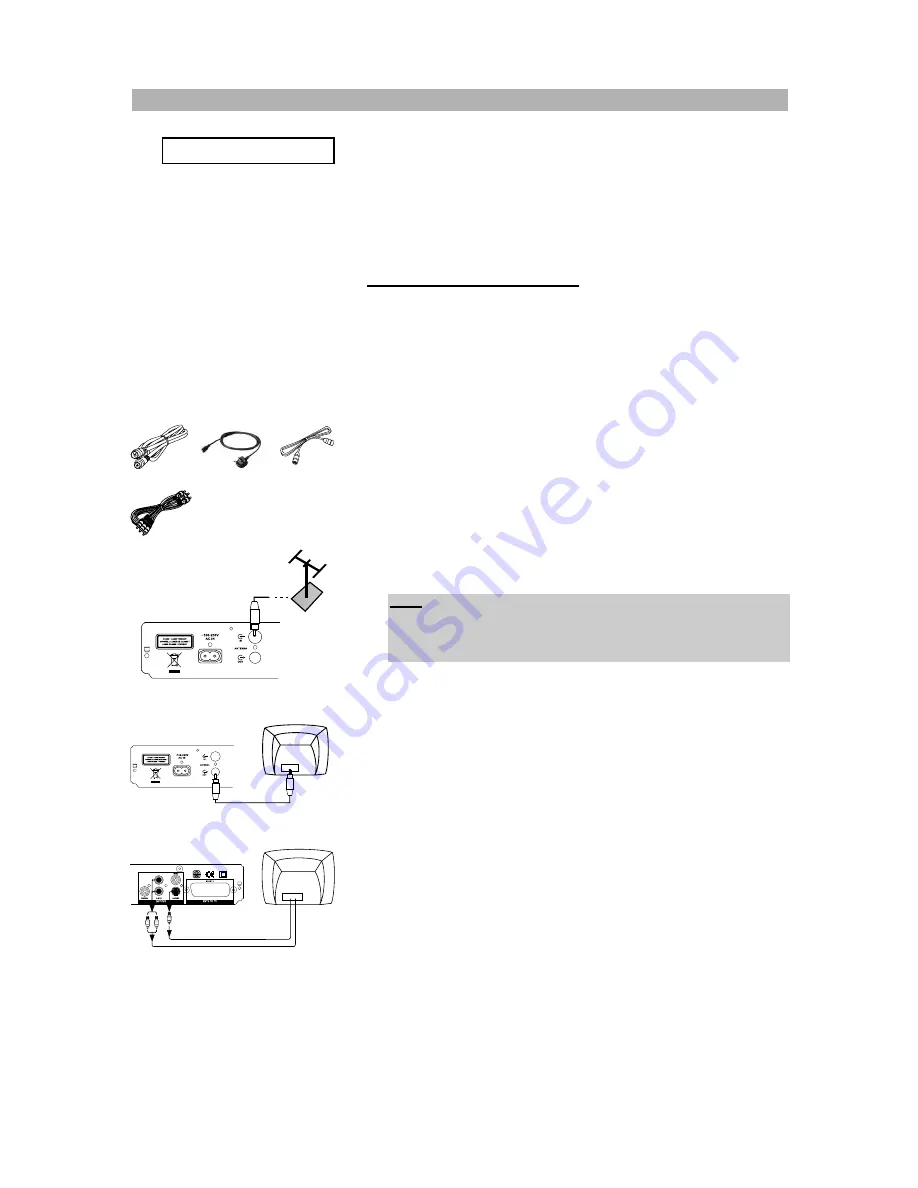
Have the following cables ready:
1. Two aerial cables (not supplied)
2. Power cord (supplied)
3. S-Video cable (not supplied)
4. Audio/video cable - red and white plug (not supplied)
1
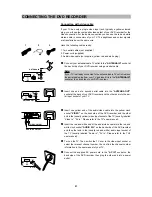
Connect your antenna/cable TV outlet to the
“ANTENNA IN”
socket at
the back side of your DVD recorder using an aerial cable.
2
Insert one end of a second aerial cable into the
“ANTENNA OUT”
socket at the back of your DVD recorder and the other end into the aer-
ial input socket of your TV.
3
Insert one end of the S-Video cable into the socket
“S-VIDEO”
on the
back side of the DVD recorder and the other end in the S-Video input
socket of the TV (usually labelled “S-Video in”, "SVHS in”. Please refer
to the TV's user manual).
4
Insert the red and white end of the audio/video cable into the red and
white cinch socket
“AUDIO R/L”
on the back side of the DVD recorder
and the other end in the (usually red and white) audio input socket of
the TV (usually labelled “Audio in”, "AV in”. Please refer to the TV's
user manual).
22
CONNECTING THE DVD RECORDER
4
1
2
3
ANTENNA IN
ANTENNA OUT
HELLO
S
R
L
AUDIO R/L OUTPUT
S-VIDEO OUTPUT
Note:
If your TV is already connected to the antenna/cable TV outlet, remove
the aerial cable plug from your TV and insert it into the
“ANTENNA IN”
socket at the back side of your DVD recorder.


