background image

INTRODUCTION 

9

Compatibility

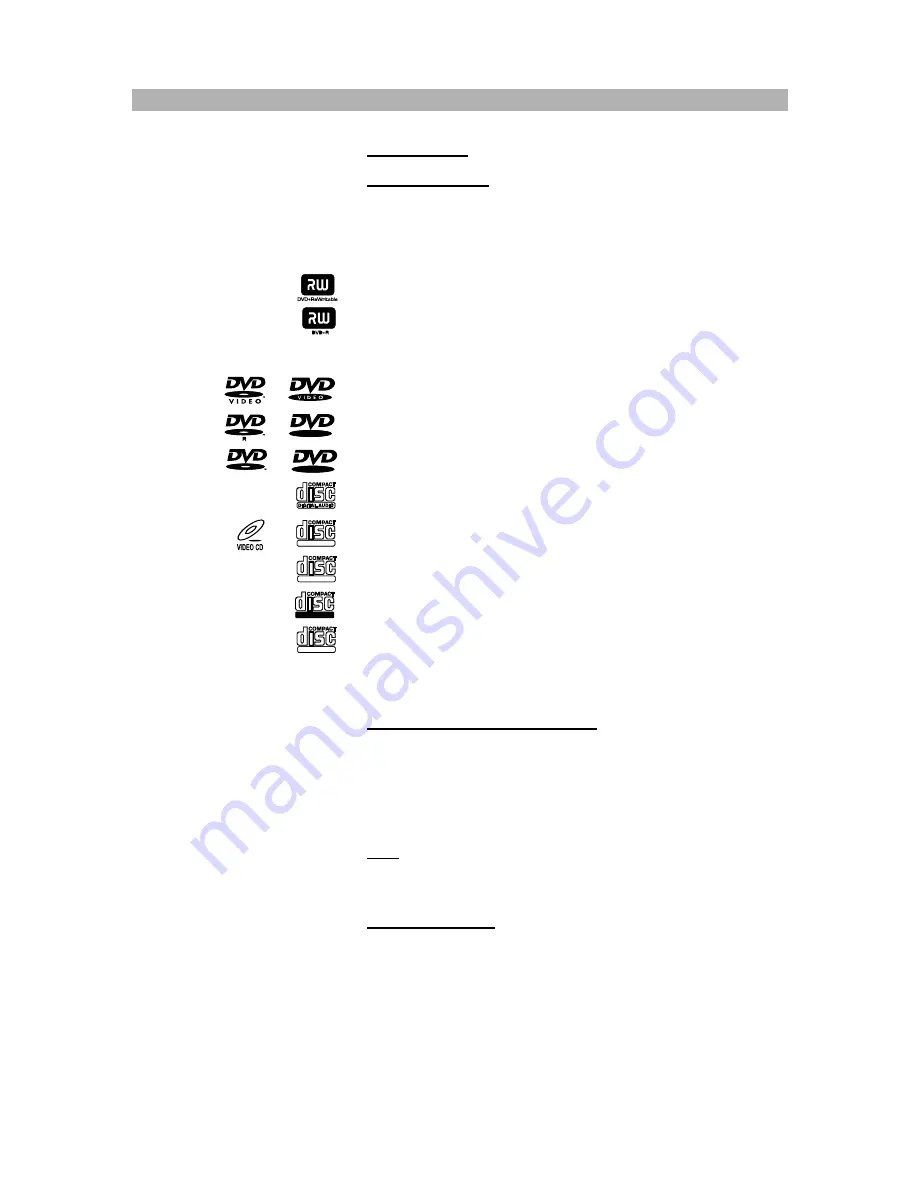
Usable disc types

The following discs can be used in your DVD recorder for playback and
recording:

Recording and playback:

DVD+RW (Digital Versatile Disc + rewritable)

DVD+R (Digital Versatile Disc + recordable)

Playback only:

DVD-Video (Digital Versatile Disc)

DVD-R (DVD-Recordable)

DVD-RW (DVD-Rewritable)

Audio CD (Compact Disc Digital Audio)

Video CD (format 1.x/2.0)

Super Video CD

CD-R (CD-Recordable) with audio/MP3/JPEG/MPEG/WMA content

CD-RW (CD-Rewritable) with audio/MP3/JPEG/MPEG/WMA content

Kodak Picture-CD

Compatibility of PC created discs

When recording a disc with a PC, even if it is recorded in a compatible for-
mat as listed above, there may be cases in which the disc cannot be played
in this device due to the application software setting used to create the
disc. In this case, please contact the software publisher for more detailed
information. 

Note:

Don’t load any exceptional discs in the unit, as this will cause null

playback or other problems (also with copy-protected Audio CDs).

Data transfer rates

The maximum speed for playing CDs is 4x. The corresponding data trans-
fer rate is 600 KB/sec. The maximum speed for playing DVDs is 2x with a
data transfer rate of 2700 KB/sec.

R

R W

R W

DIGITAL VIDEO

SUPER VIDEO

Recordable

ReWritable

Summary of Contents for DVR 1600

Page 1: ...DVR 1600 USER MANUAL ...

Page 2: ...V channels 30 Setting the language 32 Setting the date and time 32 Playback 33 General playback hints 33 Inserting a disc 34 Playing a DVD Video disc 34 Playing a DVD R RW or DVD R RW disc 35 Playing a Super Video CD 35 Playing an Audio CD 36 Playing an MP3 disc 36 Playing a WMA CD 37 Playing a Picture CD 37 Playing a mixed format disc 38 Playing functions 39 Selecting a section of the disc to pla...

Page 3: ...a title 56 Protecting unprotecting a title 57 Renaming a title name 58 Deleting A B 58 Formatting a disc 59 Finalizing DVD R discs 60 Programming a recording timer 61 General information 61 Non interruptible tasks 61 Programming a recording 62 Editing deleting a programmed recording 63 Problem solving for programmed recordings 64 User preferences 65 Important notes for moving in the setup menu 65 ...

Page 4: ...erwise damaged turn off the power and disconnect the AC power cord If smoke odours or noises are emitted from the unit turn off the power and disconnect the AC power cord The power cord must be routed properly to prevent people from stepping on them or objects from resting on them Check the cords at the plugs and product Do not damage break or alter the electric cord Do not cover the cord under a ...

Page 5: ... exposed to dripping or splashing and no objects filled with liquids such as vases shall be placed on the device Keep magnetic objects such as speakers distant from the DVD recorder Condensation Moisture may form on the lens immediately after a heater has been turned on in a steamy or very humid room or if the unit is moved from a cold environment to a warm one If moisture forms inside this unit i...

Page 6: ...osure to beam This DVD recorder is a class 1 laser product However this DVD recorder uses a visible laser beam which could cause hazardous radiation expo sure if directed Be sure to operate this DVD recorder correctly as instruct ed When this DVD recorder is plugged into the plug socket do not place your eyes close to the opening of the disc tray and other openings to look into the inside of this ...

Page 7: ...ecorded on a Digi tal Versatile Disc DVD If the number of the destination area on a DVD does not correspond with the number of the destination area of this DVD recorder this device won t be able to play the corresponding disc The device is set to region code 2 You can find the region code on the back side of the DVD cover DVD s must be labelled with ALL for all regions or with 2 for region 2 for t...

Page 8: ...ompatibility of PC created discs When recording a disc with a PC even if it is recorded in a compatible for mat as listed above there may be cases in which the disc cannot be played in this device due to the application software setting used to create the disc In this case please contact the software publisher for more detailed information Note Don t load any exceptional discs in the unit as this ...

Page 9: ...lutions which contain benzene thinner or any other vaporizing substances as they may damage the disc surface Storage of discs To prevent discs from getting bent or deformed they should be vertically kept in the disc storage case To prevent damages avoid placing them in a car which may contact direct sunlight Also avoid leaving discs in excessively cold or humid envi ronments For more information r...

Page 10: ...completely off please remove the power cord from the device Please note that the unit consumes a slight amount of power in standby mode 7 DV IN i Link DV socket digital video input IEEE 1394 Fire Wire for connecting digital camcorders To select use the SOURCE button and select DV 8 AUDIO IN L white Left audio input socket for connecting devices with analogue 2 channel audio output e g DVD player c...

Page 11: ...red socket for connection to a television AV receiver beamer or stereo system 5 VIDEO OUTPUT Composite video output yellow socket for connecting to a TV with a video input CVBS composite video by an audio video cable 6 REGION CODE Indicates that the device is set to DVD region code 2 7 ANTENNA OUT Aerial output for connecting to the TV 8 EXT2 AUX SCART socket 2 for connecting additional devices e ...

Page 12: ... Currently playing I Paused 3 MULTI FUNCTION DISPLAY Indicates the time in standby mode TEXT LINE Indicates the playback time of the disc title or track Indicates the chapter or track number Indicates the programme number of the TV channel Display of information warnings 4 TIMER Indicates that a recording timer has been programmed 5 RECORD Indicates that a recording is in progress 6 PHOTO Indicate...

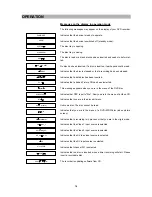
Page 13: ...e in the menu of the DVD disc Indicates that PBC is set to On Now you are in the menu of a Video CD Indicates that you are in the disc edit menu Unknown disc The disc cannot be read Indicates that you are in the menu of a DVD R RW disc index picture screen Indicates that a recording is in process or that you are in the virgin mode Indicates that the Video 1 input source is selected Indicates that ...

Page 14: ...with a new Lithium battery CR2025 3V To replace the remote control s bat tery the battery holder must be removed Be sure to take note of the polar ity marking on the battery The side must face the bottom of the remote the side without any buttons 1 Use your thumbnail to slide the clip on the battery holder to the right side and pull out the battery holder simultaneously in order to remove the batt...

Page 15: ...er direct sunlight as the heat may cause deformation of the unit When the remote sensor window is exposed to direct sunlight it may not work properly If so please operate the remote control closer to the remote sensor window or change the angle of the lighting or device Important notes about the battery If the unit is not used for a longer period of time we recommend you to remove the battery Plea...

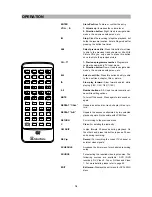
Page 16: ...il view mode only supported on Picture CDs SUBTITLE For DVDs this can be used to display subtitles and select the language to use AUDIO Interchanges the audio settings depending on the disc content on DVD and VCD discs ZOOM For zooming in and out of the picture G Fast backward Fast backward search while play ing 2x 4x 8x 16x 32x Not possible with JPEG files CH C 1 Next programme number Programme n...

Page 17: ...r numeric val ues while setting options MUTE To turn off the sound Press again to turn sound on again REPEAT 1 ALL Repeats an entire disc track chapter title or pic ture REPEAT A B Repeats the sequence stipulated by two selected playback points Not possible with JPEG files RETURN For returning to the previous menu C Clear For deleting the last entry CM SKIP Jumps forward 30 seconds during playback...

Page 18: ...ry Connection with S Video cable A higher quality connection that requires a special S Video cable not included in your accessory and a S Video capable TV In detail Connection with SCART cable If your TV has a SCART socket you can optionally connect your DVD recorder with the TV over the SCART socket The advantage is here an optimal picture quality Have the following cables ready 1 Two aerial cabl...

Page 19: ... chapter Installing your DVD recorder see pages 26 27 20 Tips If your TV has several SCART sockets please use the SCART sock et that is suitable for the video output and the video input If your TV offers a menu to choose the SCART socket please select VCR as the connection source of this SCART socket Problem Your screen is empty Many TVs are switched by the DVD recorder to the programme num ber fo...

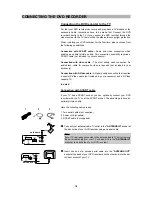
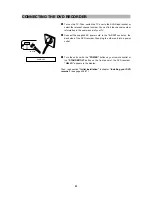
Page 20: ...on the back side of the DVD recorder and the other end in the usually yellow video input socket of the TV usually labelled Video in AV in Please refer to the TV s user manual 4 Insert the red and white end of the audio video cable into the red and white cinch socket AUDIO R L on the back side of the DVD recorder and the other end in the usually red and white audio input socket of the TV usually la...

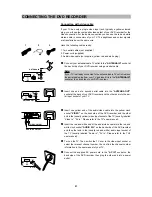
Page 21: ...NTENNA IN socket at the back side of your DVD recorder using an aerial cable 2 Insert one end of a second aerial cable into the ANTENNA OUT socket at the back of your DVD recorder and the other end into the aer ial input socket of your TV 3 Insert one end of the S Video cable into the socket S VIDEO on the back side of the DVD recorder and the other end in the S Video input socket of the TV usuall...

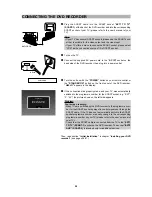
Page 22: ... Connect the supplied AC power cord to the AC IN socket on the back side of the DVD recorder then plug the other end into a power outlet 7 Turn the unit on with the POWER button on your remote control or the STANDBY ON button on the front panel of the DVD recorder HELLO appears in the display Then read section Initial installation in chapter Installing your DVD recorder see pages 26 27 23 1 1 7 HE...

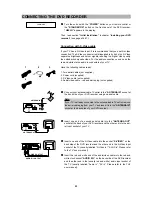
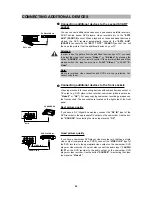
Page 23: ...he DVD recorder to the appropriate DV output on the camcorder Use the but ton SOURCE for selecting the video input source DV Good picture quality If you have a camcorder DVD player video recorder etc that has a single video output composite video CVBS connect the VIDEO IN 2 input of the DVD recorder to the appropriate video output on the camcorder DVD player or video recorder You must also connect...

Page 24: ...ital A receiver with two channel digital stereo PCM Connect the coaxial digital output of the DVD recorder with the correspon ding input on the AV receiver by means of a coaxial cable not included in your accessory R L AUDIO R L OUTPUT RECEIVER 3 4 RECEIVER COAXIAL OUTPUT What is digital multi channel sound Digital multi channel sound offers you a maximum of sound quality You need a multi channel ...

Page 25: ...ite receiver to the aerial cable switch them on The automatic channel search will recognise them and save them No aerial connected Even if you only want to use the DVD recorder to play back or have only connected a satellite receiver you must still com plete the initial installation This is necessary so that the basic settings are stored correctly Once the initial installation is completed you can...

Page 26: ...V system may have been stored for the TV chan nel Read in section Manual TV channel search on page 28 how to change the TV system Problem The DVD recorder cannot find any TV channels while searching Select channel 1 on the TV set Can you see the stored TV channel on the TV set If not check the cable connection from the aerial aer ial socket to the DVD recorder and to the TV set Please have patienc...

Page 27: ...e by pressing the direction button D and press ENTER to enter this page 5 Select Manual search with the button D on your remote control and confirm your selection by pressing ENTER The menu will be opened 6 Highlight the input field PR with the direction button C or D on your remote control and use the number buttons 0 9 to select the pro gramme number that you want to use for the TV channel e g 0...

Page 28: ... on the DVD recorder with the POWER button on the remote control or the STANDBY ON button on the front panel of the DVD recorder 3 Press the SETUP button on the remote control The setup menu appears 4 Select the General setup page by pressing the direction buttons and press ENTER to enter this page 5 Select Automatic search with the button D on your remote con trol and confirm your selection by pr...

Page 29: ...he direction button C or D you can select the TV channel that you want to delete rename or whose order you want to change To leave the Edit channel list option please navigate to the field Exit and press the button ENTER on your remote control Sorting TV channels 1 If you want to change the position of a current TV channel please high light the required TV channel by pressing the direction buttons...

Page 30: ...remote control The new TV channel name is stored 5 If you do not want to save the new TV channel name please highlight the field Cancel and press the button ENTER on your remote con trol The virtual keyboard will disappear and the previous TV channel name retains on the TV screen 31 Recording Audio Video Disc Ge He Edit Aut Manual search OSD language Menu language Add Rename Exit 03 C3 Off 04 C4 O...

Page 31: ...he direction button C or D and confirm with the button ENTER 7 To end press the SETUP button Setting the date and time If the display shows an incorrect time the time and date have to be set manually 1 Press the SETUP button on the remote control The setup menu appears 2 Select the General setup page and press ENTER to enter this page 3 Use the button D to navigate down to the Clock setting option...

Page 32: ... so that certain steps are required before the disc can be played or so that only limited operation is possible during playback When an appears on the screen the selected fea ture is not possible The screen is showing Region error Since DVD films are normally not released in all parts of the world at the same time all DVD recorders have a specific region code Discs can be given an optional region ...

Page 33: ... does not start automatically press the Play Pause button A I on the remote control or on the front of the DVD recorder In the display will appear the chapter and time elapsed 2 To stop the disc press the Stop button J on the remote control On the VFD display appears STOP 3 To eject the disc press the Open Close button K on the remote con trol or on the front of the device How to insert a double s...

Page 34: ...ng 1 Insert a Super Video CD If playback does not start automatically press the Play Pause button A I on the remote control or on the front of the DVD recorder 2 If a menu appears on the screen use the number buttons 0 9 to select the menu option you want If the PBC menu contains a title list the desired title can be chosen directly 3 Stop playback using the Stop button J Additional playing functi...

Page 35: ...he button ENTER to start the playback Note for Audio CD display If the TV is on press the button DISPLAY on your remote control to display the Audio CD screen see illustration on the left side For more information please refer to page 46 Additional playing functions With the button H or F you can select the previous or next track When playing an Audio CD you can also use the repeat functions For t...

Page 36: ...on the screen With Kodak Picture CDs playback starts directly 2 When pressing the Stop button J you will enter the thumbnail mode Here you may start the slide show and enter the remote key function menu see lower line 3 Stop playback using the button MENU A Additional playing functions With the button H or F you can select the previous or next track You can also use the number buttons 0 9 on the r...

Page 37: ...extension and WMA files with wma 2 Select the required folder using the direction button C or D and press ENTER to confirm your selection The files of the correspon ding folder will now be shown on the screen Select now the file you want to play by pressing again the direction keys C and D Press then ENTER or the Play Pause button A I to start playback 3 Stop playback using the Stop button J with ...

Page 38: ... is available on Audio CDs DVD Video discs and Super Video CDs You can jump directly to a specified time If for example the length of a track is 4 minutes and 37 seconds you can start playback from the 4th minute so that you only listen to the last 37 seconds 1 Press the button GOTO on your remote control 2 Use the number buttons 0 9 on your remote control to enter the time that you want to move t...

Page 39: ...of the current chapter or track press the button H 3 To skip to the beginning of the previous chapter or track press the but ton H twice With JPEG discs you only need to press this button once to skip to the previous picture Using the repeat features1 The repeat features allow you to repeat a section of a disc once it has fin ished playing According to the disc type an entire disc a single track a...

Page 40: ...n 3 To check the status of the repeat mode when used with JPEG MPEG MP3 and or WMA files press the button DISPLAY 3 Repeating a section of a disc A B A section of a disc can be repeated by defining two points A B This fea ture allows you to select where you want the repeat to start and then the section where you want the repeat to stop 1 As the disc is playing press the button REPEAT A B on your r...

Page 41: ...s that can be achieved are 2X 4X 8X 16X and 32X 2 To play the disc at different speeds in reverse use the button G on your remote control The speeds that can be achieved in reverse are 2X 4X 8X 16X and 32X 3 To stop playing the disc at different speeds please press the Play Pause button A I on your remote control or on the front of the device Slow play When a DVD Super Video CD or MPEG disc is pla...

Page 42: ...hich shows the zoom factor and the zoomed in field To zoom out please press the button ZOOM again until the required size is reached 1 2 1 3 1 4 2 When used with Picture CDs Zoom 100 is displayed in the top left corner of the screen To zoom in please press the button E You can zoom in the picture 125 150 and 200 To zoom out please press the button G until the required size is reached possible are ...

Page 43: ...e displayed in the top left field of the screen 3 Press ENTER to play the selected marker 4 If you set the marker to the wrong point you can delete it by pressing C on your remote control Navigate to the marker which you want to delete using the direction buttons B and A and press C 5 To exit the bookmark menu please press the BOOKMARK key again Displaying disc information Different playback infor...

Page 44: ...dicates the currently selected audio format Select the required audio set ting by using the direction buttons C and D The available audio set tings are dependent on the available audio tracks on the DVD Video disc or DVD R RW disc Subtitles Indicates the subtitle status You can change the subtitle language depending on the disc content by using the direction buttons C and D or you can switch off t...

Page 45: ...en L Mono There will only be output of the left signal on the left and right loudspeaker R Mono There will only be output of the right signal on the left and right loudspeaker Stereo Sets the stereo signal Mix Mono The left and right signal will be mixed and put out mixed on the left and right loudspeaker PBC Here you can set the Playback Control Function PBC for Super Video CDs to PBC On or PBC O...

Page 46: ...itial installation or the main language of the DVD You can change the audio track of the current disc at any point of time 1 You can switch between the various languages and audio modes on DVD discs with the AUDIO button on your remote control On Video CDs you can only change the audio mode 2 Press the AUDIO button while a disc is playing to cycle between the languages and soundtracks available on...

Page 47: ...ted 2 To change the language that the subtitles are displayed in press the button SUBTITLE again until the required language is displayed To turn the subtitles off press the SUBTITLE button until Off is dis played on the screen 3 Playback continues in the new subtitle language Changing the camera angle If a pre recorded DVD Video disc contains sequences recorded from differ ent camera angles you c...

Page 48: ...ion please press again the button PBC until PBC Off is displayed on the screen Only Video CDs with playback control can use this playing function Due to the differences in the disc design the operation method may be different Please refer to the instructions of each disc When the PBC function is acti vated pressing the button RETURN will skip back to the previous level of the menu Random play When...

Page 49: ...on keys If you have select ed the desired picture press the button ENTER on your remote con trol to start playing 4 If you are in the preview window mode you can also select a menu indi cating the remote key functions for playing JPEG files Please navigate with the direction keys to the field and press ENTER A menu will now be displayed on the screen indicating you all available remote key functio...

Page 50: ...omatic switch off to start a recording manually but stop it automatically Displaying information during recording Interrupt recordings Pause Which discs can be used for recordings With this DVD recorder you can record on two types of DVD DVD RW This disc can be written to several times and then the contents can be deleted DVD R This type of disc can only be recorded once If you want to play this d...

Page 51: ...ideo input source An additional device with S Video out put has to be connected to the SCART 2 socket EXT2 AUX on the rear panel of the DVD recorder The S Video signal will be transferred over the SCART cable pin 15 and 20 when setting to S Video On the VFD display appears S_VIDEO DVD DVD recorder mode To play back an inserted disc DV DV input source A digital camcorder has to be connected to the ...

Page 52: ...aximum recording time for a disc 1 Press the button SETUP on your remote control and enter the setup page Recording 2 Select Recording quality and press the button A or ENTER to access the recording quality menu 3 Select the required recording quality with the direction buttons and con firm your selection by pressing ENTER on your remote control 53 Tip How to select set chapters 1 Press the button...

Page 53: ...ng should be started A dialog box appears asking if the disc should be formatted or the disc should be ejected This disc cannot be used for recordings until the entire disc is format ted Select OK to format the disc The disc will be erased 0 C 9 8 7 A B REPEAT RETURN EDIT CM SKIP CM SKIP REC SCHEDULE SOURCE DV L R VIDEO 2 TUNER Video 1 S Video TV SOURCE Tuner Pr no 1 Press or SOURCE key to select ...

Page 54: ... the following information recording date and start time of your recording selected video input source e g Video 2 remaining time for your recording according to the selected recording quality elapsed time recording quality for your recording Interrupt recordings Pause 1 During recording press the Play Pause button A I to avoid record ing the commercial The icon I appears on the VFD display 2 To c...

Page 55: ...ind out how to change a name Deleting A B to delete point A to point B within a title Formatting a disc to format the disc in order to make it compatible to your DVD recorder Finalizing DVD R discs to finalize a DVD R disc for being able to play it in other DVD players Deleting a title You can delete individual recordings from a disc Proceed as following 1 Select the title to be erased by pressing...

Page 56: ...screen and the required title is protected 6 In the lower right corner of the protected title appears the icon to inform you that this title is protected In this status you are only able to play the title respectively to unprotect the title again or to format the disc All other options in the edit menu are not possible 57 EDIT Protect this title OK Cancel TITLE Car 2 2 58 03 22 05 0 20 05 SP Delet...

Page 57: ... and press ENTER 5 To confirm the new title name please highlight the field Enter and press the button ENTER on your remote control A status bar will appear on the screen and the new title name is stored 6 If you do not want to save the new title name please highlight the field Cancel and press the button ENTER on your remote control The virtual keyboard will disappear and the previous title name ...

Page 58: ... the TV screen See illustration on the left 2 To format the disc navigate to the field OK with the direction buttons and press then ENTER to confirm The format disc progress bar appears Please wait some seconds First PROCESS appears on the VFD display then ROOT If the formatting is finished successful ly the title menu of the formatted disc with the free space appears on the TV screen 3 If you do ...

Page 59: ... with the direction buttons and press then ENTER to confirm 3 The finalize disc progress bar appears Please wait some seconds If the finalizing is finished successfully on the TV screen appears the title menu of the finalized disc 4 If you do not want to finalize the disc please select Cancel and press ENTER on your remote control to cancel this operation Note After finalizing the disc it will not...

Page 60: ...R discs firmware update What is VPS PDC With VPS Video Programming System PDC Programme Delivery Con trol the TV station controls the start and duration of TV channel recordings If a TV programme starts earlier or ends later than it was scheduled the DVD recorder will still switch itself on and off at the correct times What do I need to know about VPS PDC Usually the start time is the same as the ...

Page 61: ...urrence mode The recurrence mode indicates how often and when your scheduled recording shall start You can select between the following recurrence modes by pressing the buttons C and D in the field Repeat Once Recording that will only be made once Mo Fr Recordings that will be repeated daily from Monday to Friday Daily Recordings that will be repeated daily Weekly Recordings that will be repeated ...

Page 62: ...he TV 2 Switch on the DVD recorder and then press the button SCHEDULE on your remote control 3 Select the programmed recording timer you want to check change or delete by pressing the button C or D Then press the button ENTER on your remote control 4 A further display appears on the screen asking you if you want to delete or edit your programmed recording 5 Highlight the field Edit and press the b...

Page 63: ...e time for the recording is overdue Please check the date start time and length of the programmed recording The information for two programmed recordings overlap If you ignore this error message the TV programme with the earlier start time will be recorded first You will miss the start of the second pro gramme Change the information for one of the recordings Delete one of the recordings If this er...

Page 64: ... setup menu is divided into the following menus Recording Audio Video Disc General Help The setup menu can be accessed during disc playback Nevertheless you may not have access to all options all the time For example you need to select the Tuner mode to have access to the tuner settings Press the button SETUP on the remote control to display the setup menu The menu appears By pressing the buttons ...

Page 65: ...rs Extended Play better than VHS quality Recording time approx 240 minutes SLP approx 6 hours Super Long Play lower than VHS picture quality Recording time approx 360 minutes Chapter marker If this feature is activated each 5 to 15 minutes chapter markers will be set automatically during recording That means a new chapter will start on this place For more details see the section Inserting chapter ...

Page 66: ...le of decoding this signal type Stereo If you plan to use the stereo analogue outputs for a connection to a TV or receiver you must enable this setting to downmix the 5 1 channel soundtracks of most DVD movies to a stereo format If you set to stereo the left signal consists of the front left signal plus surround left signal and sum signal of the centre and subwoofer The right signal consists of th...

Page 67: ...ith normal size The picture is displayed in full height with the sides trimmed 4 3 letterbox This setting will enable the Letterbox format where the movie is presented in wide screen format with black lines at the top and bottom of the screen 16 9 If you are using a wide screen TV set to the option 16 9 to match the aspect ratio of your TV SCART output By default the recorder is set to RGB off Sel...

Page 68: ...s ENTER to enter a menu Use the button D or C to select the required disc setting and press ENTER or A to confirm your selection To leave a submenu press the button RETURN or B on your remote control Password In the Password menu you can activate or deactivate the password to control the parental lock Select On to activate the password or Off to deactivate it You are prompted for a password This o...

Page 69: ...valent ratings are listed below 1 Kid safe Suitable for all audiences 2 G Suitable for general audiences 3 PG Parental guidance suggested 4 PG 13 Parental guidance suggested unsuitable for children under 13 5 PGR Parental guidance recommended implications or very brief discreet language or situations 6 R Restricted violence adult language and situation unsuit able for young viewers 7 NC 17 Adult t...

Page 70: ...ve a submenu press the button RETURN or B on your remote control Edit channel list In this option you can edit the TV channel list Select this option with the button ENTER on your remote control and on the screen appears the TV channel list Here you can sort add delete and rename TV channels For more information please refer to page 30 Sorting adding deleting and renaming TV channels in chapter In...

Page 71: ... the required language Please refer to the language codes on the next page Audio language1 Selection of the desired audio language for playback If the required lan guage won t be shown in this menu please select the option Other and key in the language code of the required language Please refer to the lan guage codes on the next page Recording Audio Video Disc General Help Edit channel list Automa...

Page 72: ...reek 6978 English 6979 Esperanto 6983 Spanish 6984 Estonian 6985 Basque 7065 Persian 7073 Finnish 7074 Fiji 7079 Faeroese 7082 French 7089 Frisian 7165 Irish 7168 Scots Gaelic 7176 Galician 7178 Guarani 7185 Gujarati 7265 Hausa 7273 Hindi 7282 Croatian 7285 Hungarian 7289 Armenian 7365 Interlingua 7378 Indonesian 7383 Icelandic 7384 Italian 7387 Hebrew 7465 Japanese 7473 Yiddish 7487 Javanese 7565...

Page 73: ...n saver In this menu you can enable or disable the screen saver The screen saver protects your TV s cathode ray tube from screen burn that could result from a static image being displayed for a prolonged period The screen saver will automatically start within a few minutes of video inactivity if you select the On setting Version Highlight the menu point Version On the screen will now be displayed ...

Page 74: ...d on the screen Please see below the questions listed in the Help menu 1 How to setup TV channels 2 What is recordable DVD media 3 How to set recording parameters 4 How to record a TV program 5 How to record from a camcorder with DV outputs 6 How to record from a camcorder with audio video outputs 7 How to record from a VCR 8 How to setup a scheduled recording 9 Why do I see a caution sign when pr...

Page 75: ...econds and re insert it Make sure there are no obstacles between the remote control and the device The battery may be used up Change the battery in the remote control You could be using the remote control too far away Try closer to the recorder Make sure the video cable connecting the DVD recorder to your TV is secure The TV is not set to the DVD Video mode Set the TV to the audio video programme ...

Page 76: ...ignal is unstable No recording can be made A message appears on the TV screen A finalized finished DVD R has been inserted Change the disc No disc has been inserted for recording A message appears on the TV screen A copy protected disc has been inserted for recording It is not possible to copy a copy protected disc On the TV screen appears the message Signal is copy protected You have set the wron...

Page 77: ...ecorder Please check if the DVD recorder is connected to a VCR or a TV Video Set If so there will be the Macrovision copyright protection Please directly connect your device to the TV and not to the VCR The emergency eject feature allows you to remove a disc from the disc drive in the very rare case that the tray will not open Disconnect the recorder from the power supply On the bottom of your rec...

Page 78: ...tice All of the company or product names mentioned in this manual are the trademarks or registered trademarks of their respective holders DVD Video DVD R DVD RW DVD R DVD RW Audio CD Video CD Super Video CD CD R CD RW MP3 Kodak Picture CD JPEG MPEG WMA NTSC PAL CVBS RGB S Video CVBS S Video DV in IEEE 1394 AC 100 230V 50 60Hz 30W 4W lower power 2 5W standby 350mm x 55mm x 240mm 2 07 kg Channel and...

Page 79: ...igital socket Dolby Digital A digital surround sound system which is able to transfer up to 5 sound channels plus a sub bass channel 5 1 or 3 2 01 Developed by Dolby Lab oratories dts not supported Digital Theatre System Digital sound system which works with 5 1 chan nels and corresponds to Dolby Digital on the first view It differs regarding the data reduction The dts system works with higher dat...

Page 80: ...essed audio format MP3 files recorded on CD R or CD RW media are suitable for playback on your DVD recorder MPEG Moving Picture Experts Group Compression method that is used for digital video records e g for Video CDs or CDs NTSC National Television System Committee television norm among others in the USA and Japan from 525 lines only 480 lines will be transferred with a picture changing frequency...

Page 81: ...e Video CD It uses MPEG 2 video compression with a higher and variable data rate VCD Video CD A digital video disc format that uses MPEG 1 video compression The picture quality is roughly that of VHS tapes VPS Video Programming System VPS is used to control the start and duration of TV channel recordings If a TV programme starts earlier or ends later than it was scheduled the DVD recorder will sti...

Page 82: ...ease refer to our website http www cyberhome de en FAQ html or contact Sales Support CyberHome Europe AG Applied House Building 3 Fulflood Road Havant Hants PO9 5AX UK Phone 44 0 2392 47 47 74 E mail jgould cyberhome europe co uk EUROPEAN HEADQUARTERS CyberHome Europe AG Weststraße 42 40721 Hilden Germany E mail support cyberhome de Internet http www cyberhome de ...

Page 83: ...Order no CH1600 301 002 Revision 1600 01 ENG ...

Reviews: