7
WHAT NEXT?
1. Create Customer Account and register Appliance
Browse to http://customer.cyberoam.com and click Register and follow the on-screen steps.
It creates your customer account as well as register your appliance.
To subscribe for free 15-days trial subscription of Web and Application Filtering, IPS, Anti Virus and
Anti Spam, browse to http://customer.cyberoam.com and login with the credentials provided at the
time of account creation.
2.
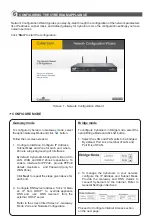
Access Cyberoam Web Admin Console
Browse to https://<IP address of cyberoam> and log on using the default username (admin) and
password (admin).
Note: Internet Explorer 7+ or Mozilla Firefox 1.5+ is required to access the Cyberoam Web Admin
Console.
3.
Go to menu System Maintenance Licensing page and synchronize the registration details.
Registration and subscription details are displayed only after synchronization.
4.
Configure the correct firewall rule for your Domain Name Server (DNS). You may not be able to
access Internet if not configured properly.
5.
Go to Firewall Rule Rule and edit default firewall rules to enable virus scanning.
6.
Set authentication parameters
Go to Identity Authentication Authentication Server to define the authentication parameters.
7.
Access Help
For accessing online help, click the Help button or F1 key on any of the screens to access the
corresponding topic's help. Use the Contents and Index options to navigate through the entire online
help.
Congratulations!!!
This finishes the basic configuration of Cyberoam.
Your network is now protected from Internet-based threats and access to Adult contents, Drugs, Crime and
Suicide, Gambling, Militancy and Extremist, Violence, Weapons, Phishing and Fraud and URLTranslation
sites are blocked.
Visit following links for more information to configure Cyberoam
Technical Documentation -
http://docs.cyberoam.com
Cyberoam Knowledge Base -
http://kb.cyberoam.com
Cyberoam Security Center -
http://csc.cyberoam.com
Cyberoam Upgrades -
http://download.cyberoam.com
Additional Resources


