CyberOptics Corporation
67
Main Electrical Panel
Replacing the Conveyor Clamp Hall Effect Switch
Use this procedure to replace the hall effect switch on each of the conveyor clamp cylinders. This
procedure can be performed with access to the left/right of the machine in production line. This
section shows the procedure performed when the machine is not in production line.
Parts
Hall Effect Switch
➢
To replace the hall effect switch
1. Turn off all electrical power to the system. For more information, refer to the section
2. Make a reference mark on the side of the conveyor clamp cylinder to indicate the switch
position.
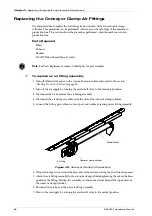
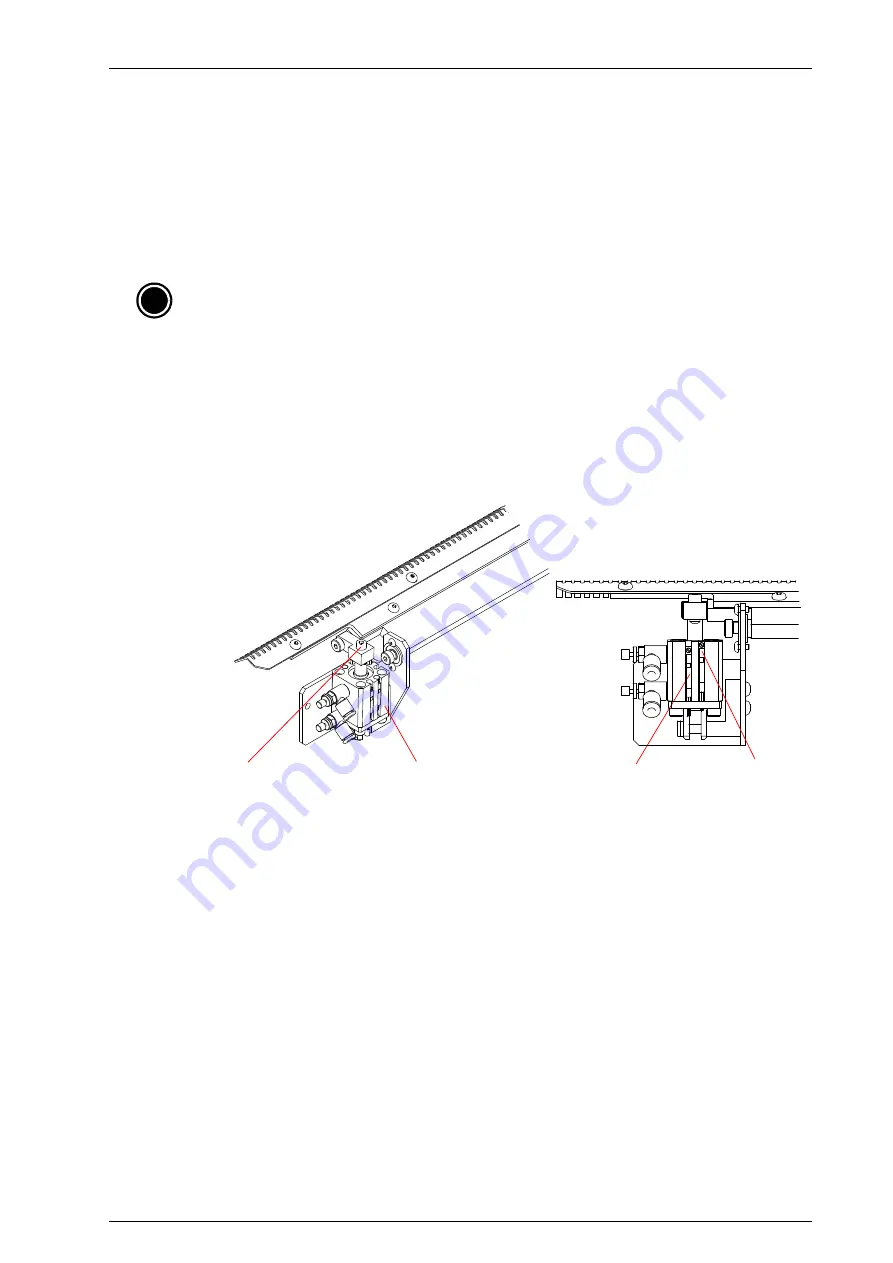
3. Loosen the screw that attaches the switch to the conveyor clamp cylinder.
Figure 50.
Conveyor Clamp Hall Effect Switch
4. Remove the screw from the top of the conveyor clamp cylinder using a 5/16 inch hex
wrench. Support the clamp surrounding the screw with a ½ inch wrench to avoid bending
the shoulder screw.
5. Flip the conveyor clamp cylinder away from the conveyor rail.
6. Slide the switch out of the groove on the side of the cylinder.
7. Unscrew the switch cable connector.
8. Slide the new switch into the groove on the side of the cylinder.
9. Flip the cylinder back up to the conveyor rail.
10. Reattach the screw on the top of the cylinder, using a 5/16 inch wrench to support the clamp.
11. Position the switch on the side of the cylinder using the reference mark and tighten the screw.
12. Attach the cable connector.
i
Note:
For Parts Replacement, contact CyberOptics for part numbers.
SIDE VIEW
Conveyor clamp cylinder
Conveyor clamp
cylinder screw
Hall effect
switch
Hall effect
switch screw
Summary of Contents for SE500CP
Page 1: ...SE500CP Hardware Manual ...
Page 6: ...Contents vi SE500CP Hardware Manual ...
Page 10: ...x SE500CP Hardware Manual ...
Page 170: ...Index 160 SE500CP Hardware Manual ...


