background image

3

V1.0

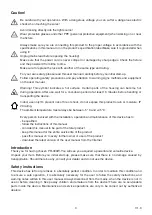
Caution!

Be careful with your operations. With a dangerous voltage you can suffer a dangerous electric 

shock when touching the wires!

Avoid looking directly into the light source!

Wear protective glasses and other PPE (personal protective equipment) when working on or near 

the fixture.

For your own safety, please read this user manual carefully before you initial start-up.

Follow operating safety precautions and pay attention to warning signs methods and equipment 

on the user manual.

Indoor use only! To prevent risk of fire or shock, do not expose this product to rain or moisture. IP 

20 rating.

The ambient temperature must always be between -5° C and +45° C. 

Always make sure you are connecting this product to the proper voltage in accordance with the 

specifications in this manual or on the product’s specification label.Make sure it is grounded when 

using it!

Unplug mains lead before opening the housing!

Make sure that the power cord is never crimped or damaged by sharp edges. Check the fixture 

and the powercord from time to time.

Make sure to replace the fuse with another of the same type and rating.

Warning! This symbol indicates a hot surface. Certain parts of the housing can become hot 

during operation. After use, wait for a cool-down period of at least 10 minutes before handling or 

transporting the device.

Every person involved with the installation, operation and maintenance of this device has to

- be qualified

- follow the instructions of this manual

- consider this manual to be part of the total product

- keep this manual for the entire service life of the product

- pass this manual on to every further owner or user of the product

- download the latest version of the user manual from the Internet

Introduction

Thank you for having chosen PR-300W. You will see you acquired a powerful and versatile device.

Unpack your item. Before you initial start-up, please make sure that there is no damage caused by 

transportation. Should there be any, consult your dealer and do not use the device.

Safety instructions

This device has left our premises in absolutely perfect condition. In order to maintain this condition and 

to ensure a safe operation, it is absolutely necessary for the user to follow the safety instructions and 

warning notes written in this user manual. Always disconnect from the mains, when the device is not in 

use or before cleaning it. Keep away children and amateurs from the device! There are no serviceable 

parts inside the device. Maintenance and service operations are only to be carried out by authorized 

dealers.

Summary of Contents for PR-300W

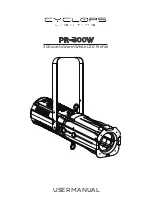
Page 1: ...USER MANUAL PR 300W 300 watts Warm White LED Profile...

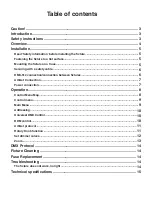
Page 2: ...6 DMX 512 connection connection between fixtures 6 Art Net Connection 7 Power connection 7 Operation 8 Control Menu Map 8 Control menu 9 Main Menu 9 Addressing 10 Universal DMX Control 10 RDM control...

Page 3: ...f the housing can become hot during operation After use wait for a cool down period of at least 10 minutes before handling or transporting the device Every person involved with the installation operat...

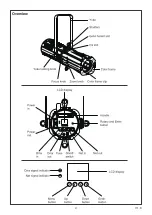
Page 4: ...4 V1 0 Overview...

Page 5: ...l over If you install the fixture in a location where it may cause injury or damage if it falls secure it as directed below with a securely anchored safety cable that will hold the fixture if the prim...

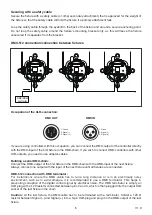
Page 6: ...DMX chain If you wish to connect DMX controllers with other XLR outputs you need to use adapter cables Building a serial DMX chain Connect the DMX output of the first fixture in the DMX chain with th...

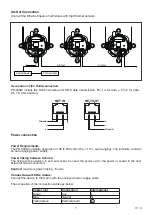
Page 7: ...r Requirements The PR 300W luminaire operates on 100 to 240 volts AC 10 auto ranging The luminaire contains an auto ranging power supply Power linking between fixtures The fixture with powercon in and...

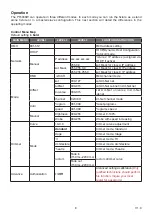
Page 8: ...Net Mask for class C IP address Mode DMX 1 2 3CH DMX channel mode ArtNet Net 000 127 Set Art Net net SubNet 000 015 Set Art Net subnet in Art Net net Universe 000 015 Set Art Net universe in Art Net s...

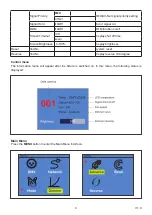
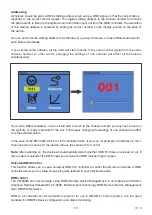
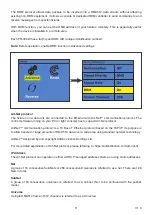
Page 9: ...Timeout 30S Display shut off time Never Screen Brightness 10 100 Display brightness Reset Yes No System reset Reverse Yes No Display reverse 180 degree Control menu The information menu will appear a...

Page 10: ...ave set based on the quantity of control channels of the unit That means changing the settings of one channel will affect only the selected fixture In the case of the PR 300W which is 1 2 3 channels f...

Page 11: ...nning on your PC or light console has to support Art Net protocol Art Net communication protocol is a 10 Base T Ethernet protocol based on the TCP IP Its purpose is to allow transfer of large amounts...

Page 12: ...Rotate the rotary knob to control the dimmer right stop maximum output left stop zero output or strobe right stop maximum strobe left stop no strobe Note Rotary dimmer or strobe function works in inf...

Page 13: ...UP or DOWN button to select Dimmer menu and press ENTER 3 Press DOWN menu and select Mode sub menu 4 Press the UP or DOWN button to select Custom menu and press ENTER 5 Adjust fade in and fade out ti...

Page 14: ...es from the outside of the fixture with low pressure compressed air 3 Clean the surfaces by wiping gently with a soft clean lint free cloth moistened with a weak detergent solution Do not rub glass su...

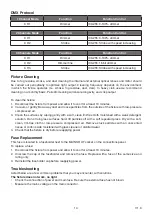
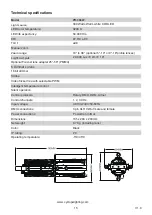
Page 15: ...snel lens adapter 25 50 PMMA 5 Dimmer curves 16 bit dimmer Strobe Video flicker free with selectable PWM Intelligent temperature control Silent operation Control protocols Rotary DMX RDM Artnet Contro...

Reviews: