M4-CYG1UW-TSR-M-ENG_Iss11.docx
Cygnus UW-TSR Operating Manual
9
Multiple Echo Measurements
The Gauge works on the pulse-echo principle. The Probe transmits
a very short pulse of ultrasound which enters the test piece. The
Probe then acts as a receiver listening for return echoes,
converting them into electrical signals which are processed to
produce timing information that can be used to determine the
material thickness.
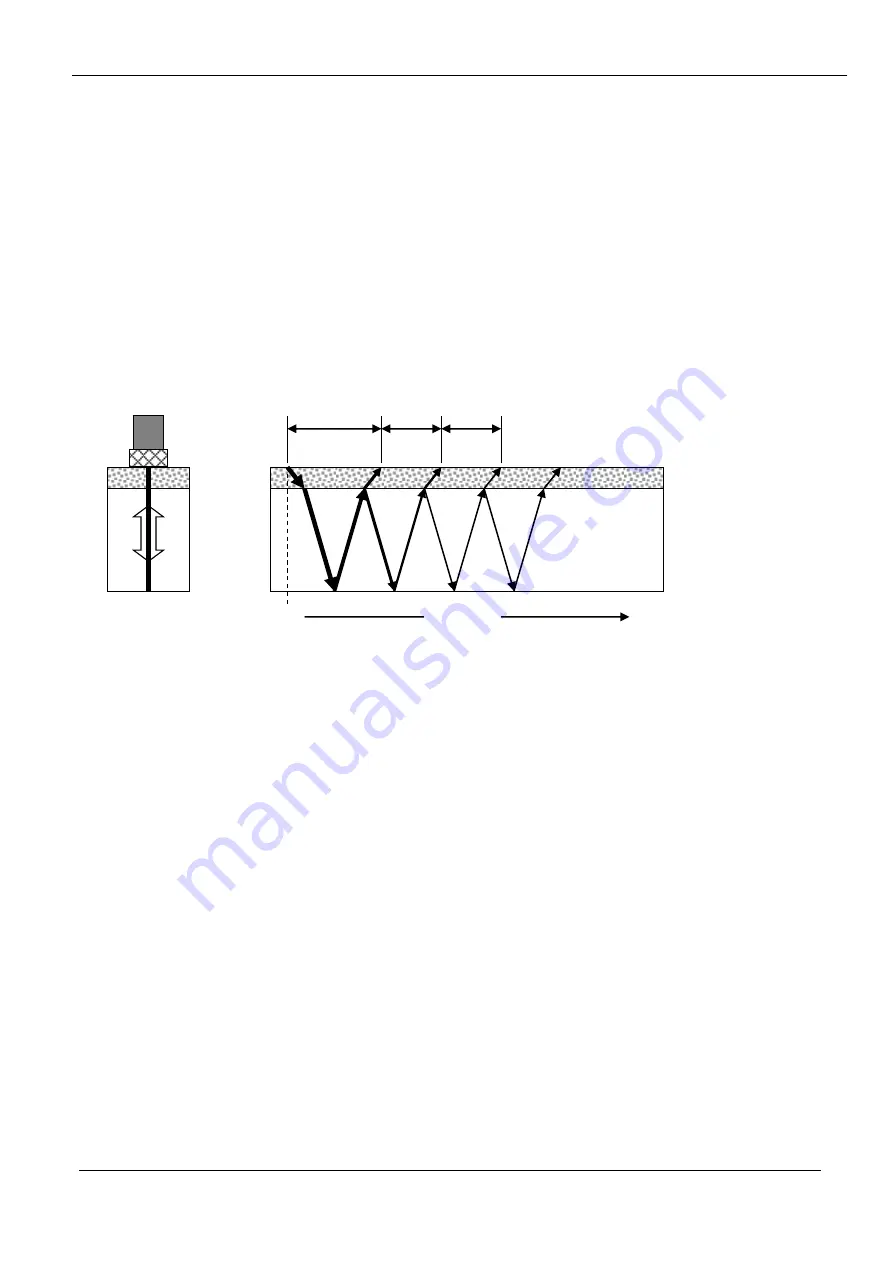
The
multiple-echo
beam travel is depicted above, spread out in
time, to illustrate the timing method. In reality the beam path is
straight and perpendicular to the surface as the ultrasonic energy
reverberates up and down within the metal (shown on the left).
Each time an echo is reflected back down, a small portion of the
energy comes up through the coatings (e1, e2 and e3) and is
detected by the Probe which acts as a receiver.
The delay between echoes at the Probe-face (t2 and t3) is exactly
equal to the time taken to pass through the metal twice, therefore
coatings such as paint are ignored and the measurement displayed
is the metal thickness only.
Triple Echo Verification
The Gauge requires 3 equi-spaced return echoes in order to
calculate a thickness measurement value (t2=t3). This method
ensures the Gauge only displays valid thickness values, the three
e1
e2
e3
t2
t3
Valid Thickness Measurement only when:
t2=t3
Time
Paint, Dirt etc
Metal
0
t1
Probe


