background image


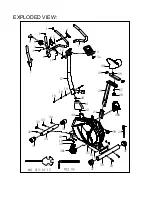
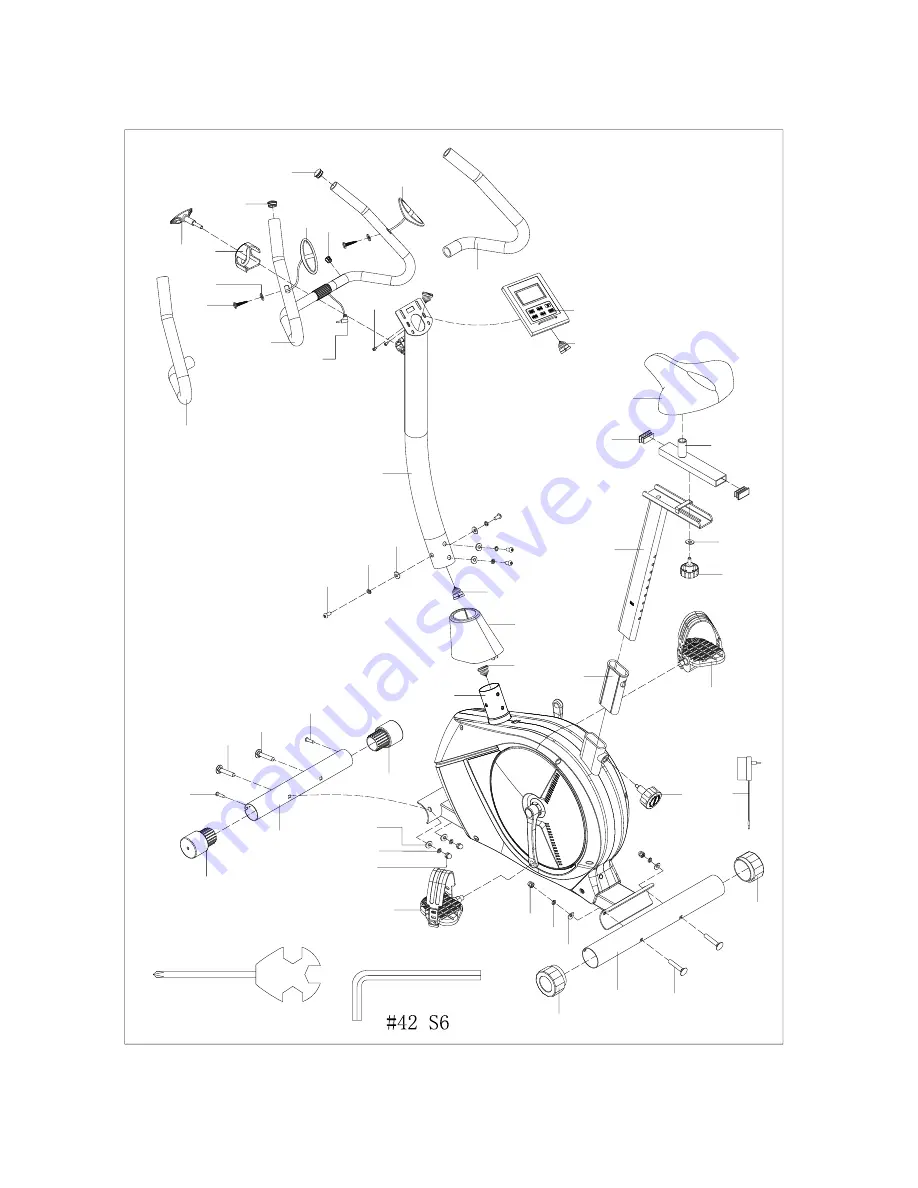
EXPLODED VIEW: 

19

35

34

32

33

33

32

31

31

22

39

21

35

19

33

19

18

#41 S13-14-15

S14

S13

S15

36L

1

1

2

2

8

9

3

4

7

11

12

7

36R

5

6

13

20

24

25

26

27

28

29

30

40

37

37

17

38

13a

10

10

10

23


Summary of Contents for AB 08-7090049

Page 1: ...Cykelstaden AB 08 7090049 Owner s Manual IMPORTANT PLEASE READ THIS MANUAL CAREFULLY BEFORE USING THE BIKE...

Page 2: ...ontinuing with your exercise program 4 Keep children and pets away from the equipment The equipment is designed for adult use only 5 Use the equipment on a solid flat level surface with a protective c...

Page 3: ...EXPLODED VIEW 19 35 34 32 33 33 32 31 31 22 39 21 35 19 33 19 18 41 S13 14 15 S14 S13 S15 36L 1 1 2 2 8 9 3 4 7 11 12 7 36R 5 6 13 20 24 25 26 27 28 29 30 40 37 37 17 38 13a 10 10 10 23...

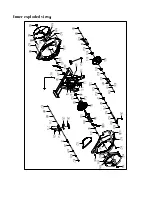
Page 4: ...2 80 79 81 62 77 62 58 84 67 68 69 70 71 74 72 73 76 75 67 51 49 86 86 43L 85 43R 86 87 86 85 87 84 87 36 50 59 78 58 59 61 62 63 65 64 63 62 61 60 58 59 60 66 68 69 70 22 87 87 88 89 88 89 88 89 87 6...

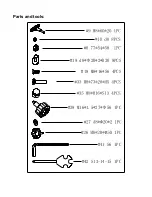
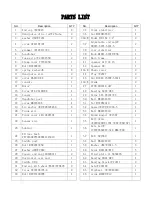
Page 5: ...Parts and tools 19 d8 20 2 R30 8PCS 18 M8 16 S6 4PCS 39 M16 1 5 27 56 1PC 41 S6 1PC 42 S13 14 15 1PC...

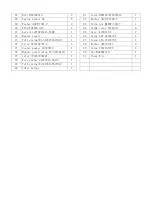
Page 6: ...9 8 4 48 Bearing 6203 2RS 2 16 Sensor 1 49 Screw ST4 2 16 8 1 17 Handlebar post 1 50 Bolt M6 45 S10 1 18 screw M8 16 S6 4 51 Nut M6 H5 S10 2 19 Arc washer d8 20 2 R30 8 52 Spacer 22 18 6 5 1 20 Trunk...

Page 7: ...12 70 14 45 5 M6 1 85 disc 189 10 5 2 72 Magnet board 1 86 Screw ST4 2 16 8 4 73 Pull spring 1 5 15 44 N10 1 87 Screw ST4 2 19 8 7 74 Screw ST3 10 5 6 5 88 Washer d5 13 1 8 75 Square magnet 40 25 10...

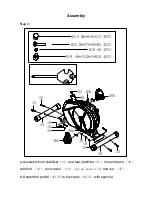
Page 8: ...10 10 22 33 M8 73 20 H5 4PCS 19 d8 20 2 R30 4PCS 35 M8 H16 S13 4PCS 10 d8 4PCS a Assemble front stabilizer 34 and rear stabilizer 38 to main frame 40 with bolt 33 arc washer 19 spring washer 10 and n...

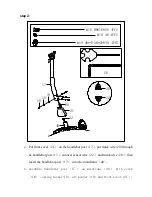
Page 9: ...front cover 21 on the handlebar post 17 put trunk wire 20 through he handlebar post 17 connect sensor wire 22 and trunk wire 20 then insert the handlebar post 17 into the mainframe 40 b Assemble hand...

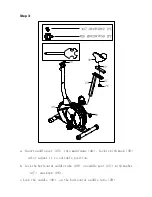
Page 10: ...Insert saddle post 25 into mainframe 40 lock it with knob 39 after adjust it to suitable position b Lock the horizontal saddle tube 29 on saddle post 25 with washer 27 and knob 26 c Lock the saddle 30...

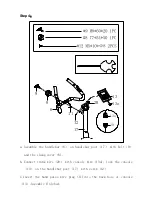
Page 11: ...dlebar 6 on handlebar post 17 with bolt 9 and the clamp cover 8 b Connect trunk wire 20 with console wire 13a lock the console 13 on the handlebar post 17 with screw 12 C Insert the hand pulse wire pl...

Reviews: