17
6.7.1 Video Switch Tab
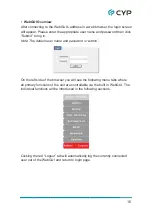
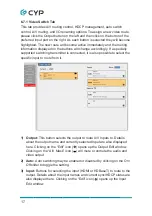
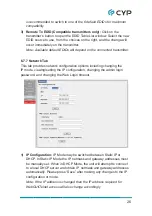
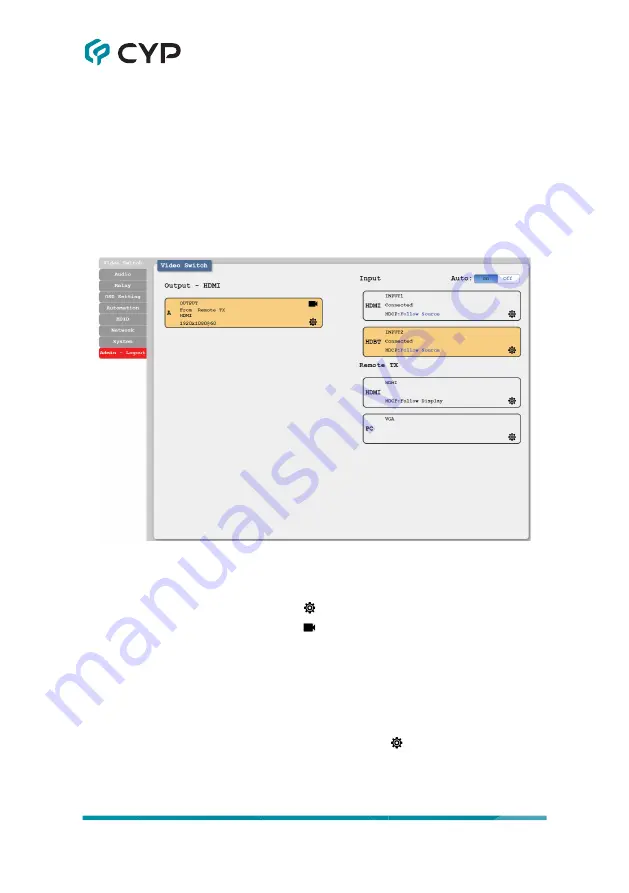
This tab provides A/V routing control, HDCP management, auto switch
control, A/V muting, and I/O renaming options. To assign a new video route,
please click the Output button on the left and then click on the button of the
preferred input port on the right. As each button is selected they will become
highlighted. The new route will become active immediately and the routing
information displayed on the buttons will change accordingly. If a specially
supported switching transmitter is connected, it is also possible to select the
specific input to route from it.
1) Output:
This button selects the output to route A/V Inputs to. Details
about the output name and currently selected Input are also displayed
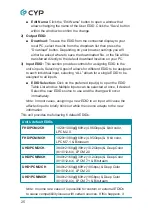
here. Clicking on the “Edit” icon ( ) opens up the Output Edit window.
Clicking on the “A/V Mask” icon ( ) will mute or unmute the audio and
video output.
2) Auto:
Auto switching may be enabled or disabled by clicking on the On/
Off slider to toggle the setting.
3) Input:
Buttons for selecting the input (HDMI or HDBaseT) to route to the
output. Details about the input names and current sync/HDCP status are
also displayed here. Clicking on the “Edit” icon ( ) opens up the Input
Edit window.

