12
6.4.2 Connection Window
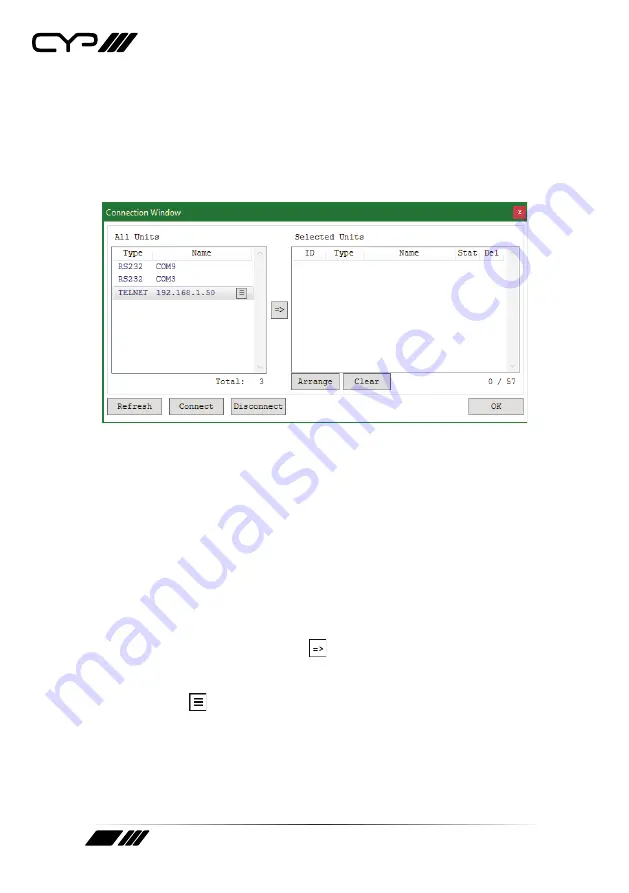
By clicking on the “Connection” button at the top-left corner of the main
window the “Connection Window” will open up and list all Video Wall
Processors that are currently detected on the local network as well as
listing all available RS-232 ports on the PC. Each detected unit can then be
added to the current video wall layout and assigned a unique ID number.
Once all units have been added to the list, click the “Connect” button
to connect to all of the units. If desired, the order of the units, if more
than one is required for the video wall, may also be changed here. Once
everything is configured, click “OK” to close the window and return to the
Layout tab.
Note: Units connected via RS-232 can’t be directly detected, so all available
serial ports will be listed, even if they do not currently have a connected unit.
1) All Units List:
All detected units on the local network as well as
all available local serial ports are listed here. All detected units are
identified by their IP address. Selecting a Unit (or serial port) and then
clicking the right arrow button ( ) will place them in the Selected
Units window in the order they are added. The Ethernet details of
each detected unit may also be changed by clicking on the associated
details icon ( ).
Note: A unit’s Ethernet settings cannot be changed if the software is
actively “Connected” to it. To make changes, please press the “Disconnect”
button first.
■
Refresh Button:
Click this button to detect any additional units
that were added to the network after the window was opened.
Summary of Contents for DS-MSC14-4K22
Page 2: ......


