8
6. OPERATION CONTROLS AND FUNCTIONS
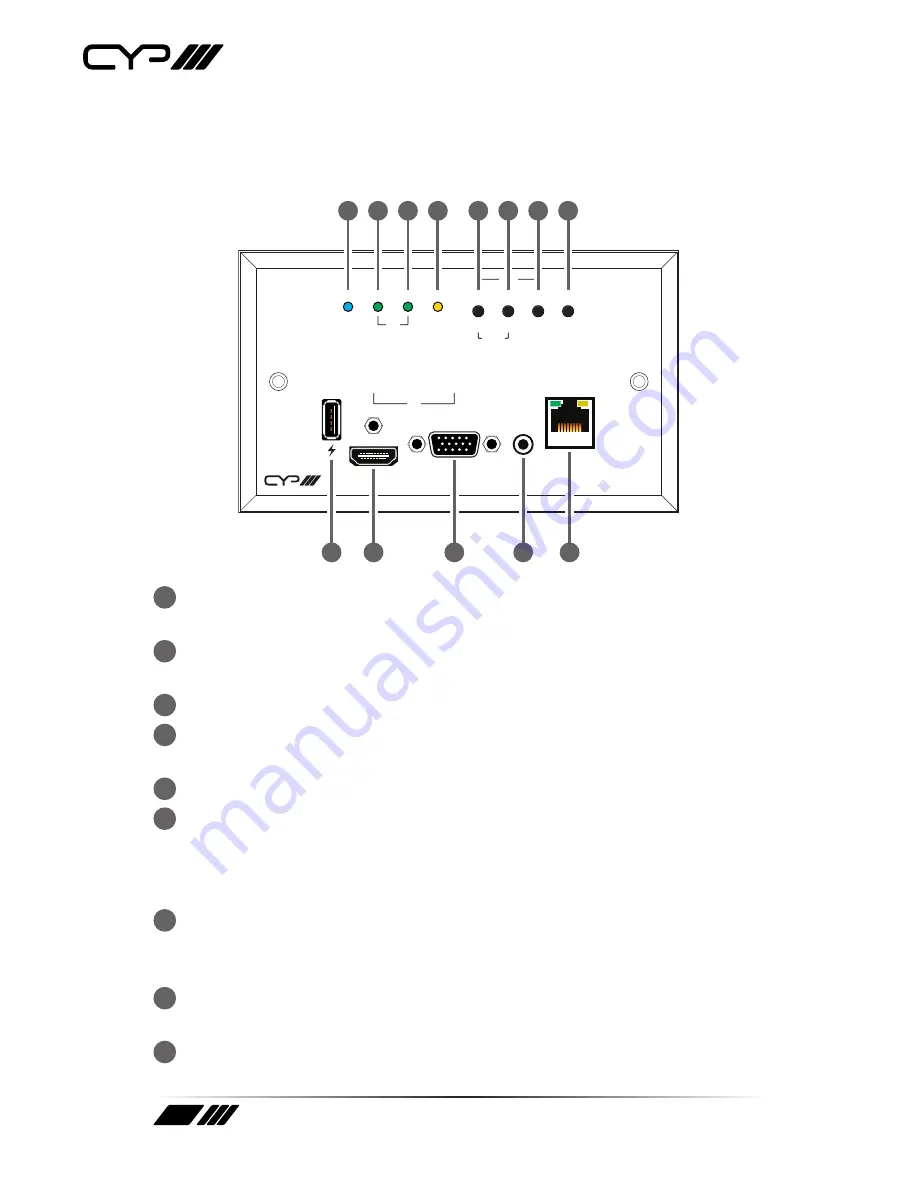
6.1 Front Panel
HDMI
VGA
+
AUTO
ADJUST
IN SEL
ENTER
XGA
1080P
MENU
LINK
VGA
HDMI
POWER
SERVICE
LAN
AUDIO
IN
−
IN
IN
PUV-1605S-TXWP
9
1
2
3
4
6
5
7
8
10
11
12
13
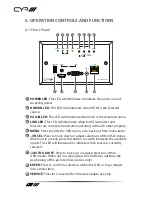
1
POWER LED:
This LED will illuminate to indicate the unit is on and
receiving power.
2
HDMI IN LED:
This LED will illuminate when HDMI is the selected
source.
3
VGA IN LED:
This LED will illuminate when VGA is the selected source.
4
LINK LED:
This LED will illuminate when both Transmitter and
Receiver are connected and communicating with each other properly.
5
MENU:
Press to enter the OSD menu, or to back out from menu items.
6
−/IN SEL:
Press to move down or adjust selections within OSD menus.
When not in a menu press this button to switch between the available
inputs. The LED will illuminate to indicate which source is currently
selected.
7
+/AUTO ADJUST:
Press to move up or adjust selections within
OSD menus. When not in a menu press this button to optimise the
positioning of the picture (VGA sources only).
8
ENTER:
Press to confirm a selection within the OSD or to go deeper
into a menu item.
9
SERVICE:
This slot is reserved for firmware update use only.
Summary of Contents for PUV-1605S-TXWP
Page 2: ......


